- Getting started
- Notifications
- Licensing
- Troubleshooting
- Connector Builder
- Act! 365
- ActiveCampaign
- Active Directory - Preview
- Adobe Acrobat Sign
- Adobe PDF Services
- Amazon Bedrock
- Amazon Connect
- Amazon Polly
- Amazon SES
- Amazon Transcribe
- Amazon Web Services
- Anthropic Claude
- Asana
- AWeber
- Azure AI Document Intelligence
- Azure Maps
- BambooHR
- Box
- Brevo
- Calendly
- Campaign Monitor
- Cisco Webex Teams
- Citrix Hypervisor
- Citrix ShareFile
- Clearbit
- Confluence Cloud
- Constant Contact
- Coupa
- CrewAI – Preview
- Customer.io
- Database Hub - Preview
- Databricks Agent
- Datadog
- DeepSeek
- Deputy
- Discord - Preview
- DocuSign
- Drip
- Dropbox
- Dropbox Business
- Egnyte
- Eventbrite
- Exchangerates
- Exchange Server - Preview
- Expensify
- Facebook
- Freshbooks
- Freshdesk
- Freshsales
- Freshservice
- GetResponse
- GitHub
- Gmail
- Google Cloud Platform
- Google Docs
- Google Drive
- Google Forms - Preview
- Google Maps
- Google Sheets
- Google Speech-to-Text
- Google Text-to-Speech
- About the Google Text-to-Speech connector
- Google Text-to-Speech authentication
- Google Tasks - Preview
- Google Vertex
- Google Vision
- Google Workspace
- GoToWebinar
- Greenhouse
- Hootsuite
- HTTP
- HTTP Webhook
- Hubspot CRM
- HubSpot Marketing
- HyperV - Preview
- Icertis
- iContact
- Insightly CRM
- Intercom
- Jina.ai
- Jira
- Keap
- Klaviyo
- LinkedIn
- Mail
- Mailchimp
- Mailgun
- Mailjet
- MailerLite
- Marketo
- Microsoft 365
- Microsoft Azure
- Microsoft Azure Active Directory
- Microsoft Azure AI Foundry
- Microsoft Azure OpenAI
- Microsoft Dynamics 365 CRM
- Microsoft OneDrive & Sharepoint
- Microsoft Outlook 365
- Microsoft Power Automate – Preview
- Microsoft Sentiment
- Microsoft Teams
- Microsoft Translator
- Microsoft Vision
- Miro
- NetIQ eDirectory
- Okta
- OpenAI
- OpenAI V1 Compliant LLM
- Oracle Eloqua
- Oracle NetSuite
- PagerDuty
- PayPal
- PDFMonkey
- Perplexity
- Pinecone
- Pipedrive
- QuickBooksOnline
- Quip
- Salesforce
- Salesforce AgentForce & Flows – Preview
- Salesforce Marketing Cloud
- SAP BAPI
- SAP Cloud for Customer
- SAP Concur
- SAP OData
- SendGrid
- ServiceNow
- Shopify
- Slack
- SmartRecruiters
- Smartsheet
- Snowflake
- Snowflake Cortex
- Stripe
- Sugar Enterprise
- Sugar Professional
- Sugar Sell
- Sugar Serve
- System Center - Preview
- TangoCard
- Todoist
- Trello
- Twilio
- UiPath Apps - Preview
- UiPath Data Fabric – Preview
- UiPath GenAI Activities
- UiPath Orchestrator
- X (formerly Twitter)
- Xero
- watsonx.ai
- WhatsApp Business
- WooCommerce
- Workable
- Workday
- Workday REST
- VMware ESXi vSphere
- YouTube
- Zendesk
- Zoho Campaigns
- Zoho Desk
- Zoho Mail
- Zoom
- ZoomInfo

Integration Service user guide
Google Text-to-Speech authentication
Prerequisites
To create a connection to the UiPath Google Text-to-Speech connector, you can choose between two authentication methods: API Key or OAuth 2.0 Authorization code.
Depending on the authentication type you select, you need one of the following credentials:
- API Key
- Client ID and Client secret
Refer to the Google Cloud Authentication documentation for more details on choosing the right authentication method for your use case.
Retrieve your credentials
API Key
-
Log in to your Google Cloud Console.
-
Create a new project or select an existing project which you want to use.

-
On your project dashboard, navigate to Quick access and select API & Services.

-
Select Enable APIs and Services.

-
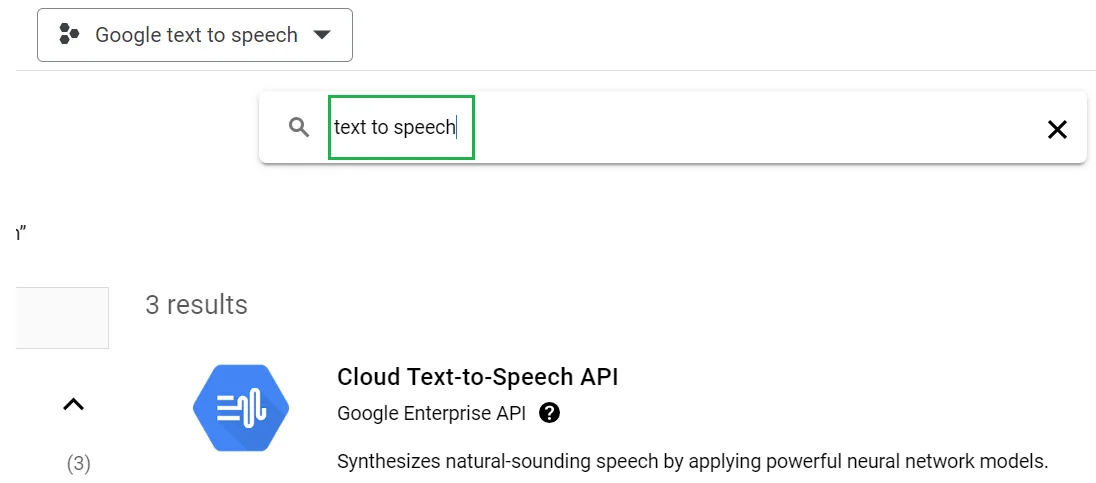
Search for the API you want to enable. In this case, Text-to-Speech. Select it from the list, then select Enable.

-
An API Enabled confirmation message will be displayed on the API page.

Note: You might be required to add a Billing Account.
-
Go back to the APIs & Services screen and select Credentials from the left-side panel.

-
Select Create Credentials. You can choose from several options: API key, OAuth client ID, or Service account.

-
Select API key. A key will be generated shortly.
-
Copy the API key and use it to create the connection in Integration Service. Note: We recommend you do not share the API key. API calls are billed.
OAuth Client ID and Client secret
-
Follow steps 1-8 from the previous section.
-
At the Create credentials step, select OAuth client ID.
-
Configure the application:
- Set Application type to Web application.
- Give your application a name.

-
Next, set the Redirect URI to:
https://{baseURL}/provisioning_/callback, then select Create. -
Once your application is created, copy the Client ID and Client secret or download the JSON file storing the credentials.

Add the Google Text-to-Speech connection
-
Select Integration Service from the left rail.
-
From the Connectors list, select Google Text-to-Speech. You can also use the search bar to find the connector.
-
Select the Add connection button.
-
You are now redirected to the connection page. You can choose between two authentication methods: OAuth 2.0 Authorization code or API Key.

-
Select your preferred authentication method and enter the required credentials.
-
Select Connect.