- Getting started
- Notifications
- Licensing
- Troubleshooting
- Connector Builder
- Act! 365
- ActiveCampaign
- Active Directory - Preview
- Adobe Acrobat Sign
- Adobe PDF Services
- Amazon Bedrock
- Amazon Connect
- Amazon Polly
- Amazon SES
- Amazon Transcribe
- Amazon Web Services
- Anthropic Claude
- Asana
- AWeber
- Azure AI Document Intelligence
- Azure Maps
- BambooHR
- Box
- Brevo
- Calendly
- Campaign Monitor
- Cisco Webex Teams
- Citrix Hypervisor
- Citrix ShareFile
- Clearbit
- Confluence Cloud
- Constant Contact
- Coupa
- CrewAI – Preview
- Customer.io
- Database Hub - Preview
- Databricks Agent
- Datadog
- DeepSeek
- Deputy
- Discord - Preview
- DocuSign
- Drip
- Dropbox
- Dropbox Business
- Egnyte
- Eventbrite
- Exchangerates
- Exchange Server - Preview
- Expensify
- Facebook
- Freshbooks
- Freshdesk
- Freshsales
- Freshservice
- GetResponse
- GitHub
- Gmail
- Google Cloud Platform
- Google Docs
- Google Drive
- Google Forms - Preview
- Google Maps
- Google Sheets
- Google Speech-to-Text
- Google Text-to-Speech
- Google Tasks - Preview
- Google Vertex
- Google Vision
- Google Workspace
- GoToWebinar
- Greenhouse
- Hootsuite
- HTTP
- HTTP Webhook - Preview
- Hubspot CRM
- HubSpot Marketing
- HyperV - Preview
- Icertis
- iContact
- Insightly CRM
- Intercom
- Jina.ai
- Jira
- Keap
- Klaviyo
- LinkedIn
- Mail
- Mailchimp
- Mailgun
- Mailjet
- MailerLite
- Marketo
- Microsoft 365
- Microsoft Azure
- Microsoft Azure Active Directory
- Microsoft Azure AI Foundry
- Microsoft Azure OpenAI
- Microsoft Dynamics 365 CRM
- Microsoft OneDrive & Sharepoint
- Microsoft Outlook 365
- Microsoft Power Automate – Preview
- Microsoft Sentiment
- Microsoft Teams
- Microsoft Translator
- Microsoft Vision
- Miro
- NetIQ eDirectory
- Okta
- OpenAI
- OpenAI V1 Compliant LLM
- Oracle Eloqua
- Oracle NetSuite
- PagerDuty
- PayPal
- PDFMonkey
- Perplexity
- Pinecone
- Pipedrive
- QuickBooksOnline
- Quip
- Salesforce
- Salesforce AgentForce & Flows – Preview
- Salesforce Marketing Cloud
- SAP BAPI
- SAP Cloud for Customer
- SAP Concur
- SAP OData
- SendGrid
- ServiceNow
- Shopify
- Slack
- SmartRecruiters
- Smartsheet
- Snowflake
- Snowflake Cortex
- Stripe
- Sugar Enterprise
- Sugar Professional
- Sugar Sell
- Sugar Serve
- System Center - Preview
- TangoCard
- Todoist
- Trello
- Twilio
- UiPath Apps - Preview
- UiPath Data Fabric – Preview
- UiPath GenAI Activities
- UiPath Orchestrator
- X (formerly Twitter)
- Xero
- watsonx.ai
- WhatsApp Business
- WooCommerce
- Workable
- Workday
- Workday REST
- VMware ESXi vSphere
- YouTube
- Zendesk
- Zoho Campaigns
- Zoho Desk
- Zoho Mail
- Zoom
- ZoomInfo

Integration Service user guide
Activity designer
Overview
Activity designer lets you preview the layout of your custom Integration Service activities as they will appear in UiPath® Studio.
Its key features include:
- Preview layout: preview the design of your custom activities and see how they will appear in Studio. You can visualize the setup and make necessary adjustments before deploying your connector.
- Parameter settings: create and manage parameter fields, for more flexibility in customizing your activity. This includes input, output, in/out arguments, and properties that are used in your workflow.
- Request and Response fields: add request and response fields. This helps you define the information required by the activity (request) and the information that will be returned by the activity (response).
Input fields
To configure a custom connector's resources, you use the Parameters tab to add fields specific to your request type. Activity designer retrieves all the parameter and fields from the Parameters or Request fields tabs and displays them under the Input section.
The following image shows the resource's Parameters tab. Only one field is marked as required:
Figure 1. Parameters with one required field

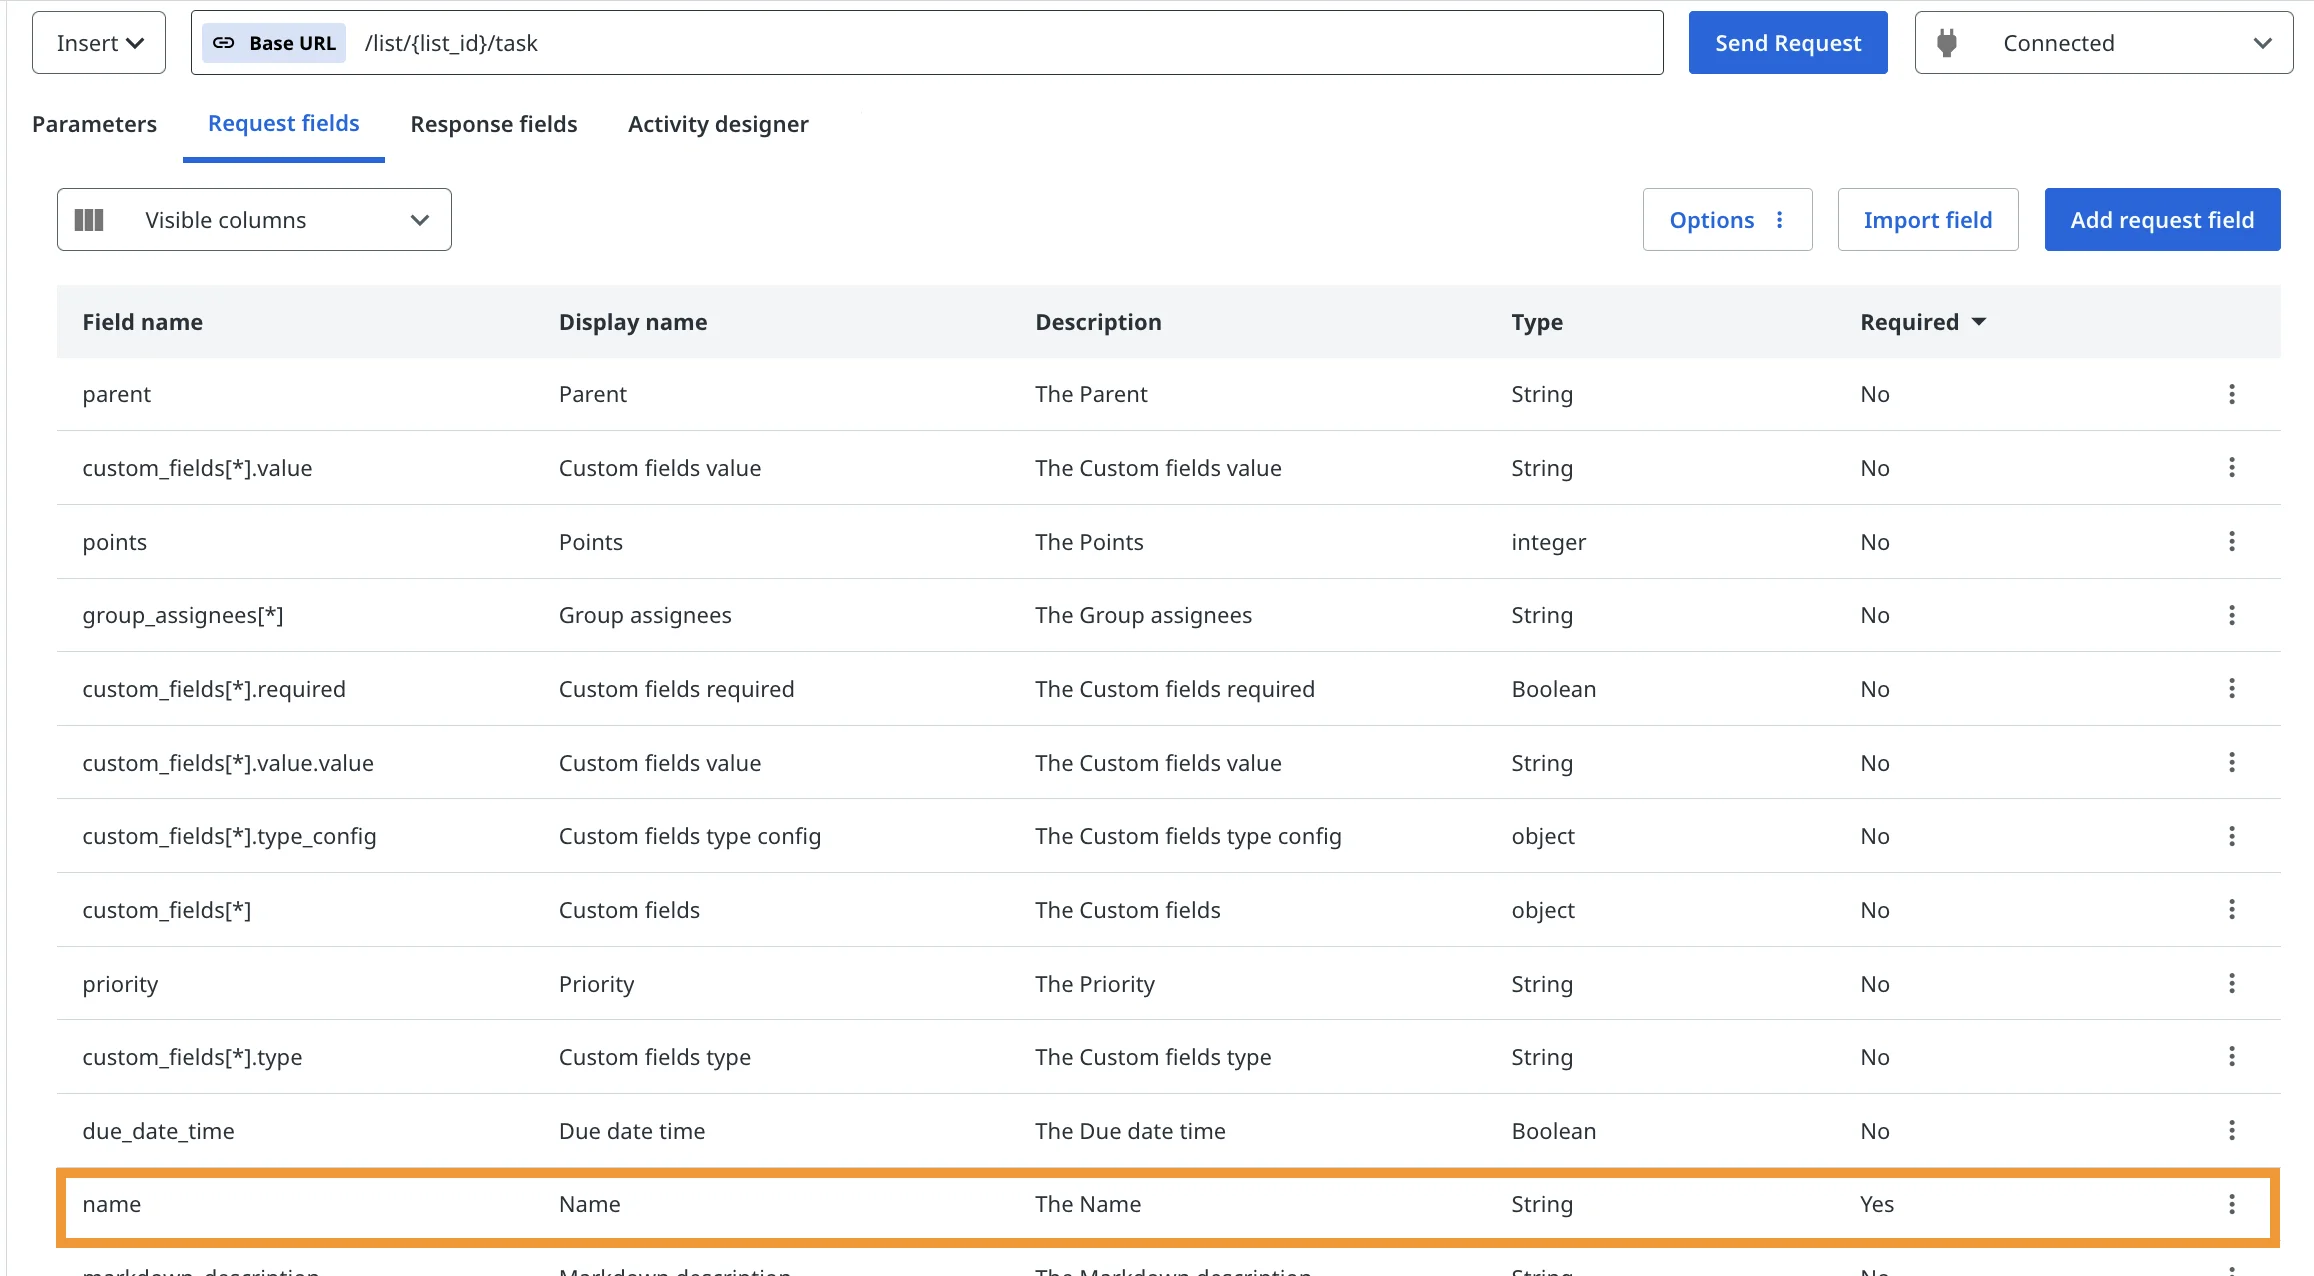
Figure 2. Request fields with one required field
The following image shows the resource's Request fields tab. Only one field is marked as required:

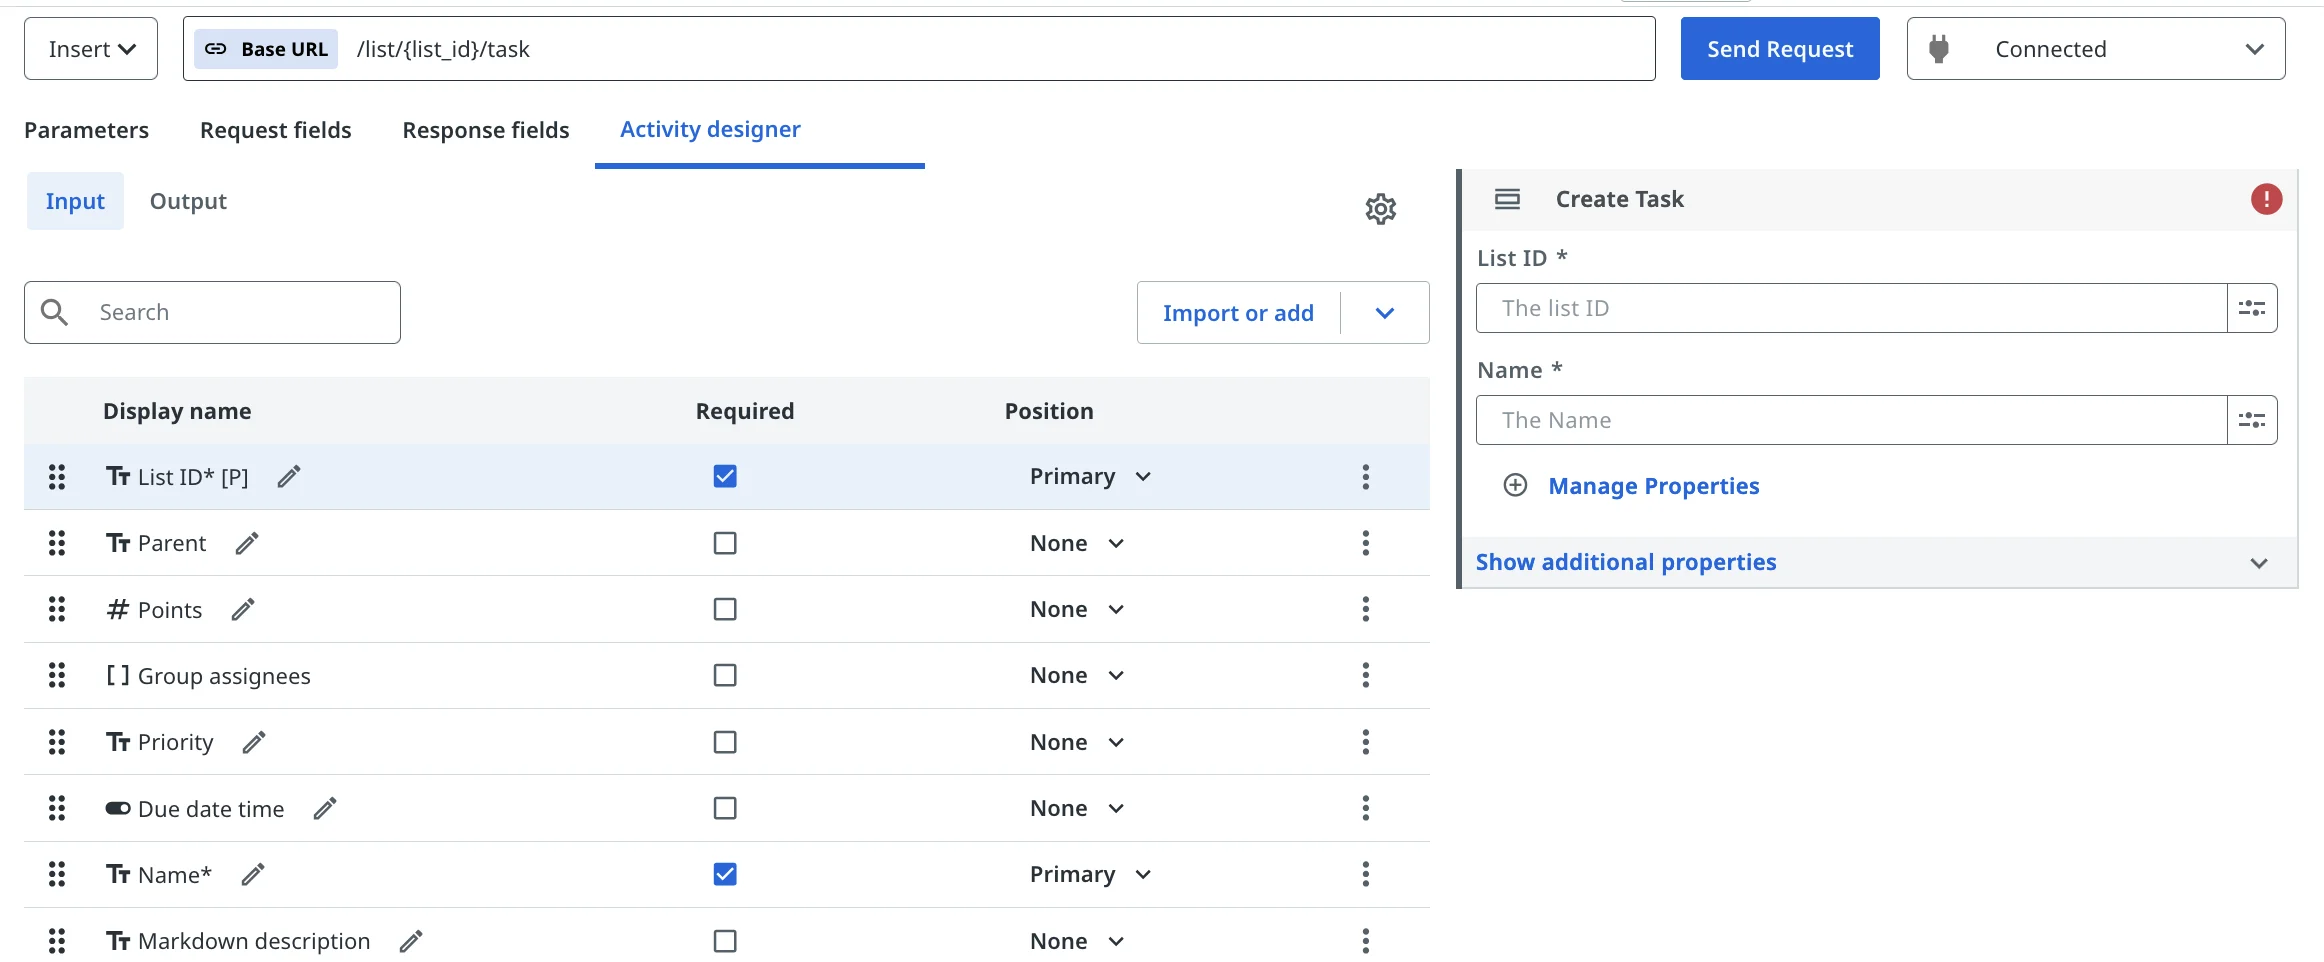
The following image shows the resource's Activity designer tab. The required parameter and request fields are displayed in the Preview window:

Editing parameters
Edit or delete parameters from the Activity designer tab by selecting the More options 
Configure the placement of parameters and request fields by choosing a Position option: Primary, Secondary, or None. When you set a field as Required, its Position is automatically set to Primary and the field is displayed on the main section of the activity canvas.
Change how the parameter is displayed in the Preview window (its Display name and Description) by selecting the Edit 
Input parameter values
In the Activity designer tab, you can specify a parameter or field's position on the activity canvas as Primary, Secondary, or None. Each option dictates the parameter's behavior and where it is displayed on the activity canvas. Alternatively, you can mark a field as Required to automatically set its position as Primary.
-
Required: The parameter or field requires a value to successfully execute the activity. The parameter is marked as required using the asterisk (*) symbol. This means it's always visible on the canvas and you must provide a value for it.

-
Primary: The parameter is displayed in the primary section of the activity. It may be left blank when using the activity in an automation.

-
Secondary: The parameter is hidden from the main canvas. It is displayed under the Show additional options section. These fields are optional and may be left blank.

-
None: The parameter is hidden from the activity. You must use the Manage Properties wizard to add it to the canvas.
Ordering input parameters
The order of input parameters dictates their location in the activity's Preview window. You can change the display order by using the icon located on the far left of each parameter to drag the list item up or down.

Request fields
Request fields allow you to populate the body of an HTTP request.
Request fields are most often associated with POST, PUT, or PATCH requests (insert, upsert, or update record activities).
Populating Request and Response fields
There are two ways to populate the request and response fields.
Option 1 (recommended): Using a properly formatted JSON.
- Select a resource's Send Request button.
- Add the JSON.
- Make sure the Overwrite fields on send request option is enabled.
- Select Execute.
If the response is successful, the Input fields are populated with the JSON properties used for the request and the Output fields are populated based on the response.
If you use this method, make a request that is exhaustive of all the fields you want to use in your activity.
The following image shows an example payload for a POST request. Note that the Overwrite fields on send request field is enabled:

Option 2: Manually adding each request and response field from the Activity designer tab.
-
Navigate to the Activity designer tab.
-
In the Input tab, select the More options
menu.
-
Select Add request field.
-
Add the details of the request field in a similar manner to adding a parameter.

-
To add response fields, go to the Output tab and select the Add response field option.

Output fields
The Output fields in Activity designer are pulled from the Response fields. The values can be populated by successfully making a call to the resource.
Curated fields
You can mark output fields as Curated. The field value is specifically extracted from the response object and can be assigned to a variable, making it easy to access and use in other activities when used in an automation.
The following image shows how Status, the curated field, is directly displayed in the activity's Output section:
