- Release Notes
- Getting Started
- Setup and Configuration
- Automation Projects
- Dependencies
- Types of Workflows
- File Comparison
- Automation Best Practices
- Source Control Integration
- Debugging
- The Diagnostic Tool
- Workflow Analyzer
- About Workflow Analyzer
- ST-NMG-001 - Variables Naming Convention
- ST-NMG-002 - Arguments Naming Convention
- ST-NMG-004 - Display Name Duplication
- ST-NMG-005 - Variable Overrides Variable
- ST-NMG-006 - Variable Overrides Argument
- ST-NMG-008 - Variable Length Exceeded
- ST-NMG-009 - Prefix Datatable Variables
- ST-NMG-011 - Prefix Datatable Arguments
- ST-NMG-012 - Argument Default Values
- ST-NMG-016 - Argument Length Exceeded
- ST-DBP-002 - High Arguments Count
- ST-DBP-003 - Empty Catch Block
- ST-DBP-007 - Multiple Flowchart Layers
- ST-DBP-020 - Undefined Output Properties
- ST-DBP-021 - Hardcoded Timeout
- ST-DBP-023 - Empty Workflow
- ST-DBP-024 - Persistence Activity Check
- ST-DBP-025 - Variables Serialization Prerequisite
- ST-DBP-026 - Delay Activity Usage
- ST-DBP-027 - Persistence Best Practice
- ST-DBP-028 - Arguments Serialization Prerequisite
- ST-USG-005 - Hardcoded Activity Arguments
- ST-USG-009 - Unused Variables
- ST-USG-010 - Unused Dependencies
- ST-USG-014 - Package Restrictions
- ST-USG-020 - Minimum Log Messages
- ST-USG-024 - Unused Saved for Later
- ST-USG-025 - Saved Value Misuse
- ST-USG-026 - Activity Restrictions
- ST-USG-027 - Required Packages
- ST-USG-028 - Restrict Invoke File Templates
- ST-USG-032 - Required Tags
- ST-USG-034 - Automation Hub URL
- Variables
- Arguments
- Imported Namespaces
- Coded automations
- Trigger-based Attended Automation
- Control Flow
- Object Repository
- Logging
- The ScreenScrapeJavaSupport Tool
- Studio testing
- Extensions
- About extensions
- SetupExtensions tool
- UiPathRemoteRuntime.exe is not running in the remote session
- UiPath Remote Runtime blocks Citrix session from being closed
- UiPath Remote Runtime causes memory leak
- UiPath.UIAutomation.Activities package and UiPath Remote Runtime versions mismatch
- The required UiPath extension is not installed on the remote machine
- Screen resolution settings
- Group Policies
- Cannot communicate with the browser
- Chrome extension is removed automatically
- The extension may have been corrupted
- Check if the extension for Chrome is installed and enabled
- Check if ChromeNativeMessaging.exe is running
- Check if ComSpec variable is defined correctly
- Enable access to file URLs and Incognito mode
- Multiple browser profiles
- Group Policy conflict
- Known issues specific to MV3 extensions
- List of extensions for Chrome
- Chrome Extension on Mac
- Group Policies
- Cannot communicate with the browser
- Edge extension is removed automatically
- The extension may have been corrupted
- Check if the Extension for Microsoft Edge is installed and enabled
- Check if ChromeNativeMessaging.exe is running
- Check if ComSpec variable is defined correctly
- Enable access to file URLs and InPrivate mode
- Multiple browser profiles
- Group Policy conflict
- Known issues specific to MV3 extensions
- List of extensions for Edge
- Extension for VMware Horizon
- SAP Solution Manager plugin
- Excel Add-in
- Troubleshooting

Studio user guide
Project Templates
A template is a preconfigured project that helps speed up automation design when used as a starting point for new automation projects. You can use one of the built-in templates or use custom templates from other sources, such as the organization-wide template feed. In addition, you can create and publish your own custom templates.
The following built-in project templates are available on the Start tab in Studio Backstage View:
- Background Process
- Mobile Testing Project
- Orchestration Process
- Robotic Enterprise Framework
- Attended Automation Framework
- SAP Testing Project
- Transactional Process:::note If after updating Studio from a version prior to 2021.4 you experience issues such as no built-in templates being displayed on the Start tab or pinning/unpinning templates not working, do one of the following, and then restart Studio: * Open the file
C:\Users\<user>\AppData\Roaming\UiPath\UiStudio.v2.settingsin a text editor and set the value of the<HasCustomFavorites>element tofalse. * Go to Settings > General and select Reset settings. For more information about the settings that are reset, see Configuring Studio Settings. :::
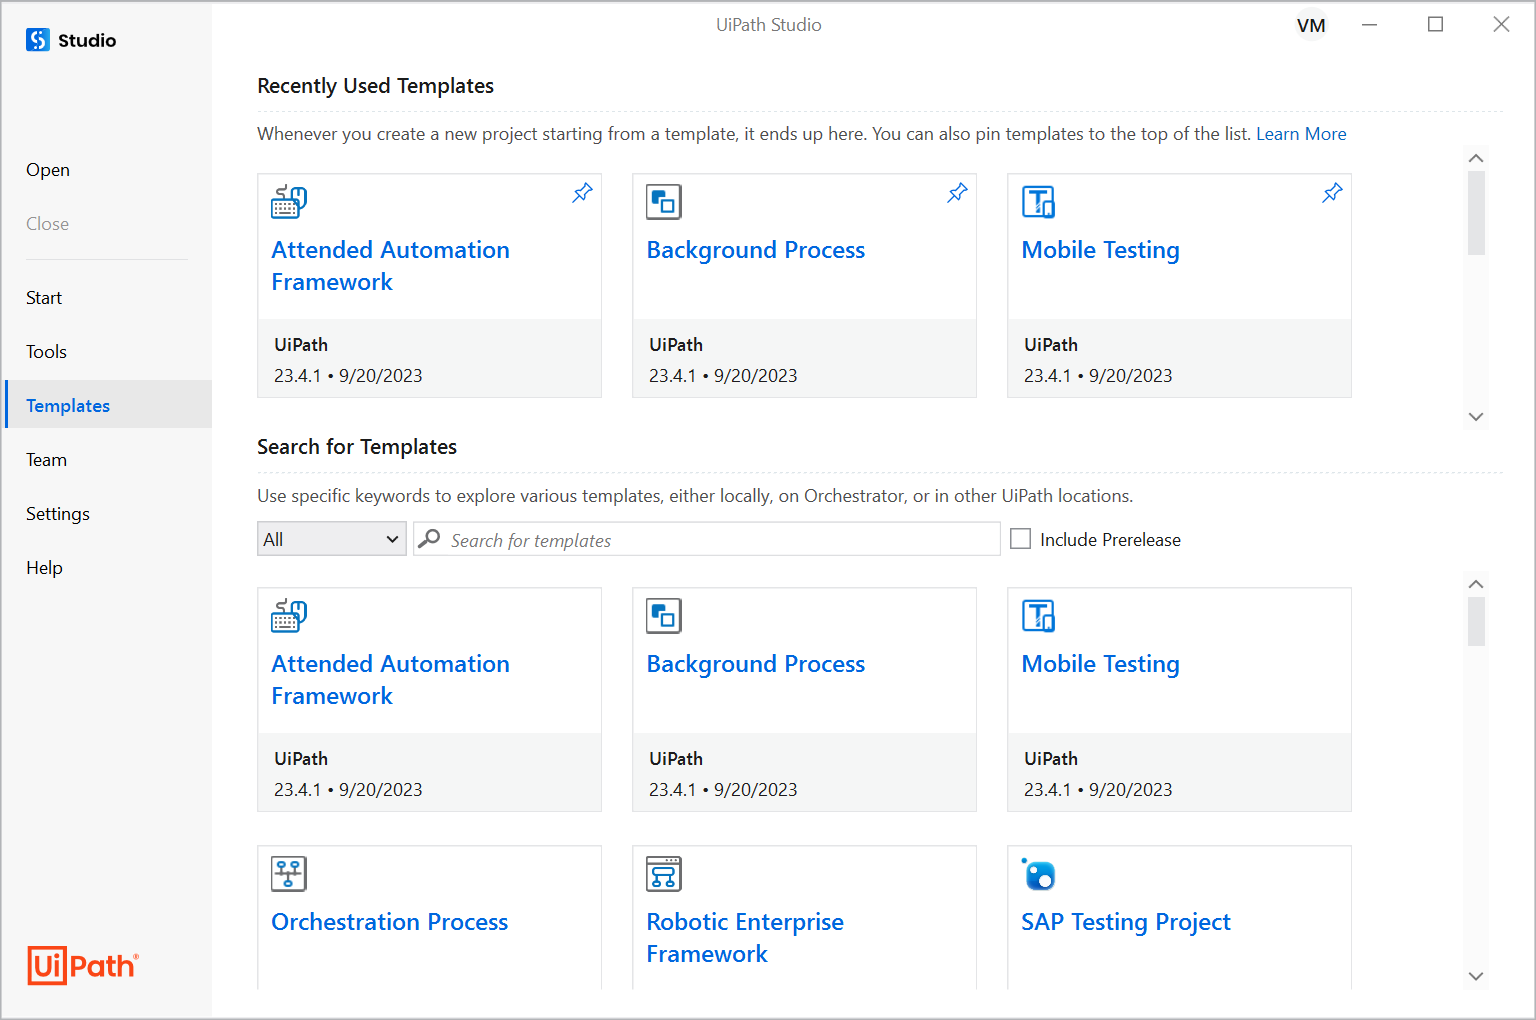
To browse and search for custom templates from all available sources, go to Home (Backstage View) and select the Templates tab.
Custom Templates
User-defined processes, or test automation projects can be saved as templates to be used in other automation projects. Such templates may contain a particular set of dependencies and built-in workflows with already defined variables and arguments that can later be used in various projects.
Studio offers two ways to create your own custom templates, either by using the Template project type in the Home tab or by exporting a process, or test automation project as a template.
Creating a Template
-
In the Studio Backstage view, under New Project, click Template.
-
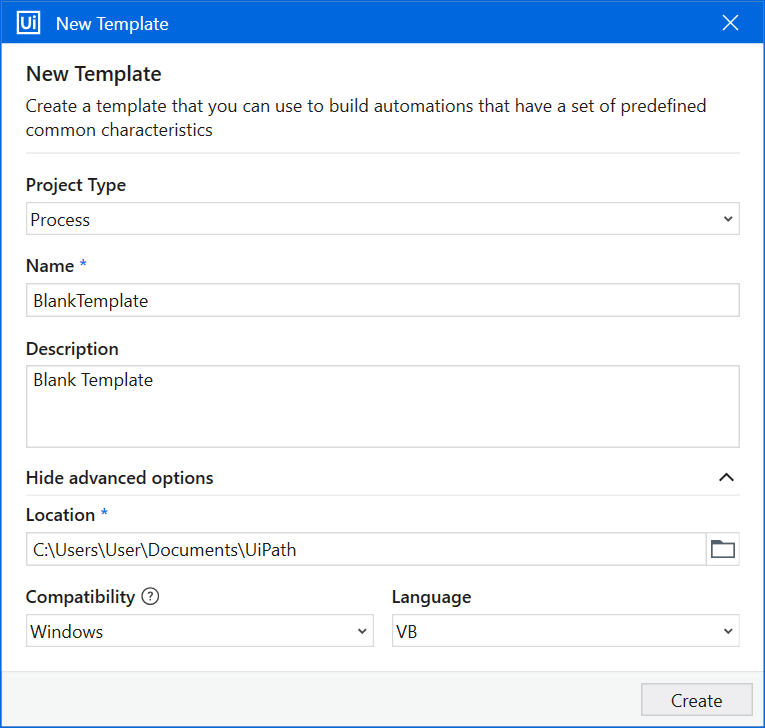
In the new template window, configure the following:
- Choose between a Process and a Test Automation type of template.
- Enter a name for the new project (up to 128 characters) and a description that summaries what you are aiming to do with this automation project (up to 500 characters).
- Select the location where to create the project. The default location where projects are created is
%USERPROFILE%\Documents\UiPath. - Select the compatibility and language.
-
Click Create and your template opens in Studio.
-
A pop-up is displayed with information about customizable fields. Click Continue and optionally, select Don't show again.
Customizable Fields
Customizable fields allow you to create a template with sample data that is cleared when the template is published. This makes it easier to then create tasks with your own data from that template.
When creating a template, you may have fields that should become configurable once the template is published. As an example, this can be useful when creating a template using Excel activities where the file used and the range selected can change according to what is being automated.
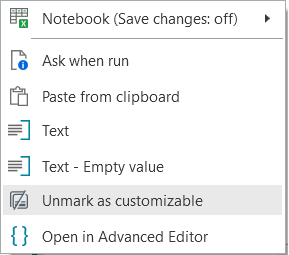
For those instances, you can mark fields as customizable by clicking Plus  on the right side of the field, then selecting Mark as Customizable.
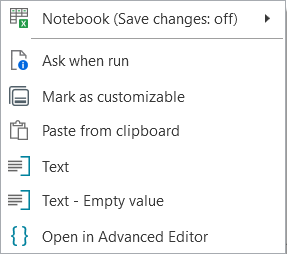
This marks the field with an icon. You can still use fields marked as customizable as any other field, so you can run and test the project with your own values.
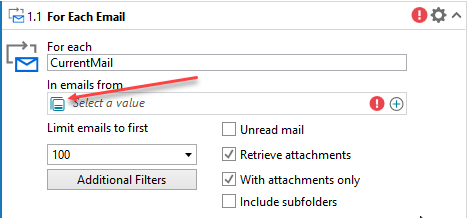
Once the template is published, the value in this field is cleared. If you reopen the template after saving it, your test values are kept and you can continue editing.
If you decide you’d like this field not to be configurable and maintain the values, select Plus  > Unmark as customizable.
Exporting a Project as a Template
Processes and test automation projects can be exported as templates, published to a certain location, and then made available in the Templates tab in Studio's Backstage view.
A process, test automation, or modified built-in template opened in Studio can be exported using the Export As > Templates ribbon button.
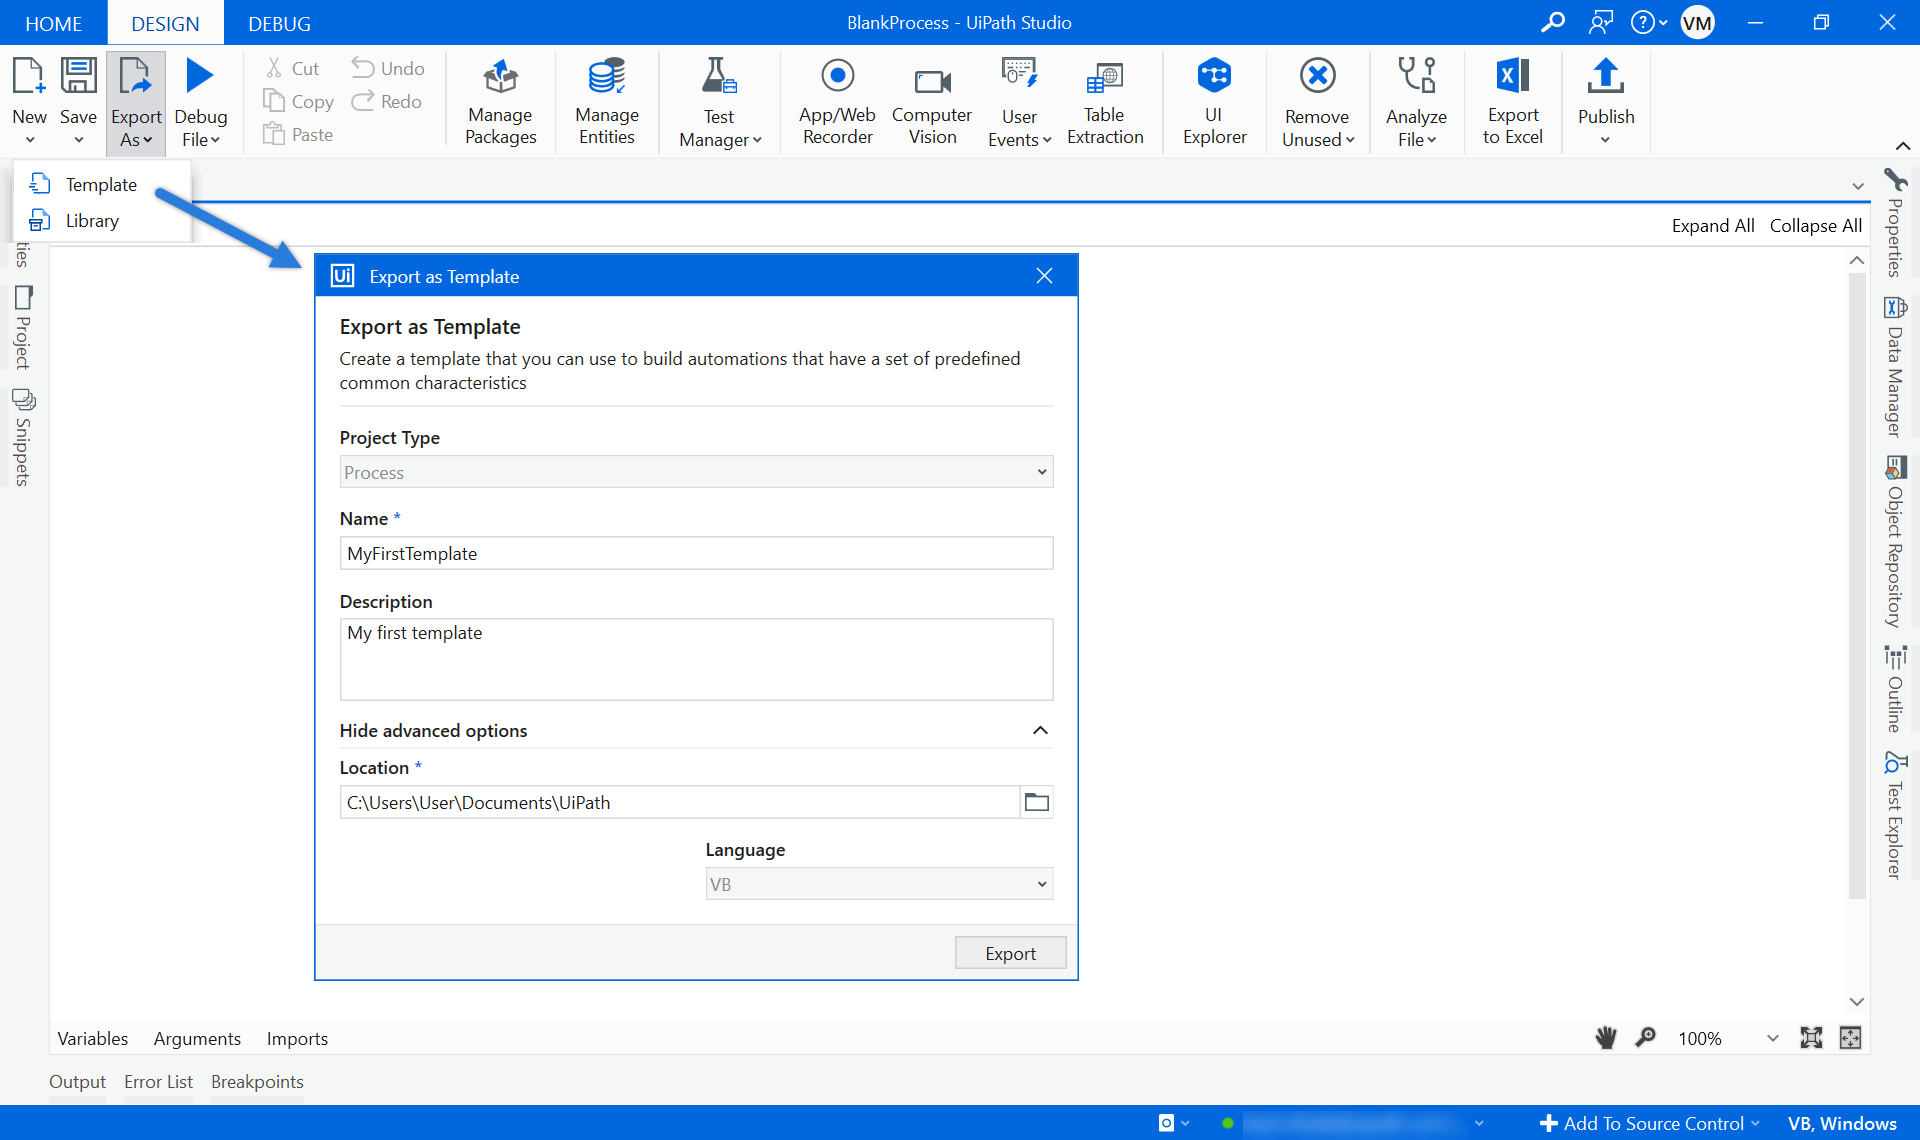
When exported, the template is saved under the path in the Location field.
Unsaved changes made in files are automatically saved in the project before the template is created.
Publishing a Template
Publishing templates is similar to publishing processes and libraries, with the exception that the wizard contains an additional step where to enter template information. For more information, see About Publishing Automation Projects.
Browsing and Using Templates
You can view all available project templates in the Templates tab in Studio Backstage View.
Recently used templates are listed at the top. You can search for templates by name and description, select whether to include prerelease versions, or filter templates by location.
The following template locations are available:
- All - All locations.
- Built-in - Templates that come installed with Studio.
- Official - Templates from the official UiPath feed.
- Orchestrator - Organization-wide templates feed, available when connected to Orchestrator.
- Local - The local user feed, by default:
C:\Users\User\Documents\UiPath\.templates. The location can be defined by selecting Settings > Locations in Studio Backstage view. - Marketplace - Templates published to the UiPath Marketplace.
Creating a Project Based on a Template
- Click the template. A window with details about the template opens.
- Select the version to use from the lower-left corner of the window, and then click Use Template.
- If the template uses any packages that require accepting license terms, click View License to read the terms, and then I Accept to agree and continue.
- In the new project window, edit the details of the project (name, location, description). Some templates also give you the option to select the compatibility and language.
Transactional Process
The Transactional Process is a project template based on a Flowchart, optimized for basic automation processes.
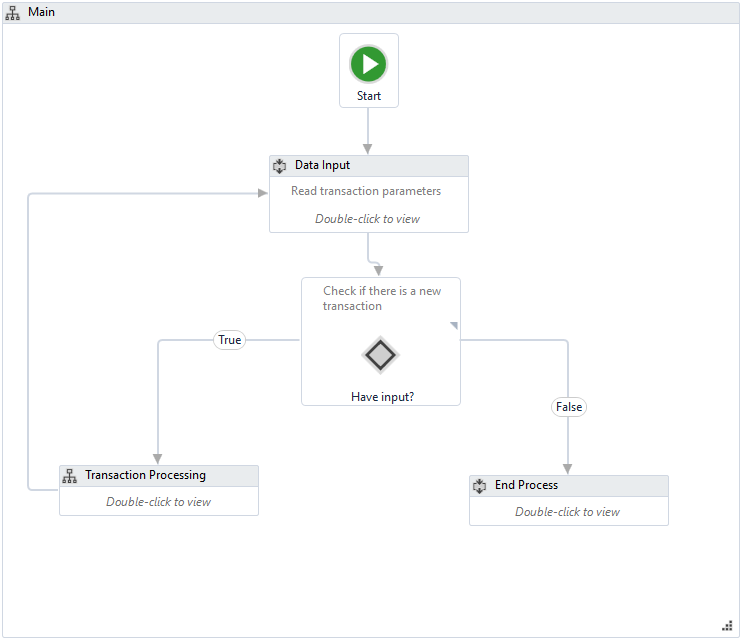
This template contains several pre-made containers, as follows:
Data Input Sequence
This container is connected to the Start node and is meant to hold all the activities related to retrieving the data necessary for running the project. The read transaction parameters are stored in the predefined NewTransaction variable of type Boolean.
Flow Decision
The Flow Decision activity is meant to analyze the data that was retrieved based on the condition represented by the data stored under the NewTransaction. The True branch of the Flow Decision leads to the Transaction Processing Flowchart, while the False branch leads to the End Process Sequence.
Transaction Processing Flowchart
- a Transaction Processing Flowchart that processes the transaction items and then loops back to the initial Data Input Sequence.
- an End Process Sequence which is meant to contain all steps that must be taken at the end of an automation process, such as saving the workflow.
Note:
Please take into consideration that whenever you wish to copy a large number of activities from one sequence to another, it is recommended to scroll down to the bottom of the Designer panel beforehand. This is due to a Windows Workflow Foundation limitation.