- 基本情報
- 通知
- ライセンス
- トラブルシューティング
- コネクタ ビルダー
- Act! 365
- Active Directory - プレビュー
- ActiveCampaign
- Adobe Acrobat Sign
- Adobe PDF Services
- Amazon Bedrock
- Amazon Connect
- Amazon Polly
- Amazon SES
- Amazon Transcribe
- Amazon Web Services
- Anthropic Claude
- Asana
- AWeber
- Azure AI Document Intelligence
- Azure Maps
- BambooHR
- Box
- Brevo
- Calendly
- Campaign Monitor
- Cisco Webex Teams
- Citrix Hypervisor
- Citrix ShareFile
- Clearbit
- Confluence Cloud
- Constant Contact
- Coupa
- Customer.io
- Datadog
- Deputy
- DocuSign
- Drip
- Dropbox
- Egnyte
- Eventbrite
- Exchange Server - プレビュー
- Exchangerates
- Expensify
- Facebook
- Freshbooks
- Freshdesk
- FreshService
- Getresponse
- GitHub
- Gmail
- Google Cloud Platform
- Google ドキュメント
- Google ドライブ
- Google マップ
- Google スプレッドシート
- Google Speech-to-Text
- Google ToDo リスト - プレビュー
- Google Text-to-Speech
- Google Vertex
- Google Vision
- Google Workspace
- GoToWebinar
- Greenhouse
- Hootsuite
- HTTP Webhook - プレビュー
- HubSpot CRM
- Hubspot Marketing
- HyperV - プレビュー
- iContact
- Insightly CRM
- Intercom
- Jira
- Keap
- Klaviyo
- LinkedIn
- Mailchimp
- MailerLite
- Mailgun
- Mailjet
- Marketo
- Microsoft 365
- Microsoft Azure
- Microsoft Azure Active Directory
- Microsoft Azure OpenAI
- Microsoft Dynamics 365 CRM
- Microsoft OneDrive & SharePoint
- Microsoft Outlook 365
- Microsoft Sentiment
- Microsoft Teams
- Microsoft Translator
- Microsoft Vision
- Miro
- NetIQ eDirectory
- Okta
- OpenAI
- Oracle Eloqua
- Oracle NetSuite
- PagerDuty
- Paypal
- PDFMonkey
- Pinecone
- Pipedrive
- QuickBooks Online
- Quip
- Salesforce
- Salesforce Marketing Cloud
- SAP BAPI
- SAP Cloud for Customer
- SAP Concur
- SAP OData
- SendGrid
- ServiceNow
- Shopify
- Slack
- SmartRecruiters
- Smartsheet
- Snowflake
- Stripe
- Sugar Enterprise
- Sugar Professional
- Sugar Sell
- Sugar Serve
- System Center - プレビュー
- TangoCard
- Todoist
- Trello
- Twilio
- VMware ESXi vSphere
- watsonx.ai
- WhatsApp Business
- WooCommerce
- Workable
- Workday
- X(旧ツイッター)
- Xero
- YouTube
- Zendesk
- Zoho Campaigns
- Zoho Desk
- Zoho Mail
- ZoomInfo

Integration Service ユーザー ガイド
コネクタ
Integration Service は、UiPath Platform 上のすべての製品間 (UiPath® 製品および他社製品間) での連携/接続を可能にし、連携するシステムの認可および認証を標準化します。
コネクタについて
コネクタは、UiPath と外部のアプリケーションとの間にセキュリティで保護されたコネクションを作成します。コネクタは構築済みの強力な API 連携機能で、連携プロセスを簡素化すると共に、一貫性のある開発エクスペリエンスを提供します。
プレビューとしてリリースされたコネクタは、運用環境での使用ではなく、主にテストとフィードバックを目的として推奨されます。これらのコネクタは、事前の通知なしにカタログから変更または削除される場合があります。機能を評価し、今後の開発のための貴重な情報を提供するために、重要ではないシナリオでのみ使用することを強くお勧めします。
コネクタの公開
概要
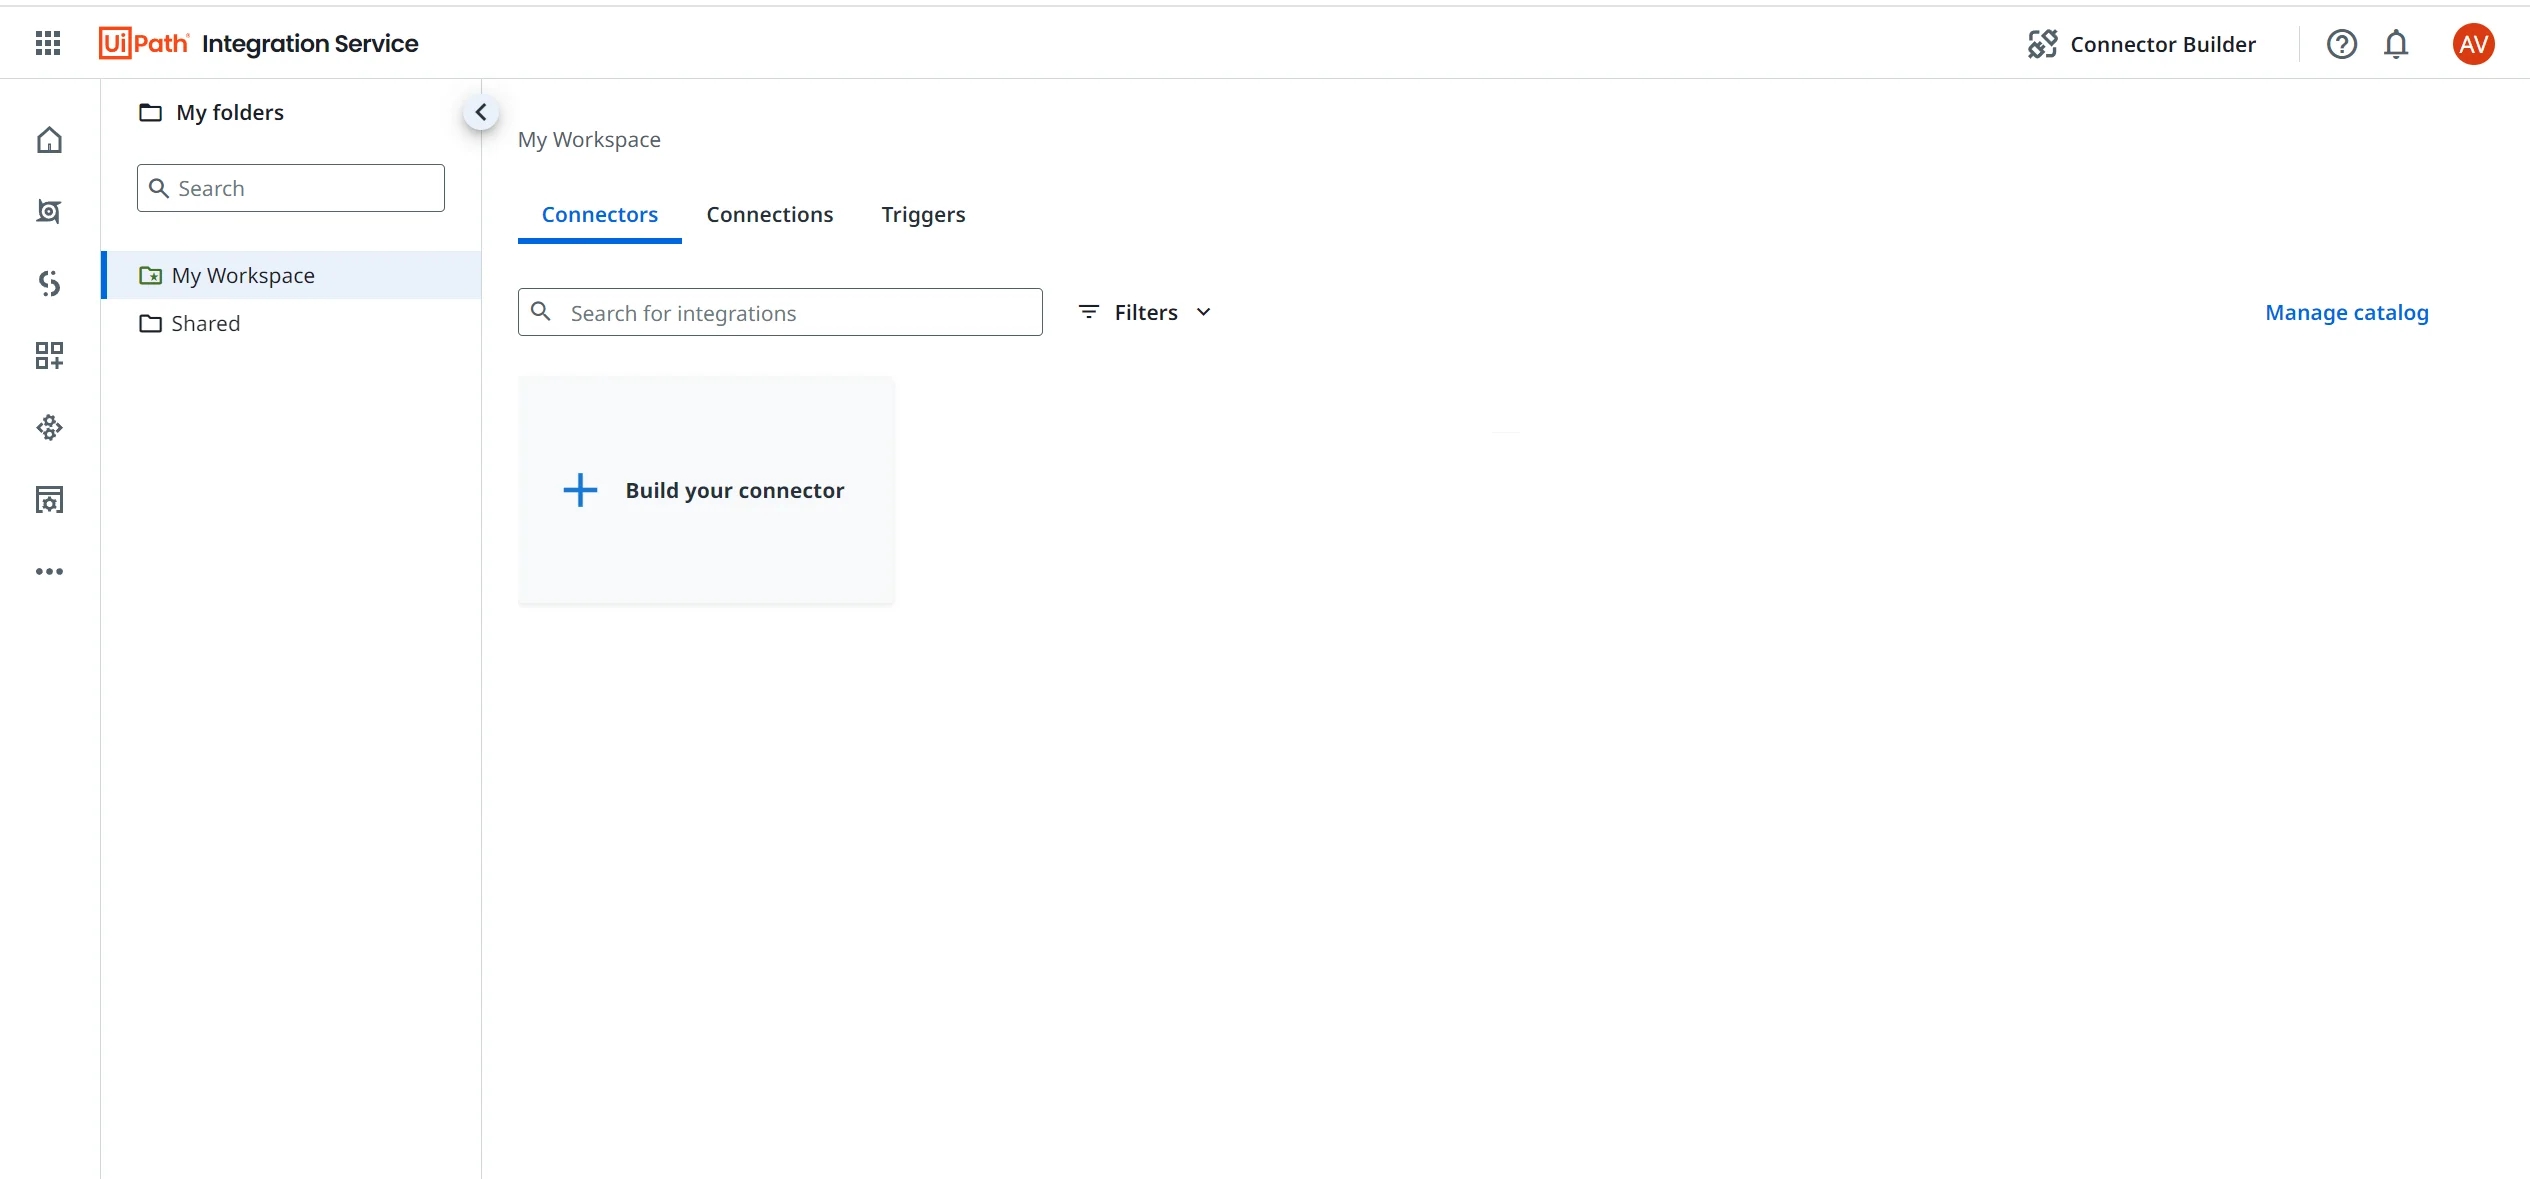
開始するには、Automation Suite プラットフォームにアクセスします。左側のメニューで [ Integration Service] を選択します。
コネクタ カタログは既定では空です。インストールしてワークスペースにパブリッシュするコネクタを選択できます。つまり、リリースや更新のたびに、利用可能なすべてのコネクタをデプロイする必要はありません。コネクタのパブリッシュ、管理、保守を、不必要なインストールやテストを行うことなく簡単に行うことができます。
コネクタ公開ユーザー インターフェイスを使用すると、管理者ユーザーは Automation Suite 環境内でインストールまたはアップグレードに利用可能なコネクタを管理できます。 このインターフェイスでは、管理者は次の操作を実行できます。
- コネクタをパブリッシュする: Automation Suite インスタンスにインストールするコネクタを選択します。
- バージョンをバイパスする: 関連性のないコネクタのバージョンや、既存のワークフローに影響を与える可能性があるコネクタのバージョンをスキップし、必要なコネクタのバージョンを選択します。
カタログの管理
[ カタログを管理 ] オプションには、管理者権限を持つユーザーがアクセスできます。管理者権限を持たないユーザーは、パブリッシュされたコネクタのみを表示できます。 [カタログを管理 ] オプションは表示されません。

コネクタをワークスペースにパブリッシュするには、次の手順に従います。
- Integration Service が Automation Suite インスタンスに正しくインストールされていることを確認します。
- 左側のナビゲーション タブから [Integration Service] を選択します。[ コネクタ] ページが表示されます。このページは既定では空です。
- [カタログを管理] を選択します。
- Integration Service で利用可能なコネクタの完全なリストが表示されます。管理者は、利用可能なすべてのコネクタを選択してインストールすることも、選択したコネクタのみを選択してインストールすることもできます。インストールするすべてのコネクタのチェックボックスをオンにして、[ インストール ] ボタンを選択します。グローバルの [インストール ] ボタン、または各コネクタで利用可能な [インストール ] オプションを使用できます。インストール プロセスには数分かかります (選択したコネクタの数によって異なります)。

リリース状況
[リリース列] には、プレビュー版のすべてのコネクタが一覧表示されます。特定のコネクタにタグが存在しない場合、そのコネクタは一般提供中であることを意味します。

バージョン
管理者は、[ カタログを管理 ] ダッシュボードでコネクタのバージョンを以下のいずれかのタグとともに確認できます。
- アクティブ: コネクタがインストールされ、表示されているバージョンでアクティブになっています。
- 最新 (インストールされていない): このコネクタはインストールされておらず、これが最新バージョンです。
- 事前インストール済み: 最後にインストールされたバージョンが表示されます。
各コネクタの [その他のオプション ] メニューを選択してインストールするか、ドキュメントにアクセスします。
インストールが完了したら、 コネクタの ホーム ページに戻り、パブリッシュ済みのコネクタのリストを表示できます。
アクティビティは、すぐには Studio Web で利用可能になりません。すべてのアクティビティが読み込まれるまで、20 分から 30 分ほど待ってください。
コネクタのガバナンス
パブリッシュ済みのコネクタに対しては、ガバナンス ポリシーを設定して以下の操作を行うことができます。
- テナントごとにコネクタを有効化する: 各テナントで有効化するコネクタを選択します。
- 認証を管理する: 各コネクタの認証の種類を選択します。
- 資格情報を事前定義する: プライベート アプリケーションの資格情報を設定します (独自のアプリを使用する)。
詳しくは、『Automation Ops ガイド』の 「Integration Service ポリシーの設定 」をご覧ください。
非公開
コネクタのパブリッシュを取り消すことはできません。 これにより、パブリッシュ済みのコネクタを使用している可能性のあるコネクション、トリガー、またはプロセスへの影響を防ぐことができます。
パブリッシュ後にコネクタを非表示にする場合は、Automation Ops でガバナンス ポリシーを設定できます。
コネクタを使用する
コネクタのページには、[構築]、[コネクション]、[トリガー]、[アクティビティ] の 4 つのタブがあります。
開発
[構築] タブでは、以下のいずれかのオプションを選択することで、コネクタを使用したワークフローの構築を開始できます。
- Studio でオートメーションをゼロから構築する – そのコネクタを使用した Studio Web プロジェクトを開始します。
- デスクトップ版の Studio でオートメーションを構築 – デスクトップ版の Studio アプリケーションを開いて、新しいプロジェクトを作成します。
コネクション
[コネクション] タブでは、そのコネクタのコネクションを表示、編集、管理できます。
トリガー
[トリガー] タブでは、そのコネクタのトリガーを表示、編集、管理できます。
アクティビティ
[ アクティビティ ] タブには、そのコネクタで利用可能なすべてのアクティビティとトリガーが一覧表示されます。詳しくは、「 Integration Service のアクティビティについて」をご覧ください。
コネクタのガバナンス ポリシー
コネクタ カタログとコネクタ認証のオプションは、UiPath® Automation Ops のポリシーを使用して管理できます。
ポリシーを使用すると、認証設定 ([独自のアプリ (BYOA) を使用する] など) を上書きまたは事前定義したり、テナントまたは組織に対する特定の認証の詳細を指定したりできます。
詳しくは、『Automation Ops ガイド』の 「 Integration Service ポリシーの設定 」をご覧ください。
ポリシーのデプロイは、既存のコネクションとワークフローには影響しません。新しいポリシーは、新しく作成されたコネクションにのみ影響します。