- Getting Started
- Tutorials
- Automation Projects
- Creating Automations
- Automation Basics
- Object Repository
- Automation Best Practices
- Tutorial: Creating a Pivot Table
- Tutorial: Iterating Through Rows in a Table
- Tutorial: Comparing Excel Files and Emailing Reconciliation Errors
- Tutorial: Extracting Data From Automated Emails and Moving It to a Desktop Application
- Tutorial: Filtering Data in Excel
- Tutorial: Formatting Cells
- Tutorial: Adding Information About the Files in a Folder to an Excel File
- Tutorial: Adding Your Own Formulas to the Project Notebook
- PowerPoint Automation
- Data Automation
- Common Activities
- Google Workspace Automation
- OneDrive & SharePoint Automation
- Troubleshooting
The information on this page applies to projects with the Windows and Windows - Legacy compatibilities. For information specific to designing cross-platform projects, see Cross-platform Projects in the Studio guide.
About Activities
Activities are the basic building blocks of an automation project, each representing one or more manual tasks that StudioX can automate. A sequence of related, interconnected activities makes up an automation project. When you consider automating a repetitive process, you must first break down that process into each of the individual manual steps you take, and then identify the activities in StudioX that automate each of those steps.
For example, let’s say that you want to automate the following workflow:
- Open a spreadsheet.
- Open a business application
- Copy the data from a cell in the spreadsheet.
- Paste the copied data into a field in a business application.
- Click a button in the application to submit the data.
When you create a project in StudioX to automate that process, you use the following activities:
- Use Excel File to indicate which spreadsheet you want to use.
- Use Application/Browser to indicate which application you want to use.
- Type Into to select the input field in the business application where to copy the data as well as the cell from which you want to copy the data.
- Click to indicate which button to click to submit the data in the business application.
There isn’t always a one-to-one relationship between a manual step and a StudioX activity. As you can see in the above example, the Type Into activity covers two manual steps because you use it to indicate both the source and the destination of the copied text.
The Activities Panel
The Activities panel shows available activities that can be added to the current project. In Windows and cross-platform projects, you can see both installed and installable activities, while in Windows - Legacy projects only installed activities are visible. Installed refers to activities packages that are already part of a project, while installable refers to packages that are available to install from the Official and Orchestrator Tenant feeds. To add an activity to your automation, double-click it or drag and drop it to the desired place in the Designer panel. Adding an installable activity installs its corresponding activities package in the project.
Hovering over an activity in the panel displays the package it belongs to and its description. To add an activity to the list of favorites, right-click it and select Add to favorites.
Customizing the Activities Panel
Click the Group by button at the top of the panel to group available activities by the category they belong to or by the package they belong to. You can also clear the two options to see an ungrouped list of activities arranged alphabetically.
Click the Filter by ![]() button to filter activities based on the options below.
button to filter activities based on the options below.
For Windows and cross-platform projects
- Filter by availability:
- Installed - Show activities that are part of packages installed in your project (this filter cannot be deactivated)
- Available - Show discovered activities that you can add to you project
- Windows - Show activities that are only available in Windows projects (this filter is only available in cross-platform projects)
- Filter by type:
- Activities - Show activities
- Triggers - Show triggers
- Filter by category:
- Developer - Show activities designed for the Studio profile.
For Windows - Legacy projects
- Filter by type:
- Activities - Show activities
- Triggers - Show triggers
- Filter by category:
- Developer - Show activities designed for the Studio profile. These activities may not function as expected in the StudioX profile.
For example, if you are trying to view all Excel activities, you can select Group by Packages and deselect Group by Category.
Container Activities
Container activities define a scope or the conditions to be met for the execution of the activities added inside them. A container activity can be described as a parent activity that contains one or more child activities. Examples of container activities include:
- Resource activities - Add an application resource to the automation and make that resource available to the activities added inside them.
- For Each activities - Define a collection of items and repeat the activities added inside them once for each of those items.
- Repeat number of times - Similar to a For Each, but it repeats the activities added inside it for a specified number of times.
- If, Switch, and Check App State - Evaluate a condition and determine the flow of the automation by executing specific activities added inside them based on the result of the evaluation.
- Wait for Download - Detects a file download initiated by the activities added inside it and makes the file available in the automation.
Resource Activities
Activities are grouped into categories based on the application they apply to. Before you can automate tasks you perform in an application, you must first add the required application resource to the automation. The following activities add resources to your automations:
- Use Excel File - Use a specified Excel file. The data in the Excel file is available to all the activities added inside this activity. When you configure child activities, you can select individual cells, ranges, or sheets in the file directly from StudioX.
- Use Desktop Outlook App, Use Outlook 365, and Use Gmail add a desktop Outlook, Outlook 365, and Gmail account to the automation. The emails in the account are available to all the activities added inside this activity. When you configure child activities, you can select individual folders, messages, or message fields directly from StudioX.
- Use Word File - Use a specified Word document. Add the activities to perform on the file inside this activity.
- Use Application/Browser - Use a specified desktop application or web browser page. Add the activities to perform in the application or web browser inside this activity.
- Use PowerPoint Presentation - Use a specified PowerPoint file. Add the activities to perform on the file inside this activity.
- Use OneDrive & SharePoint - Select an account to use for OneDrive and SharePoint automation. Add the related activities inside this activity.
You can add as many resources as your automation requires. For activities that use more than one application, add the resources one inside the other. For example:
- To add activities that use both data from an Excel file and emails from an Outlook account, add a Use Excel File activity inside a Use Desktop Outlook App activity, and then add the common activities inside Use Excel File.
- To add activities that use both data from a web page and a Word document, add a Use Application/Browser activity inside a Use Word File activity, and then add the common activities inside Use Application/Browser.
Adding Global Resources to the Automation
When you add a resource to the automation using a resource activity, the resource is only available to the activities added inside the resource activity. To make a resource available to all the activities in a project, you can add the resource globally by connecting the project to the resource. Global resources are managed from the Data Manager panel, not added as activities to the project. This means that connecting the project to a resource also helps save space in the Designer panel.
For information on how to connect a project to an Excel workbook, see Connecting a Project to an Excel File.
Iterating through Items
Iterating refers to repeating one or more activities in your automation project for each individual item in a collection of items. To iterate through items, add one of the available For Each activities in which you define the collection, and then add the activities to repeat inside the For Each. When you configure the activities to repeat, indicate that an activity should use data from each item in the iteration by selecting the current item option from the Plus ![]() menu.
menu.
StudioX comes with the following For Each activities:
-
For Each Excel Row - Repeat one or more activities for each row in an Excel table, range, or sheet.
The current item option is
CurrentRow. For some activities, you must also select which column to use from the current row. -
For Each Excel Sheet - Repeat one or more activities for each sheet in an Excel file.
The current item option is
CurrentSheet. -
For Each Email - Repeat one or more activities for each message in an Outlook folder, Gmail label, or in a selection of messages.
The current item option is
CurrentMail. For some activities, you must also select which field to use from the current mail: Subject, Body, Body as HTML, Bcc, Cc, To, From, or Priority. -
For Each File in Folder - Repeat one or more activities for each file in a folder on your computer.
The current item option is
CurrentFile. You must also select which file property to use from the current file: Size, Name, Full Name (includes full path), Folder, Last modified date, Last accessed date, Created date, IsReadOnly, or Size in KB. -
For Each Folder in Folder - Repeat one or more activities for each folder inside a specified folder on your computer.
The current item option is
CurrentFolder. For some activities, you must also select which folder property to use from the current folder: Name, Full Path, or Last modified date.
To make it easier to identify when configuring activities added inside a For Each, you can rename the current item option using a name that describes the items you are iterating through.
Configuring the Data Used by Activities
Activities can receive data as input and, upon execution, they can generate output data. You configure the data for each activity using the Plus ![]() menu available on the right side of data fields.
menu available on the right side of data fields.
Depending on its purpose, an activity can have no data fields, one, or multiple data fields. The following information describes the options you can find in the Plus ![]() menu. Because the menu displays options that are relevant in the context of each field, activity, and parent activity, only a subset of the options is available for each field.
menu. Because the menu displays options that are relevant in the context of each field, activity, and parent activity, only a subset of the options is available for each field.
Options for Input Fields
Input fields define the data received by an activity using the following options:
-
Data from resources added to the project:
- Excel - Data from the Project Notebook or from an Excel file added to the automation. Select named cells, named ranges, tables, or sheets directly from the Plus
 menu, or select Indicate in Excel to open the workbook in Excel and indicate in it. Selecting Custom Input lets you manually enter sheet names, table names, cell addresses, or range addresses. If the activity is inside an For Each Excel Row activity, you can select the current row in the iteration.
 - Outlook / Gmail / Outlook 365 - Data from an email account defined for a parent mail resource activity. You can use the message selected in the Outlook desktop app when the project is executed or, if the activity is inside a For Each Email activity, the current email in the iteration.
- PowerPoint - Data from a PowerPoint presentation defined for a parent Use PowerPoint Presentation activity. You can select slides, placeholders, slide masters, or layouts.
- File - If the activity is inside a For Each File in Folder activity, you can use properties of the current file in the iteration.
- Excel - Data from the Project Notebook or from an Excel file added to the automation. Select named cells, named ranges, tables, or sheets directly from the Plus
-
Text - Enter text using the built-in text builder. You can click Plus
inside the Text Builder to add Excel data, mail data, or values you saved for later use to the text. -
Text - Empty Value - This option gives you the ability to have an empty text as a value for cases where you want to add additional text or update it later on.
-
Number - Enter a numeric value or a formula. Formulas support the following operators and symbols:
+(addition),-(subtraction),*(multiplication),/(division),^(exponent, for example 2^3 for 2 raised to the power of 3),( )(to enforce the order of operations).You can click Plus
inside the Numeric Calculation window to add numeric values from the project. For example, select a cell in an Excel file, or a numeric value that you saved for later use. -
Condition Builder - Add conditional statements that are used to determine what activities to execute based on whether or not the conditions are met. For example, the If activity contains a condition field, and it executes a series of activities if the condition is met and, optionally, another set of activities if the condition is not met. You create a conditional statement by selecting two values and comparing them using one of the available operators: greater than, greater than or equal, less than, less than or equal, equal to, not equal to, is empty, is not empty, is true, is false, starts with, ends with, contains, is numeric, is not numeric. You can add multiple statements and select if all of the statements or any of the statements must be true for the condition to be met.
-
True / False - Adds a conditional statement. Select either
TrueorFalsefor fields that support conditional statements in activities such as the If activity. -
Use Variable - Use the output of another activity that you stored as a variable in the project for the current field. In certain cases, StudioX adapts the variable type so it matches the type the field requires. For example, you can use Text variables in fields that require a Number since the value is automatically converted from Text to Number. When a variable type is converted to another type, StudioX adds the new type at the end of the variable's name. In Windows and cross-platform projects, the variable selection window displays all the variables and arguments in the project, as well as properties specific to each data type. You can navigate to the desired property or use the search bar to find it. An icon next to each property indicates the type (for example, Tt for strings or 123 for numerical types). Variables that are automatically generated by StudioX for activity outputs are displayed under the activity where they were generated.
-
Choose Date/Time - Select a date from the calendar or a time (hour, minute). This option is available for date and time fields.
-
Choose Duration - Select a duration (hours, minutes, and seconds). This option is available for duration fields.
-
Runtime options - Contains the Ask when run and Paste from clipboard options. Ask when run prompts for a value during project execution, This option is available for fields that accept text, numeric, date/time, or Boolean (True/False) values. Paste from clipboard uses an output value that you copied to the clipboard in another activity as input for the current field. This option is available for fields that accept text values or Excel ranges.
-
Variables - Select a variable created for use in App/Web activities selectors.
-
Open in Advanced Editor - Enter VB expressions.
-
Clear Value - Clear the current selection in the field.
Options for Output Fields
Output fields define what to do with the data generated by an activity using the following options:
- Excel - Save output to the Project Notebook or an Excel file defined for a parent Use Excel File activity. Select named cells, named ranges, tables, or sheets directly from the Plus menu, or select Indicate in Excel to open the workbook in Excel and indicate in it. Selecting Custom Input lets you manually enter sheet names, table names, cell addresses, or range addresses. If the activity is inside an For Each Excel Row activity, you can select the current row in the iteration.
- Create Variable - Save the output for later use in your automation as a variable. Enter a name by which to refer to the variable in the project, select a scope, and a data type from the following options: Text, Number, True or False, Number with decimals, Date, and Duration. The created variable can then be selected as input in another activity.
- Runtime options - Contains the Copy to clipboard option, which saves the output to the clipboard. You can then paste the value in an input field in another activity. This option is available for fields that output text, Boolean values (True/False), numbers, or Excel ranges (for example, the Destination field in the Copy Range activity). Boolean and number values are converted to text when copied to the clipboard.
- Use Variable - Use the output of another activity that you stored as a variable in the project for the current field. In certain cases, StudioX adapts the variable type so it matches the type the field requires. For example, you can use Text variables in fields that require a Number since the value is automatically converted from Text to Number. When a variable type is converted to another type, StudioX adds the new type at the end of the variable's name. In Windows and cross-platform projects, the variable selection window displays all the variables and arguments in the project, as well as properties specific to each data type. You can navigate to the desired property or use the search bar to find it. An icon next to each property indicates the type (for example, Tt for strings or 123 for numerical types). Variables that are automatically generated by StudioX for activity outputs are displayed under the activity where they were generated.
- Rename Variable - Rename a variable you created for later use.
- Variables - Select a variable created for use in App/Web activities selectors.
- Open in Advanced Editor - Enter VB expressions.
- Clear Value - Clear the current selection in the field.
Using the Output of an Activity as Input for Another Activity
Passing data from one activity to another can be very useful, even essential when trying to achieve certain workflows. StudioX enables you to save the output generated by an activity in variables, and then use them as input in other activities later in the project:
- To save data and use it in other activities, select the Create Variable option in the Plus menu of a field that configures the output data of an activity, and enter a name for the variable (saved value). You will use this name later to identify and select the variable as input in another activity, so make sure to use a unique name that describes the variable.
Note:
Certain activities may require you to select the type of the data along with the name of the variable. Select from the following options: Text, Number, True or False, Number with decimals, Date, and Duration. Select Advanced options if the type of data you need to store is not found in the list.
- To use the variable as input for another activity later in the project, select it from the Use Variable option in the Plus menu of a field that configures the input data of an activity.
There are various scenarios in which this feature can be useful. Here are a couple of examples:
- A Read Text File activity reads and outputs the contents of a text file which can then be used as the input for an Append Text activity to add the text to a Word file.
- A File Exists activity checks whether a file exists and outputs the result (True or False) which can then be used in the condition of an If activity to determine specific actions to perform when the file already exists.
The Properties Panel
The Properties panel is contextual and enables you to view and edit advanced properties for a selected activity. When selecting multiple activities, only their common properties can be modified from the Properties panel.
The Properties panel is hidden by default. In most situations, you can configure activities using the options available in the Designer panel. In projects with the cross-platform compatibility, all activity properties are available in the activity card in the Designer panel. This also applies to some activities in projects using the Windows compatibility.
Managing Variables
Variables are used to store data of different types and pass it between activities in a project. All variables used in your project can be found and managed in the Data Manager panel. To edit or rename a variable, open the Data Manager panel, right-click on a variable and select Edit Variable.
Read more about variables in the Managing Your Project Data page.
Starting with StudioX v2022.4, Saved Values have been replaced by Variables. The core functionality is the same, however, variables allow the data type to be set when a variable is created and later it can be changed by certain activities or manually by the user. Projects created in an older version of StudioX will still use the Saved Values system when opened in StudioX v2022.4.
Managing Arguments
Arguments are used to pass data between activities in a project and can be used to integrate an workflow with other products such as UiPath® Apps.
Once configured, you can use arguments in an activity similar to how you would use Variables (saved values). To edit or rename an argument, open the Data Manager panel, right click an argument and select Edit. Read more about arguments in the Managing Your Project Data page.
Running Your Automations
We recommend running your automations often during the design stage. This enables you to verify that the project works as expected and lets you identify potential errors early.
To run an automation, click Run in the StudioX ribbon or press F5 on your keyboard.
You can stop project execution by clicking Stop in the ribbon or pressing F5 on your keyboard. After the project is executed, a message displayed at the top of the Designer panel informs you if the run was successful or not.
To run only parts of your project, right-click any activity and select:
- Run to this Activity to execute all the activities in the project before the activity.
- Run from this Activity to execute all the activities in the project starting with the activity.
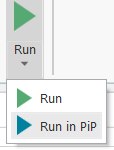
Running in Picture-in-Picture
If you want to use your computer during project execution without interference from the Robot, you can run your automation in picture-in-picture mode. This executes the project in another session opened in a separate window, leaving you in full control of the keyboard, mouse, and screen.
To run an automation in picture-in-picture, click the arrow next to Run in the StudioX ribbon, and then select Run in PiP. Alternatively, you can press F6 on your keyboard. The Robot starts executing the activities in the project in a new window.
Automations that use Microsoft Office resources do not run successfully in picture-in-picture if the resources are already open in the main session. Before you run an automation in picture-in-picture, close any PowerPoint, Excel, or Word file that is accessed by the automation.
Common Scenarios
To help speed up automation design, StudioX comes with common scenarios, reusable pieces of automation that you can add to any project. A common scenario represents one or more activities that are grouped together in a logical order to automate a task or part of a task.
Common scenarios are context-sensitive, which means the available options depend on where exactly you are in your automation. For example, in a Use Desktop Outlook App activity, the available common scenarios are related to Outlook tasks, such as Download email attachments. For a list of available common scenarios, see Common Scenarios Descriptions.
To use a common scenario in a project:
-
Click the Add activity
 icon in the Designer panel where you want to add the scenario. The Add Activity search bar appears with a list of relevant activities and common scenarios at the top.
 -
Click the common scenario you want to add. The activities in the scenario are added to the Designer panel.
-
If needed, configure the added activities.
The following tables describe the common scenarios available in StudioX and any configuration they may require. The common scenarios are listed based on the activity where you can add them.
Anywhere In the Automation
| Common Scenario | What It Does | What You Need to Configure |
|---|---|---|
| Add date to folder file names | Prompts for the folder that contains the file names to update, adds a Write Cell activity that enters today's date in a cell in the Project Notebook, and a For Each File in Folder activity that iterates through the selected folder. Inside For Each File in Folder, another Write Cell activity copies the name of the current file in the iteration to the Project Notebook, and a Move File activity adds the current date to the name using a formula in the Project Notebook. | |
| Delete folder and subfolders | Prompts for the folder to delete and adds a Delete Folder activity configured to delete even if the folder contains files or subfolders. |
Use Excel File
If not added inside a Use Excel File activity, the following common scenarios can be used with the Project Notebook.
| Common Scenario | What It Does | What You Need to Configure |
|---|---|---|
| Merge ranges | Adds an Append Range activity that copies all the values in a range and appends them to another range, and a Delete Rows activity that removes all duplicate rows from the destination after the data is appended. |
|
| Repeat actions for rows in Excel range | Adds a For Each Excel Row activity. |
|
| Paste Excel chart into Powerpoint Note: This scenario is available only when Use Excel File is placed inside an Use PowerPoint Presentation activity. | Adds a Get Chart activity that selects a chart from an Excel file and copies it to clipboard, and a Paste Item into Slide activity that inserts the saved Excel chart into a PowerPoint presentation. |
|
Use PowerPoint Presentation
| Common Scenario | What It Does | What You Need to Configure |
|---|---|---|
| Paste Excel chart into Powerpoint Note: For this scenario to work properly, place a Use Excel File activity inside the Use PowerPoint Presentation activity before adding the scenario. | Adds a Get Chart activity that selects a chart from an Excel file and copies it to clipboard, and a Paste Item into Slide activity that inserts the saved Excel chart into a PowerPoint presentation. |
|
Use Application/Browser
| Common Scenario | What It Does | What You Need to Configure |
|---|---|---|
| Fill form from Excel | Adds a For Each Excel Row activity that contains three Type Into activities configured to copy the data from the first, second, and third columns in the selected range, and pastes it into three indicated fields in the target application or web page. By default, the range A1:C3 from the Scratchpad sheet of the Project Notebook is used. |
|
Use Desktop Outlook App
| Common Scenario | What It Does | What You Need to Configure |
|---|---|---|
| Repeat actions for emails | Adds a For Each Email activity. |
|
| Send email | Adds a Send Email activity. | Configure the Send Email activity. |
| Download email attachments | Prompts for a folder where to save the attachments, adds a Save Email Attachments activity, then a For Each File in Folder containing a Write Line activity configured to display the file names in the Output panel. | |
| Email folder backup | Prompts for a folder on the computer where to save emails, adds a For Each Email with a Save Email activity inside it. | Select the folder to back up from For Each Email. The Inbox is selected by default. |
| Create contacts details database | Adds a For Each Email activity configured to use the emails from the Inbox, Write Cell and Append Range activities inside For Each Email to copy the senders from each email to a new Contacts sheet in the Project Notebook, and a Delete Rows activity to remove duplicates. | |
| Copy email details to Excel | Adds a series of Write Cell activities that add the email fields as column headers in a new sheet named Emails in the Project Notebook. Then adds a For Each Email activity that contains a series of Write Cell activities that copy the fields of each email to the Scratchpad sheet, and an Append Range activity to copy all the fields to the Emails sheet. | In For Each Email, select the folder from which to get the emails. The Inbox is selected by default. |
| Email all files in a folder | Prompts for a folder to select and adds a Send Email activity configured to use the files in the selected folder as attachments. The current Outlook account is added by default to the To field. | Edit the default values added to the fields of the activity to customize the email, for example add one or more recipients, or edit the Subject and Body. |
For Each Email
| Common Scenario | What It Does | What You Need to Configure |
|---|---|---|
| Reply to email | Adds a Reply to Email activity to reply to the current mail in the iteration, a Mark Email as Read/Unread activity, and a Move Email activity to move the email to another folder. |
|
| Forward email | Adds a Forward Email activity to forward the current mail in the iteration, a Mark Email as Read/Unread activity, and a Move Email activity to move the email to another folder. |
|
| Move email | Adds a Move Email activity to move the current email in the iteration to another folder. | In Move Email, select a folder where to move the email. |
| Save and process email attachments | Prompts for a folder where to save the attachments, adds a Save Email Attachments activity and a For Each File in Folder activity where to add activities to repeat for each attachment. | Add activities to repeat for each attachment inside For Each File in Folder. |
For Each File in Folder
| Common Scenario | What It Does | What You Need to Configure |
|---|---|---|
| Try open file as Excel | Adds an If activity that checks if the current file in the iteration has the .xlsx extension. The Then branch contains a Use Excel File activity that adds the current file to the project if the condition is met. | |
| Add date to file and move to subfolder | Adds a Create Folder activity that creates a subfolder named Processed in the current folder, a Write Cell activity to copy the name of the current file in the iteration to the Project Notebook, and a Move File activity that moves the current file to the subfolder and adds the current date to the name using a formula in the Project Notebook. | |
| Group files by type | Adds a Write Cell activity to copy the name of the current file in the iteration to the Project Notebook, a Create Folder activity that creates a subfolder in the current folder named with the extension of the current file using a formula in the Project Notebook, and a Move File activity that moves the current file to the subfolder. | |
| Group files by size | Adds an If activity that checks if the current file in the iteration is smaller than 100KB. The Then branch contains a Create Folder activity that creates a new folder with the title set to 100 K and a Move File activity that moves the current file in the iteration to the newly created folder. The Else branch contains an If activity that checks if the current file is smaller than 1000KB. Both the Then and Else branches contain a Create Folder and Move File activity. | |
| Group files by creation date | Adds a Write Cell activity to copy the creation date of the current file in the iteration to the Project Notebook, a Create Folder activity that creates a subfolder in the current folder named with the creation date of the current file using a formula in the Project Notebook, and a Move File activity that moves the current file to the subfolder. | |
| Copy file info to Excel | Adds a series of Write Cell activities that copy the name, full path, size, and creation date of the current file in the iteration to the Scratchpad sheet and an Append Range activity to copy all the fields to the Files sheet. |
Tips and Tricks
General
-
You can open Excel, Word, and PowerPoint files added to your automation directly from the Data Manager panel. Right-click any Excel or Word resource and select Open. You can also select Open file location to open the folder containing the file.
-
If you're not sure which activity can help you automate a specific action, search through activities using either the search bar at the top of the Activities panel, or the one displayed at the top of the screen after you click Add activity
in the Designer panel. Searching returns results from activity names as well as descriptions, so it can be a good way to find activities you may not have discovered yet. -
When you need help with an activity you added to your project, right-click it and then select Help, or select the activity and then press F1 on your keyboard to open its documentation page with information about how to configure it.
-
If you want to save a few clicks when designing your automations, you can double-click most activity fields to open the option in the Plus
menu most commonly used to configure that field. For example, double-clicking a field that accepts text input opens the Text Builder, doing the same for the Condition field in the If activity opens the Condition Builder. -
When you select Text from the Plus
menu to add text to an activity field, you can compose text that combines multiple types of data using the Text Builder. In addition to typing text, you can select other types of data from the Plus menu in the upper-right corner the Text Builder. For example, you can add the contents of a cell in an Excel file, a field in an Outlook email, or one of the properties of a file on your computer that you saved for later in a previous activity.
UI Automation
-
When configuring a Use Application/Browser activity to add a desktop application to the automation, if you want the automation to open a specific file, indicate the application, and then add the path to the file in the Application arguments field. For example, if you indicated Acrobat Reader as the application to automate and you want to work with the file form_template.pdf located in the
C:\Workfolder, enterC:\Work\form_template.pdfin the Application arguments field to open the file in Acrobat when the automation is executed. -
When indicating target elements of App/Web activities in web browsers, always add at least one anchor to make sure the element is correctly identified by the Robot. For more information about targets and anchors, see UI Automation.
-
When configuring a Use Application/Browser activity to automate tasks you perform in a web browser, before you indicate the web browser, navigate to the web page where the automation performs the first action. Doing this automatically adds the URL of the page to the Browser URL field, so that you don't have to enter it manually.
-
If you don't want to add too many Type Into activities to fill out a form with many fields, you can simplify your workflow by configuring one Type Into activity to enter text in multiple fields. After indicating the first field on the form and selecting the text to type into it, you can open the Text Builder of the Type this field, add the
tabspecial key from the Plus menu inside the Text Builder, and then select the text for the following field. For example, provided that the tabkey moves the cursor to the next field in the target application, configuring the Type this field like in the following image copies the text from three different cells and pastes it in three different fields. -
When two consecutive App/Web activities aren't timed correctly (for example, the first takes a long time to execute the action and the second one starts before the previous action is complete), configure the Delay before or Delay after properties from the activities' Properties panel to make sure the first activity completes before the second activity starts. These properties add a delay before or after an activity is executed, increasing the time between activities when needed.
-
When the actions you want to perform in a desktop application or web browser depend on the state of the application, use a Check App State activity to determine which actions to perform based on the state. This activity verifies whether an element appears in or disappears from the user interface of the target application and enables you to add different activities to execute when the element is found and/or when it is not found. For example, you can check if you are already logged in to a web application by verifying if the Log in button is present, and only perform the actions required to log in when the button is found.
Excel
- The Excel files you add to automations are not always available at design time (for example, a file can be created by or downloaded during the automation). In this scenario, you can still take advantage of StudioX's deep integration with Excel to configure the activities that use the file by defining another file with the same format (same sheets, columns, tables, etc.) as a template file. Once defined, you can indicate data in Excel or select data from the template file directly from the Plus menu. For example, if you want to create an automation with a report you'll receive monthly, use an existing report with the same format as the template. To define a template, add the Use Excel File Excel File activity, enter the path to the file to automate, then select the Template file option and indicate the file to use.
- When you want to work with a .xls (Excel 97-2003) workbook, the data in the file cannot be accessed directly from the Plus menu. In this case, you can configure activities that use the file with the Indicate in Excel or Custom input options in the Plus menu. Alternatively, to be able to select data directly from the menu, create a .xlsx copy and add it as a template file.
- When you filter rows in a large sheet and iterate through them using an Excel For Each Row activity, instead of iterating through the original sheet after applying the filter, use a Copy Range activity to copy the filtered rows to a different sheet, and then iterate through the filtered range in the new sheet. This will result in better performance when the project is executed.
Desktop Outlook App
-
You can add bodies formatted as HTML for emails sent using mail activities from the desktop Outlook app by selecting the Use Word Document option for the Body field. This enables you to select a Word document containing formatted text, images, or tables as the body of emails sent with the Send Email , Reply to Email, and Forward Email activities.
Running Projects
-
If you want to use your computer during project execution without interference from the Robot, you can run your automations in picture-in-picture mode. This features enables you to execute the project in another session opened in a separate window, leaving you in full control of the keyboard, mouse, and screen. To run an automation in picture-in-picture, click the arrow next to Run in the StudioX ribbon, and then select Run in PiP.
-
If you dismissed an error that occurred when executing a project before having a chance to read the error message, you can find the error message in the Output panel. To access the Output panel, click Output in the lower-left corner of the StudioX window.
-
To avoid opening multiple instances of the same application, before running an automation, close all the applications and files that are used in it.
- About Activities
- The Activities Panel
- Container Activities
- Resource Activities
- Iterating through Items
- Configuring the Data Used by Activities
- Options for Input Fields
- Options for Output Fields
- Using the Output of an Activity as Input for Another Activity
- The Properties Panel
- Managing Variables
- Managing Arguments
- Running Your Automations
- Running in Picture-in-Picture
- Common Scenarios
- Anywhere In the Automation
- Use Excel File
- Use PowerPoint Presentation
- Use Application/Browser
- Use Desktop Outlook App
- For Each Email
- For Each File in Folder
- Tips and Tricks
- General
- UI Automation
- Excel
- Desktop Outlook App
- Running Projects