- 基本情報
- チュートリアル
- オートメーション プロジェクト
- オートメーションの作成
- トラブルシューティング
このページの情報は、Windows および Windows - レガシ プロジェクトに適用されます。クロスプラットフォーム プロジェクトの設計について詳しくは、『Studio ガイド』の「クロスプラットフォーム プロジェクト」をご覧ください。
アクティビティについて
アクティビティはオートメーション プロジェクトの基本的な構成ブロックであり、それぞれが、StudioX で自動化できる 1 つ以上の手動タスクを表しています。関連するアクティビティを相互接続したシーケンスが、1 つのオートメーション プロジェクトを形成します。繰り返しプロセスの自動化を検討する場合は、まずそのプロセスを個別の手動ステップに分解したうえで、それぞれのステップを自動化するアクティビティを StudioX で特定する必要があります。
例として、次のワークフローを自動化することを検討します。
- スプレッドシートを開きます。
- ビジネス アプリケーションを開きます。
- スプレッドシートのセルからデータをコピーします。
- コピーしたデータをビジネス アプリケーションのフィールドに貼り付けます。
- アプリケーションのボタンをクリックしてデータを送信します。
このプロセスを自動化するプロジェクトを StudioX で作成する場合は以下のアクティビティを使用します。
- [Excel ファイルを使用] で、使用するスプレッドシートを指定します。
- [アプリケーション/ブラウザーを使用] で、使用するアプリケーションを指定します。
- [文字を入力] で、ビジネス アプリケーションでデータのコピー先とするフィールドと、データのコピー元のセルを選択します。
- [クリック] で、ビジネス アプリケーションでデータ送信のためにクリックするボタンを指定します。
手動ステップと StudioX のアクティビティに、必ず 1 対 1 の対応関係が存在するわけではありません。この例でもわかるように、[文字を入力] アクティビティは、コピー対象とするテキストのコピー元とコピー先の両方を示すために使用しているので、2 つの手動ステップに対応しています。
アクティビティ パネル
[アクティビティ] パネルには、現在のプロジェクトに追加できる、利用可能なアクティビティが表示されます。Windows プロジェクトとクロスプラットフォーム プロジェクトでは、インストール済みのアクティビティとインストール可能なアクティビティの両方を確認できます。Windows - レガシ プロジェクトでは、インストール済みのアクティビティのみが表示されます。[インストール済み] はプロジェクトに既に含まれるアクティビティ パッケージを指し、[インストール可能] は オフィシャル フィードと Orchestrator テナント フィードからインストールできるパッケージを指します。オートメーションにアクティビティを追加するには、アクティビティをダブルクリックするか、デザイナー パネル内の目的の場所にドラッグ アンド ドロップします。インストール可能なアクティビティを追加すると、対応するアクティビティ パッケージがプロジェクトにインストールされます。
パネル内のアクティビティ上でホバーすると、そのアクティビティが属するパッケージとその説明が表示されます。アクティビティをお気に入りのリストに追加するには、そのアクティビティを右クリックして、[お気に入りに追加] を選択します。
アクティビティ パネルをカスタマイズする
パネルの上部にある [グループ化] ボタンをクリックすると、利用可能なアクティビティが、アクティビティが属するカテゴリまたはパッケージでグループ化されます。この 2 つのオプションの選択を解除して、アクティビティをグループ化せずにアルファベット順に並べ替えて表示することもできます。
[フィルター条件] ボタン ![]() をクリックすると、以下のオプションに基づいてアクティビティがフィルター処理されます。
をクリックすると、以下のオプションに基づいてアクティビティがフィルター処理されます。
Windows プロジェクトおよびクロスプラットフォーム プロジェクトの場合
- 利用可否でフィルター処理:
- インストール済み - プロジェクトにインストールされているパッケージに含まれるアクティビティを表示します (このフィルターは非アクティブ化できません)。
- 利用可能 - プロジェクトに追加できる、検出されたアクティビティを表示します。
- Windows - Windows プロジェクトでのみ利用可能なアクティビティを表示します。このフィルターは、クロスプラットフォーム プロジェクトでのみ利用可能です。
- 種類でフィルター処理
- アクティビティ - アクティビティを表示します。
- トリガー - トリガーを表示します。
- カテゴリ別にフィルター処理:
- 開発者 - Studio プロファイル用に設計されたアクティビティを表示します。
Windows - レガシ プロジェクトの場合
- 種類でフィルター処理
- アクティビティ - アクティビティを表示します。
- トリガー - トリガーを表示します。
- カテゴリ別にフィルター処理:
- 開発者 - Studio プロファイル用に設計されたアクティビティを表示します。ただし、これらのアクティビティは、StudioX プロファイルでは期待どおりに動作しない場合があります。
たとえば、すべての Excel アクティビティを表示する場合、[パッケージ別にグループ化] を選択して [カテゴリ別にグループ化] を選択解除できます。
コンテナー アクティビティ
「コンテナー」系のアクティビティは、それらのアクティビティ内に追加されたアクティビティを実行する場合の範囲または満たすべき条件を定義します。「コンテナー」系のアクティビティは、1 つまたは複数の子アクティビティを含む親アクティビティと言えます。「コンテナー」系のアクティビティの例として、以下のものがあります。
- 「リソース」系アクティビティ - アプリケーション リソースをオートメーションに追加して、これらのアクティビティ内に追加された別のアクティビティが使用できるようにします。
- 「繰り返し (コレクションの各要素)」系アクティビティ - 項目のコレクションを定義し、これらのアクティビティ内に追加された別のアクティビティを、それらの各項目に対して 1 回ずつ繰り返します。
- 繰り返し (指定回数) - 「繰り返し (コレクションの各要素)」系アクティビティに似ていますが、このアクティビティ内に追加された別のアクティビティを指定された回数だけ繰り返します。
- [条件分岐 (if)]、[条件分岐 (switch)]、[アプリのステートを確認] - 条件を評価し、その評価結果に基づいて、これらのアクティビティ内に追加された特定のアクティビティを実行することにより、オートメーションのフローを決定します。
- ダウンロードを待機 - このアクティビティ内に追加された別のアクティビティにより開始されたファイルのダウンロードを検出し、そのファイルをオートメーションで使用できるようにします。
「リソース」系アクティビティ
アクティビティは、適用先のアプリケーションに基づいて、各カテゴリに分類されます。アプリケーションで実行するタスクを自動化するには、まず必要なアプリケーション リソースをオートメーションに追加する必要があります。以下のアクティビティによって、オートメーションにリソースを追加します。
- Excel ファイルを使用 - 指定した Excel ファイルを使用します。このアクティビティ内に追加されるすべてのアクティビティで、Excel ファイルのデータを使用できます。子アクティビティを設定するとき、StudioX からファイルの個々のセル、範囲、またはシートを直接選択できます。
- デスクトップ版 Outlook アプリを使用、Outlook 365 を使用、Gmail を使用 - デスクトップ版 Outlook、Outlook 365、および Gmail アカウントをオートメーションに追加します。アカウントのメールを、このアクティビティに追加されたすべてのアクティビティで使用できます。子アクティビティを設定するとき、StudioX から個々のフォルダー、メッセージ、またはメッセージ フィールドを直接選択できます。
- Word ファイルを使用 - 指定した Word 文書を使用します。このアクティビティ内のファイルに対して実行するアクティビティを追加します。
- アプリケーション/ブラウザーを使用 - 指定したデスクトップ アプリケーションまたは Web ブラウザーのページを使用します。アプリケーションまたは Web ブラウザーで実行するアクティビティをこのアクティビティ内に追加します。
- PowerPoint プレゼンテーションを使用 - 指定した PowerPoint ファイルを使用します。このアクティビティ内のファイルに対して実行するアクティビティを追加します。
- OneDrive と SharePoint を使用 - OneDrive や SharePoint の操作の自動化で使用するアカウントを選択します。関連するアクティビティをこのアクティビティ内に追加します。
自動化に必要なリソースはいくつでも追加できます。複数のアプリケーションを使用する複数のアクティビティについては、リソースを別のリソースの内部に追加します。以下に例を示します。
- Excel ファイルのデータと Outlook アカウントのメールの両方を使用するアクティビティを追加するには、[デスクトップ版 Outlook アプリを使用] アクティビティに [Excel ファイルを使用] アクティビティを追加し、[Excel ファイルを使用] 内に共通のアクティビティを追加します。
- Web ページと Word 文書の両方を使用するアクティビティを追加するには、[Word ファイルを使用] アクティビティに [アプリケーション/ブラウザーを使用] アクティビティを追加し、[アプリケーション/ブラウザーを使用] 内に共通のアクティビティを追加します。
オートメーションへのグローバル リソースの追加
「リソース」系のアクティビティを使用してリソースをオートメーションに追加すると、そのリソースを使用できるのはその「リソース」系アクティビティ内に追加したアクティビティのみとなります。プロジェクト内のすべてのアクティビティでリソースを使用できるよう、プロジェクトをリソースに接続することでリソースをグローバルに追加できます。グローバル リソースは [データ マネージャー] パネルで管理され、アクティビティとしてプロジェクトに追加されません。つまり、プロジェクトをリソースに接続することで、デザイナー パネルのスペースも節約できます。
プロジェクトを Excel ブックに接続する方法については、「 プロジェクトを Excel ファイルに接続する」をご覧ください。
項目を反復処理する
反復処理とは、オートメーション プロジェクト内で、項目のコレクション内の個別の項目ごとに 1 つ以上のアクティビティを繰り返すことです。項目を反復処理するには、コレクションを定義した利用可能な [繰り返し (コレクション )] アクティビティの 1 つを追加してから、繰り返すアクティビティを [繰り返し (コレクションの各要素)] 内に追加します。繰り返すアクティビティを設定する場合、プラス記号 のメニューから [現在の項目] オプションを選択して、反復処理で各項目のデータを使用するようにアクティビティが![]() を指定します。
を指定します。
StudioX には、次の「繰り返し」系アクティビティが付属しています。
-
繰り返し (Excel の各行) - Excel の表、範囲、またはシートの行ごとに、1 つ以上のアクティビティを繰り返します。
現在の項目を表すのは
CurrentRowです。アクティビティによっては、使用する列を現在の行から選択することも必要です。 -
繰り返し (Excel の各シート) - Excel ファイルのシートごとに、1 つ以上のアクティビティを繰り返します。
現在の項目を表すのは
CurrentSheetです。 -
繰り返し (各メール) - Outlook フォルダーの各メッセージ、Gmail ラベル、または選択した複数のメッセージのそれぞれで、1 つ以上のアクティビティを繰り返します。
現在の項目を表すオプションは
CurrentMailです。また、アクティビティによっては、現在のメールから使用するフィールド ([件名]、[本文]、[本文 (HTML)]、[Bcc]、[Cc]、[送信先]、[送信元]、または [優先度]) を選択する必要があります。 -
繰り返し (フォルダー内の各ファイル) - コンピューター上のフォルダーにあるファイルごとに、1 つ以上のアクティビティを繰り返します。
現在の項目を表すのは
CurrentFileです。使用するファイル プロパティとして、現在のファイルから [サイズ]、[名前]、[完全名 (フル パスを含む)]、[フォルダー]、[最終更新日]、[最終アクセス日]、[作成日]、[読み取り専用]、または [サイズ (KB)] を選択する必要もあります。 -
繰り返し (フォルダー内の各ファイル) - コンピューター上の指定したフォルダー内にあるファイルごとに、1 つ以上のアクティビティを繰り返します。
現在の項目を表すオプションは
CurrentFolderです。一部のアクティビティでは、現在のフォルダーのどのプロパティ ([名前]、[フル パス]、[最終更新日]) を使用するのかを選択する必要もあります。
[繰り返し (コレクションの各要素)] 内に追加されたアクティビティを設定するときに識別しやすくするため、現在の項目のオプションの名前を、反復処理を実行している項目を表す名前に変更できます。
アクティビティで使用されるデータを構成する
アクティビティはデータを入力として受け取って、実行時に出力データを生成することができます。各アクティビティのデータは、データ フィールドの右側に表示されるプラス ![]() メニューで設定できます。
メニューで設定できます。
アクティビティは、その目的に応じて、データ フィールドがないものや、1 つまたは複数のデータ フィールドを持つものがあります。ここでは、プラス ![]() メニューに表示されるオプションについて説明します。このメニューには、フィールド、アクティビティ、親アクティビティのそれぞれに関連性の高いオプション、すなわち各フィールドで使用可能なオプションのうち一部のみが表示されます。
メニューに表示されるオプションについて説明します。このメニューには、フィールド、アクティビティ、親アクティビティのそれぞれに関連性の高いオプション、すなわち各フィールドで使用可能なオプションのうち一部のみが表示されます。
入力フィールドのオプション
入力フィールドでは、以下のオプションを使用して、アクティビティが受け取るデータを定義します。
-
プロジェクトに追加されたリソースからのデータ
- Excel - プロジェクト ノートブックからのデータ、またはオートメーションに追加された Excel ファイルからのデータ。名前付きのセル、名前付きの範囲、表またはシートを、プラス記号
 メニューから直接選択するか、[Excel 内で示す] を選択し、Excel でブックを開いて、その中で指定します。[カスタム入力] を選択すると、手動でシート名、表の名前、セル アドレス、または範囲アドレスを入力できます。アクティビティが [繰り返し (Excel の各行)] アクティビティ内にある場合、反復処理中の現在の行を選択できます。
 - Outlook/Gmail/Outlook 365 - 親メールのリソース アクティビティに対して定義されたメール アカウントからのデータ。Outlook デスクトップ アプリで選択されたメッセージをプロジェクトの実行時に使用できます。アクティビティが [繰り返し (各メール)] アクティビティの内部にある場合は、反復処理中の現在のメールを使用できます。
- PowerPoint - 親の [PowerPoint プレゼンテーションを使用] アクティビティに対して定義された PowerPoint プレゼンテーションのデータ。スライド、プレースホルダー、スライド マスター、またはレイアウトを選択できます。
- ファイル - アクティビティが [繰り返し (フォルダー内の各ファイル)] アクティビティの内部にある場合、反復処理内の現在のファイルのプロパティを使用できます。
- Excel - プロジェクト ノートブックからのデータ、またはオートメーションに追加された Excel ファイルからのデータ。名前付きのセル、名前付きの範囲、表またはシートを、プラス記号
-
テキスト - 組み込みのテキスト ビルダーでテキストを入力します。テキスト ビルダー内でプラス記号
をクリックすると、Excel データ、メール データ、または後で使用するために保存した値をテキストに追加できます。 -
テキスト - 空の値 - このオプションを使用すると、後でテキストを追加したり更新したりする場合に空のテキストを値として設定できます。
-
数 - 数値または数式を入力します。数式でサポートしている演算子と記号は、
+(加算)、-(減算)、*(乗算)、/(除算)、^(べき乗。例: 2 の 3 乗の場合は 2^3)、( )(演算の順序を強制)です。[数値の計算] ウィンドウ内のプラス記号
をクリックして、プロジェクトから数値を追加できます。たとえば、Excel ファイルのセル、または後で使用するために保存してある数値を選択します。 -
条件ビルダー - 条件を満たすかどうかに基づいて実行するアクティビティを判断する場合に使用される条件ステートメントを追加します。たとえば、[条件分岐 (if)] アクティビティには条件フィールドが含まれ、その条件を満たすと一連のアクティビティが実行され、必要に応じて、条件を満たさない場合は他の一連のアクティビティが実行されます。 2 つの値を選択し、利用可能な演算子 ([次の値より大きい]、[次の値以上]、[次の値より小さい]、[次の値以下]、[次の値と等しい]、[次の値と等しくない]、[空である]、[空ではない]、[true である]、[false である]、[次の値で始まる]、[次の値で終わる]、[次の値を含む]、[数字である]、[数字でない]) を 1 つ使用してその 2 つの値を比較することによって、条件ステートメントを作成します。 複数のステートメントを追加し、条件を満たすにはすべてのステートメントが true である必要があるか、任意のステートメントが true であればよいかを選択できます。
-
True/False - 条件ステートメントを追加します。[条件分岐 (if)] アクティビティなどのアクティビティの、条件ステートメントの使用がサポートされているフィールドで
TrueまたはFalseのいずれかを選択します。 -
変数を使用 - プロジェクトで変数として保存した別のアクティビティの出力を、現在のフィールドの入力として使用します。特定のケースでは、StudioX が変数の型を調整してそのフィールドで必要な型と一致するようにします。たとえば、数値が必要なフィールドでテキストを使用しようとすると、値が自動的にテキストから数値に変換されます。変数の型が自動的に変換された場合は、変数名の末尾に新しい型が追加されます。 Windows プロジェクトおよびクロスプラットフォーム プロジェクトでは、変数の選択ウィンドウにはプロジェクトのすべての変数と引数、および各データ型に固有のプロパティが表示されます。目的のプロパティに移動するか、検索バーを使用して検索できます。各プロパティの横に表示されているアイコンは、型 (例: 文字列型の場合は Tt、数値型の場合は 123 など) を示します。 StudioX によってアクティビティの出力用に自動的に生成される変数は、変数が生成されたアクティビティの下に表示されます。
-
[日付/時刻を選択] - カレンダーの日付または時刻 (時、分) を選択します。このオプションは、日付と時間のフィールドで使用できます。
-
期間を選択 - 期間を選択します (時、分、秒)。このオプションは、期間のフィールドで使用できます。
-
ランタイム オプション - [実行時に確認] オプションと [クリップボードから貼り付け] オプションが含まれます。実行時に確認 - プロジェクトの実行時に値の入力を求めます。テキスト、数値、日付/時刻、または Boolean 値 (True/False) を入力できるフィールドに使用できます。クリップボードから貼り付け - 別のアクティビティでクリップボードにコピーした出力値を、現在のフィールドの入力として使用します。このオプションは、テキスト値または Excel の範囲を入力できるフィールドに使用できます。
-
変数 - アプリ/Web 系のアクティビティのセレクターで使用するために作成された変数を選択します。
-
詳細エディターを開く - VB の式を入力します。
-
値をクリア - フィールドの現在の選択内容をクリアします。
出力フィールドのオプション
出力フィールドでは、アクティビティにより生成されるデータを使用して実行される処理を定義します。以下のオプションを使用できます。
- Excel - プロジェクト ノートブックか、親の [Excel ファイルを使用] アクティビティに定義された Excel ファイルに出力を保存します。名前付きのセル、名前付きの範囲、表またはシートを、プラス記号 メニューから直接選択するか、[Excel 内で示す] を選択し、Excel でブックを開いて、その中で指定します。[カスタム入力] を選択すると、手動でシート名、表の名前、セル アドレス、または範囲アドレスを入力できます。アクティビティが [繰り返し (Excel の各行)] アクティビティ内にある場合、反復処理中の現在の行を選択できます。
- 変数を作成 - オートメーション内で後で使用できるように、出力を変数として保存します。プロジェクトでこの変数を参照するのに使用する名前を入力し、スコープを選択して、データ型を [テキスト]、[数値]、[True または False]、[小数点以下ありの数値]、[日付]、[期間] から選択します。作成した変数は、別のアクティビティで入力として選択できます。
- ランタイム オプション - 出力をクリップボードに保存する [ クリップボードにコピー ] オプションが含まれます。この値を別のアクティビティの入力フィールドに貼り付けることができます。このオプションは、テキスト、Boolean 値 (True/False)、数値、Excel の範囲を出力するフィールド (例: [ 範囲をコピー] アクティビティの [ コピー先] フィールド) に使用できます。Boolean 値および数値は、クリップボードにコピーするとテキストに変換されます。
- 変数を使用 - プロジェクトで変数として保存した別のアクティビティの出力を、現在のフィールドの入力として使用します。特定のケースでは、StudioX が変数の型を調整してそのフィールドで必要な型と一致するようにします。たとえば、数値が必要なフィールドでテキストを使用しようとすると、値が自動的にテキストから数値に変換されます。変数の型が自動的に変換された場合は、変数名の末尾に新しい型が追加されます。 Windows プロジェクトおよびクロスプラットフォーム プロジェクトでは、変数の選択ウィンドウにはプロジェクトのすべての変数と引数、および各データ型に固有のプロパティが表示されます。目的のプロパティに移動するか、検索バーを使用して検索できます。各プロパティの横に表示されているアイコンは、型 (例: 文字列型の場合は Tt、数値型の場合は 123 など) を示します。 StudioX によってアクティビティの出力用に自動的に生成される変数は、変数が生成されたアクティビティの下に表示されます。
- 変数の名前を変更 - 後で使用するために作成した変数の名前を変更します。
- 変数 - アプリ/Web 系のアクティビティのセレクターで使用するために作成された変数を選択します。
- 詳細エディターを開く - VB の式を入力します。
- 値をクリア - フィールドの現在の選択内容をクリアします。
アクティビティの出力を別のアクティビティの入力として使用する
アクティビティ間でデータの受け渡しができると非常に便利であり、特定のワークフローではこの操作が不可欠になる場合さえあります。StudioX では、あるアクティビティによって生成された出力を変数に保存しておき、そのプロジェクトで後から実行される別のアクティビティの入力として使用できます。
- データを保存して他のアクティビティで使用するには、アクティビティの出力データを設定するフィールドの プラス メニューで [ 変数を作成] オプションを選択し、変数の名前 (保存された値) を入力します。この名前は、後で別のアクティビティの入力として変数を識別および選択するときに使用します。したがって、変数を説明するような一意の名前を付けるようにしてください。
注:
特定のアクティビティでは、変数の名前とともにデータの型を選択する必要があります。[テキスト]、[数値]、[True または False]、[小数点以下ありの数値]、[日付]、[期間] からいずれかを選択します。保存する必要があるデータの型がリストに見つからない場合は、[詳細オプション] を選択します。
- この変数を、そのプロジェクトで後から実行される別のアクティビティの入力として使用するには、アクティビティの入力データを設定するフィールドのプラス メニューに表示される[ 変数を使用] オプションで変数を選択します。
この機能が役立つさまざまなシナリオがあります。次に、いくつかの例を示します。
- [テキスト ファイルを読み込み] アクティビティでテキスト ファイルの内容を読み込んで出力し、それを [テキストを追加] アクティビティの入力として使用して Word ファイルにテキストを追加します。
- [ファイルの存在を確認] アクティビティで、ファイルが存在するかどうかをチェックし、出力される結果 (True または False) を [条件分岐 (if)] アクティビティの条件として使用して、ファイルが既に存在している場合に実行する特定のアクションを判断します。
プロパティ パネル
[プロパティ] パネルには状況に応じた内容が表示されます。選択したアクティビティの詳細なプロパティの表示と編集が可能です。複数のアクティビティを選択した場合、[プロパティ] パネルでは、これらのアクティビティに共通のプロパティのみを変更できます。
既定では、[プロパティ] パネルは非表示になっています。ほとんどの場合、アクティビティの設定はデザイナー パネル内に表示されるオプションで行えます。クロスプラットフォーム対応のプロジェクトでは、アクティビティのプロパティはすべてデザイナー パネル内のアクティビティ カードに表示されます。これは、Windows プロジェクト内の一部のアクティビティにも当てはまります。
変数を管理する
変数は、さまざまな型のデータを格納してプロジェクト内のアクティビティ間で渡すために使用されます。プロジェクトで使用される変数はすべて [データ マネージャー] パネルで確認・管理できます。変数を編集したり名前を変更したりするには、[データ マネージャー] パネルを開き、変数を右クリックして [変数を編集] を選択します。
変数について詳しくは、「プロジェクト データを管理する」をご覧ください。
v2022.4 の StudioX から「保存された値」は「変数」に置き換えられました。基本的な機能は同じですが、変数を使用すると作成時にデータ型を設定できます。データ型は後で特定のアクティビティによって変更したり、ユーザーが手動で変更したりできます。なお、以前のバージョンの StudioX で作成したプロジェクトを v2022.4 の StudioX で開くと、「保存された値」のシステムが使用されます。
引数を管理する
引数は、プロジェクト内のアクティビティ間でデータを渡すために使用されます。また、引数を使用すると UiPath® Apps などの他の製品とワークフローを連携できます。
設定後は、変数 (保存された値) を使用するのと同様の方法で引数をアクティビティで使用できます。引数を編集したり名前を変更したりするには、[データ マネージャー] パネルを開き、引数を右クリックして [編集] を選択します。引数の詳細については、「プロジェクト データを管理する」をご覧ください。
オートメーションを実行する
設計段階から、オートメーションを頻繁に実行することをお勧めします。プロジェクトが期待どおりに動作することを確認して、潜在的なエラーを早期に特定することができるためです。
オートメーションを実行するには、StudioX のリボンの [実行] をクリックするか、キーボードの F5 を押します。
プロジェクトの実行を停止するには、リボンの [停止] をクリックするか、キーボードの F5 を押します。プロジェクトの実行後、デザイナー パネルの上部に、実行が正常に完了したかどうかを知らせるメッセージが表示されます。
プロジェクトの一部だけを実行するには、任意のアクティビティを右クリックして、以下のオプションを選択します。
- このアクティビティまで実行 - プロジェクト内のこのアクティビティより前のアクティビティをすべて実行します。
- [このアクティビティから実行] - プロジェクト内のこのアクティビティ以降のアクティビティをすべて実行します。
ピクチャ イン ピクチャで実行する
プロジェクトの実行中にロボットの干渉を受けずにコンピューターを使用するには、オートメーションをピクチャ イン ピクチャ モードで実行します。このモードでは、プロジェクトが別ウィンドウで開かれた別のセッションで実行されるため、ユーザーがキーボード、マウス、画面を完全に制御できます。
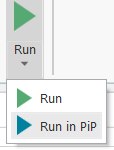
ピクチャ イン ピクチャでオートメーションを実行するには、StudioX のリボンの [実行] の下にある矢印をクリックし、[PiP で実行] を選択します。または、F6 キーを押します。ロボットにより、プロジェクト内のアクティビティが新しいウィンドウで実行されます。
Microsoft Office のリソースを使用するオートメーションは、メイン セッションでそのリソースが既に開いている場合、ピクチャ イン ピクチャで正常に実行されません。ピクチャ イン ピクチャでオートメーションを実行する前に、オートメーションでアクセスされる PowerPoint、Excel、または Word のファイルをすべて閉じてください。
共通シナリオ
オートメーションをより短期間で設計できるようにするために、StudioX には共通シナリオが付属しています。これは、再利用可能なオートメーションの部品であり、あらゆるプロジェクトに追加できます。共通シナリオとは、タスクまたはタスクの一部を自動化するための、論理的な順序でグループ化された 1 つまたは複数のアクティビティのことです。
共通シナリオはコンテキスト依存です。つまり、オートメーションのどこで使用するかによって、提供されるオプションが変わってきます。たとえば、[デスクトップ版 Outlook アプリを使用] アクティビティで使用可能な共通シナリオは、Outlook のタスク (メールの添付ファイルをダウンロードするなど) に関連したものになります。使用可能な共通シナリオのリストは、「共通シナリオの説明」をご覧ください。
プロジェクトで共通シナリオを使用するには、次の手順を実行します。
-
[デザイナー] パネルのシナリオを追加する場所で [アクティビティを追加] アイコン
 をクリックします。 [アクティビティを追加] 検索バーが、関連性の高いアクティビティや共通シナリオが先頭に示されたリストとともに表示されます。
 -
追加する共通シナリオをクリックします。 シナリオ内のアクティビティが [デザイナー] パネルに追加されます。
-
必要に応じて、追加されたアクティビティを設定します。
下の表に、StudioX で使用可能な共通シナリオと、必要になる可能性がある設定について示します。共通シナリオは、それらを追加先とすることのできるアクティビティに基づいて並べられています。
オートメーションの任意の場所
| 共通シナリオ | 機能 | 必要な設定 |
|---|---|---|
| フォルダーのファイル名に日付を追加 | 更新するファイル名を含むフォルダーを確認するプロンプトを表示し、プロジェクト ノートブック内のセルに今日の日付を入力する [セルに書き込み] アクティビティと、選択されたフォルダー内で処理を繰り返し実行する [繰り返し (フォルダー内の各ファイル]) アクティビティを追加します。[繰り返し (フォルダー内の各ファイル)] では、内部で、もう 1 つの [セルに書き込み] アクティビティが繰り返し内の現在のファイルの名前をプロジェクト ノートブックにコピーし、[ファイルを移動] アクティビティがプロジェクト ノートブック内の式を使用して今日の日付をファイル名に追加します。 | |
| フォルダーとサブフォルダーを削除 | 削除するフォルダーを確認するプロンプトを表示して、[フォルダーを削除] アクティビティを追加します。このアクティビティは、たとえ指定されたフォルダーにファイルやサブフォルダーが含まれていても削除するように設定されています。 |
Excel ファイルを使用
以下の共通シナリオは、[Excel ファイルを使用] アクティビティ内で追加される場合を除き、プロジェクト ノートブックとともに使用できます。
| 共通シナリオ | 機能 | 必要な設定 |
|---|---|---|
| 範囲を結合 | [範囲を追加] アクティビティ (ある範囲のすべての値をコピーして、それらを別の範囲に追加) と、[行を削除] アクティビティ (データの追加後に追加先から重複する行をすべて削除) を追加します。 |
|
| Excel 範囲内の行に対するアクションを繰り返す | [繰り返し (Excel の各行)] アクティビティを追加します。 |
|
| PowerPoint に Excel グラフを貼り付け 注: このシナリオは、[ Excel ファイルを使用 ] が [PowerPoint プレゼンテーションを使用 ] アクティビティ内に配置されている場合にのみ使用できます。 | この共通シナリオは、Excel ファイルからグラフを選択してクリップボードにコピーする [グラフを取得] アクティビティと、保存した Excel グラフを PowerPoint プレゼンテーションに挿入する [スライドに項目を貼り付け] アクティビティを追加します。 |
|
PowerPoint プレゼンテーションを使用
| 共通シナリオ | 機能 | 必要な設定 |
|---|---|---|
| PowerPoint に Excel グラフを貼り付け 注: このシナリオを正しく動作させるには、シナリオを追加する前に [PowerPoint プレゼンテーションを使用] アクティビティ内に [Excel ファイルを使用] アクティビティを配置します。 | この共通シナリオは、Excel ファイルからグラフを選択してクリップボードにコピーする [グラフを取得] アクティビティと、保存した Excel グラフを PowerPoint プレゼンテーションに挿入する [スライドに項目を貼り付け] アクティビティを追加します。 |
|
アプリケーション/ブラウザーを使用
| 共通シナリオ | 機能 | 必要な設定 |
|---|---|---|
| Excel からフォームに入力 | 3 つの [文字を入力] アクティビティを含む [繰り返し (Excel の各行)] アクティビティを追加します。[文字を入力] アクティビティは、選択された範囲内の 1 列目、2 列目、3 列目のデータをコピーし、対象のアプリケーション内または Web ページ内の指定された 3 つのフィールドに貼り付けるように設定されています。既定では、プロジェクト ノートブックの Scratchpad シートの A1:C3 の範囲が使用されます。 |
|
デスクトップ版 Outlook アプリを使用
| 共通シナリオ | 機能 | 必要な設定 |
|---|---|---|
| メールに対するアクションを繰り返す | [繰り返し (各メール)] アクティビティを追加します。 |
|
| メールを送信 | [メールを送信] アクティビティを追加します。 | [メールを送信] アクティビティを設定します。 |
| メールの添付ファイルをダウンロード | 添付ファイルを保存するフォルダーを確認するプロンプトを表示し、[メールの添付ファイルを保存] アクティビティを追加してから、[1 行を書き込み] アクティビティを含む [繰り返し (フォルダー内の各ファイル)] アクティビティを追加します。[1 行を書き込み] アクティビティは、[出力] パネルにファイル名を表示するように設定されています。 | |
| メール フォルダーのバックアップ | メールを保存するコンピューター上のフォルダーを確認するプロンプトを表示し、[メールを保存] アクティビティを含む [繰り返し (各メール)] アクティビティをその中に追加します。 | [繰り返し (各メール)] からバックアップするフォルダーを選択します。既定では [受信トレイ] が選択されています。 |
| 連絡先情報のデータベースを作成 | 受信トレイのメールを使用するように設定された [繰り返し (各メール)] アクティビティと、その内部の [セルに書き込み] アクティビティと [範囲を追加] アクティビティを追加して、各メールの送信者をプロジェクト ノートブックの新しい Contacts シートにコピーします。さらに、[行を削除] アクティビティを追加して、重複を削除します。 | |
| Excel にメールの詳細情報をコピー | プロジェクト ノートブックの Emails という名前が付けられた新規シートに、メールのフィールドを列見出しとして追加する一連の [セルに書き込み] アクティビティを追加します。 次に、各メールのフィールドを Scratchpad シートにコピーする一連の [セルに書き込み] アクティビティを含む [繰り返し (各メール)] アクティビティと、すべてのフィールドを Emails シートにコピーする [範囲を追加] アクティビティを追加します。 | [繰り返し (各メール)] でメールを取得するフォルダーを選択します。既定では [受信トレイ] が選択されています。 |
| フォルダー内のすべてのファイルをメール送信 | 選択するフォルダーを確認するプロンプトを表示し、選択されたフォルダー内のファイルを添付ファイルとして使用するように設定された [メールを送信] アクティビティを追加します。既定では、現在の Outlook アカウントが [宛先] フィールドに追加されます。 | アクティビティのフィールドに追加されている既定値を編集して、メールをカスタマイズします。例えば、1 人または複数の受信者を追加したり、件名や本文を編集したりします。 |
繰り返し (各メール)
| 共通シナリオ | 機能 | 必要な設定 |
|---|---|---|
| メールに返信 | [メールに返信] アクティビティ (繰り返し内の現在のメールに返信)、[メールを既読/未読にする] アクティビティ、[メールを移動] アクティビティ (メールを別のフォルダーに移動) を追加します。 |
|
| メールを転送 | [メールを転送] アクティビティ (繰り返し内の現在のメールを転送)、[メールを既読/未読にする] アクティビティ、[メールを移動] アクティビティ (メールを別のフォルダーに移動) を追加します。 |
|
| メールを移動 | 繰り返し内の現在のメールを別のフォルダーに移動する [メールを移動] アクティビティを追加します。 | [メールを移動] でメールの移動先フォルダーを選択します。 |
| メールの添付ファイルを保存して処理 | 添付ファイルを保存するフォルダーを確認するプロンプトを表示し、[メールの添付ファイルを保存] アクティビティと、各添付ファイルに対して繰り返すアクティビティを追加する [繰り返し (フォルダー内の各ファイル)] アクティビティを追加します。 | [繰り返し (フォルダー内の各ファイル)] 内に各添付ファイルに対して繰り返すアクティビティを追加します。 |
繰り返し (フォルダー内の各ファイル)
| 共通シナリオ | 機能 | 必要な設定 |
|---|---|---|
| ファイルを Excel で開く | 繰り返し内の現在のファイルの拡張子が .xlsx であるかどうかを確認する [条件分岐 (if)] アクティビティを追加します。Then 分岐には、条件が満たされたときにプロジェクトに現在のファイルを追加する [Excel ファイルを使用] アクティビティが含まれます。 | |
| ファイル名に日付を追加しサブフォルダーに移動 | [フォルダーを作成] アクティビティ (現在のフォルダーに Processed という名前のサブフォルダーを作成)、[セルに書き込み] アクティビティ (繰り返し内の現在のファイルの名前をプロジェクト ノートブックにコピー)、[ファイルを移動] アクティビティ (現在のファイルをサブフォルダーに移動し、プロジェクト ノートブックの式を使用して今日の日付をファイル名に追加) を追加します。 | |
| 種類ごとにファイルをグループ化 | [セルに書き込み] アクティビティ (繰り返し内の現在のファイルの名前をプロジェクト ノートブックにコピー) と [フォルダーを作成] アクティビティ (現在のフォルダー内に、プロジェクト ノートブックの式を使用して、現在のファイルの拡張子付きの名前でサブフォルダーを作成)、[ファイルを移動] アクティビティ (現在のファイルをサブフォルダーに移動) を追加します。 | |
| サイズごとにファイルをグループ化 | 反復処理内の現在のファイルが 100 KB 未満であるかどうかを確認する [条件分岐 (if)] アクティビティを追加します。Then 分岐には、タイトルが 100 K に設定された新しいフォルダーを作成する [フォルダーを作成] アクティビティと、反復処理内の現在のファイルを新しく作成されたフォルダーに移動する [ファイルを移動] アクティビティが含まれます。 Else 分岐には、現在のファイルが 1000 KB 未満かどうかを確認する [条件分岐 (if)] アクティビティが含まれます。Then 分岐と Else 分岐の両方に、[フォルダーを作成] アクティビティと [ファイルを移動] アクティビティが含まれています。 | |
| 作成日ごとにファイルをグループ化 | [セルに書き込み] アクティビティ (繰り返し内の現在のファイルの作成日をプロジェクト ノートブックにコピー)、[フォルダーを作成] アクティビティ (現在のフォルダー内に、プロジェクト ノートブックの式を使用して、現在のファイルの作成日でサブフォルダーを作成)、[ファイルを移動] アクティビティ (現在のファイルをサブフォルダーに移動) を追加します。 | |
| Excel にファイルの情報をコピー | 反復処理内の現在のファイルの名前、フル パス、サイズ、作成日を Scratchpad シートにコピーする一連の [セルに書き込み] アクティビティと、すべてのフィールドを Files シートにコピーする [範囲を追加] アクティビティを追加します。 |
ヒントと裏技
全般
-
オートメーションに追加した Excel、Word、PowerPoint の各ファイルを [データ マネージャー] パネルから直接開くことができます。Excel または Word のリソースを右クリックし、[開く] を選択します。[ファイルの場所を開く] を選択して、ファイルを含むフォルダーを開くこともできます。
-
特定のアクションの自動化に役立つアクティビティが不明な場合は、[アクティビティ] パネル上部にある検索バーを使用するか、[デザイナー] パネルで [アクティビティを追加]
をクリックした後に画面上部に表示される検索バーを使用してアクティビティを検索します。検索を行うと、アクティビティ名と説明からの結果が得られるため、まだ見つけていない可能性のあるアクティビティを見つけるのに役立ちます。 -
プロジェクトに追加したアクティビティに支援が必要な場合は、そのアクティビティを右クリックして [ヘルプ] を選択するか、アクティビティを選択してからキーボードの F1 キーを押して、設定方法に関する情報が記載されたドキュメント ページを開きます。
-
オートメーションの設計時に数回のクリックを省くには、ほとんどのアクティビティのフィールドをダブルクリックすると、そのフィールドの設定に最も一般的に使用されるオプションをプラス記号
のメニューから開くことができます。たとえば、テキスト入力を受け入れるフィールドをダブルクリックすると、テキスト ビルダーが開き、[条件分岐 (if)] アクティビティ内の [条件] フィールドで同じことを実行すると、条件ビルダーが開きます。 -
プラス メニューから[テキスト] を選択してアクティビティ
フィールドにテキストを追加するときは、 テキスト ビルダー を使用して複数の種類のデータを組み合わせたテキストを作成できます。テキストの入力に加え、テキスト ビルダーの右上隅にある プラス記号 の メニューから他の種類のデータを選択できます。たとえば、Excel ファイルのセルのコンテンツ、Outlook メールのフィールド、前のアクティビティで後から使用するためにコンピューターに保存したファイルのいずれかのプロパティを追加できます。
UI Automation
-
[ アプリケーション/ブラウザーを使用 ] アクティビティを設定してデスクトップ アプリケーションをオートメーションに追加するとき、オートメーションで特定のファイルを開くようにする場合は、アプリケーションを指定し、そのファイルのパスを [ アプリケーション引数 ] フィールドに追加します。たとえば、Acrobat Reader を自動化のアプリケーションに指定し、
C:\Workフォルダーにあるファイル form_template.pdfを扱う場合は、[アプリケーション引数] フィールドに「C:\Work\form_template.pdf」と入力すると、オートメーション実行時に Acrobat 内にファイルが開きます。 -
Web ブラウザーでアプリ/Web アクティビティのターゲット要素を指定する場合は、 必ず 1 つ以上 アンカーを追加して、ロボットによって要素が正しく識別されるようにします。ターゲットとアンカーについて詳しくは、「 UI 操作の自動化」をご覧ください。
-
Web ブラウザーで実行するタスクを自動化するように [アプリケーション/ブラウザーを使用] アクティビティを設定するときは、Web ブラウザーを指定する前に、オートメーションで最初のアクションを実行する Web ページに移動します。この操作を実行すると、[ブラウザーの URL] フィールドにページの URL が自動的に追加されるため、手動で URL を入力する必要がありません。
-
多くのフィールドがあるフォームへの入力のためにあまり多くの [文字を入力 ] アクティビティを追加したくない場合は、1 つの [文字 を入力] アクティビティを複数のフィールドにテキストを入力するように設定することでワークフローを簡略化できます。フォーム上で最初のフィールドを指定し、そこに入力するテキストを選択すると、[
tab以下を入力] フィールドのテキスト ビルダーが開き、そのテキスト ビルダー内の プラス 記号 の メニューから 特殊キー を追加して、以下のフィールドに入力するテキストを選択できます。たとえば、 tabキーでカーソルを対象のアプリケーションの次のフィールドに移動する場合は、[以下を入力] フィールドを次の画像のように設定することで、3 つの異なるセルからテキストをコピーし、それぞれを 3 つの異なるフィールドに貼り付けることができます。 -
2 つの連続する「アプリ/Web」系のアクティビティのタイミングが適切でない (最初のアクティビティによるアクションの実行に長い時間がかかり、そのアクションが完了する前に 2 番目のアクティビティが開始されるなど) 場合は、アクティビティの [プロパティ] パネルから [実行前の待機時間] または [実行後の待機時間] のプロパティを設定して、最初のアクティビティが完了した後に 2 番目のアクティビティが開始するようにします。この 2 つのプロパティでアクティビティの実行前または実行後の待機時間を追加することで、アクティビティの間隔を必要に応じて増やすことができます。
-
デスクトップ アプリケーションまたは Web ブラウザーで実行するアクションがアプリケーションのステートによって異なる場合は、[アプリのステートを確認] アクティビティを使用して、そのステートに基づいて実行するアクションを決定します。このアクティビティでは、対象のアプリケーションのユーザー インターフェイスに要素が表示されるかどうかが検証され、要素が見つかったときや見つからないときに実行するさまざまなアクティビティを追加できます。たとえば、[ログイン] ボタンがあるかどうかを検証することによって Web アプリケーションにログイン済みであるかどうかをチェックし、ボタンがある場合にのみ、ログインに必要な操作を実行できます。
Excel
- オートメーションに追加する Excel ファイルは、必ずしも設計時に使用できるわけではありません (たとえば、ファイルはオートメーションによって作成したり、オートメーション実行時にダウンロードできます)。このシナリオでは、さらに StudioX の Excel との緊密な連携を利用して、同じ形式 (同じシート、列、表など) の別のファイルをテンプレート ファイルとして定義することによって、ファイルを使用するアクティビティを設定できます。 定義すると、Excel 内でデータを指定するか、プラス記号 のメニューから直接テンプレート ファイルのデータを選択できます。 たとえば、毎月レポートを受信するオートメーションを作成する場合は、テンプレートと同じ形式の既存のレポートを使用します。テンプレートを定義するには、[Excel ファイルを使用] という Excel ファイルのアクティビティを追加し、自動化するファイルのパスを入力します。さらに [テンプレート ファイル] オプションを選択し、使用するファイルを指定します。
- 操作する場合 .xls(Excel 97-2003) ブック内のデータに プラス記号 メニューから直接アクセスすることはできません。この場合、 プラス 記号 メニューの [ Excel 内で示す] オプションまたは[カスタム入力] オプションを使用して、ファイルを使用するアクティビティを設定できます。あるいは、メニューから直接データを選択するには、.xlsxを作成します。コピーして テンプレート ファイルとして追加します。
- 大規模なシート内の行をフィルター処理し、[Excel の繰り返し (各行)] アクティビティを使用して反復処理する場合は、フィルター適用後に元のシートを反復処理するのではなく、[範囲をコピー] アクティビティを使用して、フィルター処理された行を異なるシートにコピーし、新しいシートのフィルター処理された範囲を反復処理します。これにより、プロジェクト実行時のパフォーマンスが向上します。
デスクトップ版 Outlook アプリ
-
[本文] フィールドの [Word 文書を使用] オプションを選択することによって、デスクトップ版 Outlook アプリからメール アクティビティを使用して送信されるメールに HTML 形式の本文を追加できます。これにより、[ メールを送信 ]、[ メールに返信]、[ メールを転送 ] の各アクティビティで送信されるメールの本文として書式設定されたテキスト、画像、または表を含む Word 文書を選択できます。
プロジェクトを実行する
-
プロジェクトの実行中にロボットの干渉を受けずにコンピューターを使用するには、オートメーションをピクチャ イン ピクチャ モードで実行します。この機能では、プロジェクトを別ウィンドウで開かれた別のセッションで実行できるため、キーボード、マウス、画面を完全に制御できます。ピクチャ イン ピクチャでオートメーションを実行するには、StudioX のリボンの [実行] の下にある矢印をクリックし、[PiP で実行] を選択します。
-
エラー メッセージを読むことなく、プロジェクトの実行時に発生したエラーを閉じた場合は、[出力] パネルでエラー メッセージを確認できます。[出力] パネルにアクセスするには、StudioX ウィンドウの左下隅にある [出力] をクリックします。
-
同じアプリケーションの複数のインスタンスが開くのを避けるために、オートメーションを実行する前に、オートメーションに使用されるアプリケーションとファイルをすべて閉じます。
- アクティビティについて
- アクティビティ パネル
- コンテナー アクティビティ
- 「リソース」系アクティビティ
- 項目を反復処理する
- アクティビティで使用されるデータを構成する
- 入力フィールドのオプション
- 出力フィールドのオプション
- アクティビティの出力を別のアクティビティの入力として使用する
- プロパティ パネル
- 変数を管理する
- 引数を管理する
- オートメーションを実行する
- ピクチャ イン ピクチャで実行する
- 共通シナリオ
- オートメーションの任意の場所
- Excel ファイルを使用
- PowerPoint プレゼンテーションを使用
- アプリケーション/ブラウザーを使用
- デスクトップ版 Outlook アプリを使用
- 繰り返し (各メール)
- 繰り返し (フォルダー内の各ファイル)
- ヒントと裏技
- 全般
- UI Automation
- Excel
- デスクトップ版 Outlook アプリ
- プロジェクトを実行する