- Getting started
- Notifications
- Licensing
- Troubleshooting
- Connector Builder
- Act! 365
- Active Directory - Preview
- ActiveCampaign
- Adobe Acrobat Sign
- Adobe PDF Services
- Amazon Bedrock
- Amazon Connect
- Amazon Polly
- Amazon SES
- Amazon Transcribe
- Amazon Web Services
- Anthropic Claude
- Asana
- AWeber
- Azure AI Document Intelligence
- Azure Maps
- BambooHR
- Box
- Brevo
- Calendly
- Campaign Monitor
- Cisco Webex Teams
- Citrix Hypervisor
- Citrix ShareFile
- Clearbit
- Confluence Cloud
- Constant Contact
- Coupa
- Customer.io
- Datadog
- Deputy
- DocuSign
- Drip
- Dropbox
- Egnyte
- Eventbrite
- Exchange Server - Preview
- Exchangerates
- Expensify
- Facebook
- Freshbooks
- Freshdesk
- Freshservice
- GetResponse
- GitHub
- Gmail
- Google Cloud Platform
- Google Docs
- Google Drive
- Google Maps
- Google Sheets
- Google Speech-to-Text
- Google Tasks - Preview
- Google Text-to-Speech
- Google Vertex
- Google Vision
- Google Workspace
- GoToWebinar
- Greenhouse
- Hootsuite
- HTTP Webhook - Preview
- Hubspot CRM
- HubSpot Marketing
- HyperV - Preview
- iContact
- Insightly CRM
- Intercom
- Jira
- Keap
- Klaviyo
- LinkedIn
- Mailchimp
- MailerLite
- Mailgun
- Mailjet
- Marketo
- Microsoft 365
- Microsoft Azure
- Microsoft Azure Active Directory
- Microsoft Azure OpenAI
- Microsoft Dynamics 365 CRM
- Microsoft OneDrive & Sharepoint
- Microsoft Outlook 365
- Microsoft Sentiment
- Microsoft Teams
- Microsoft Translator
- Microsoft Vision
- Miro
- NetIQ eDirectory
- Okta
- OpenAI
- Oracle Eloqua
- Oracle NetSuite
- PagerDuty
- PayPal
- PDFMonkey
- Pinecone
- Pipedrive
- QuickBooksOnline
- Quip
- Salesforce
- Salesforce Marketing Cloud
- SAP BAPI
- SAP Cloud for Customer
- SAP Concur
- SAP OData
- SendGrid
- ServiceNow
- Shopify
- Slack
- SmartRecruiters
- Smartsheet
- Snowflake
- Stripe
- Sugar Enterprise
- Sugar Professional
- Sugar Sell
- Sugar Serve
- System Center - Preview
- TangoCard
- Todoist
- Trello
- Twilio
- VMware ESXi vSphere
- watsonx.ai
- WhatsApp Business
- WooCommerce
- Workable
- Workday
- X (formerly Twitter)
- Xero
- YouTube
- Zendesk
- Zoho Campaigns
- Zoho Desk
- Zoho Mail
- ZoomInfo

Integration Service user guide
Publishing
There are two steps to publishing a custom connector:
- Publish it to your tenant, to make it available in the Integration Service connector catalog to anyone in your organization.
- Publish it to the UiPath Marketplace, to make it available to everyone in the UiPath Community.
Publish the connector to your tenant
- Navigate to Connector Builder, open your custom connector, and select the Publish button at the top of the screen.
- The custom connector is now visible in the catalog and ready for use within Studio. You can establish connections and use your connector across the UiPath® product suite.
- Select the More options
menu icon next to each connector to Edit, Download, Unpublish, or Delete the connector.
Publish to Marketplace
Follow these steps to start the Marketplace publishing process.
- Navigate to Integration Service.
- In the Connectors catalog, search for the custom connector you want to publish to the Marketplace.
- Select the connector and navigate to the Admin panel.
- Select the Publish to Marketplace button.

The publishing process is broken down into four steps:
- Details.
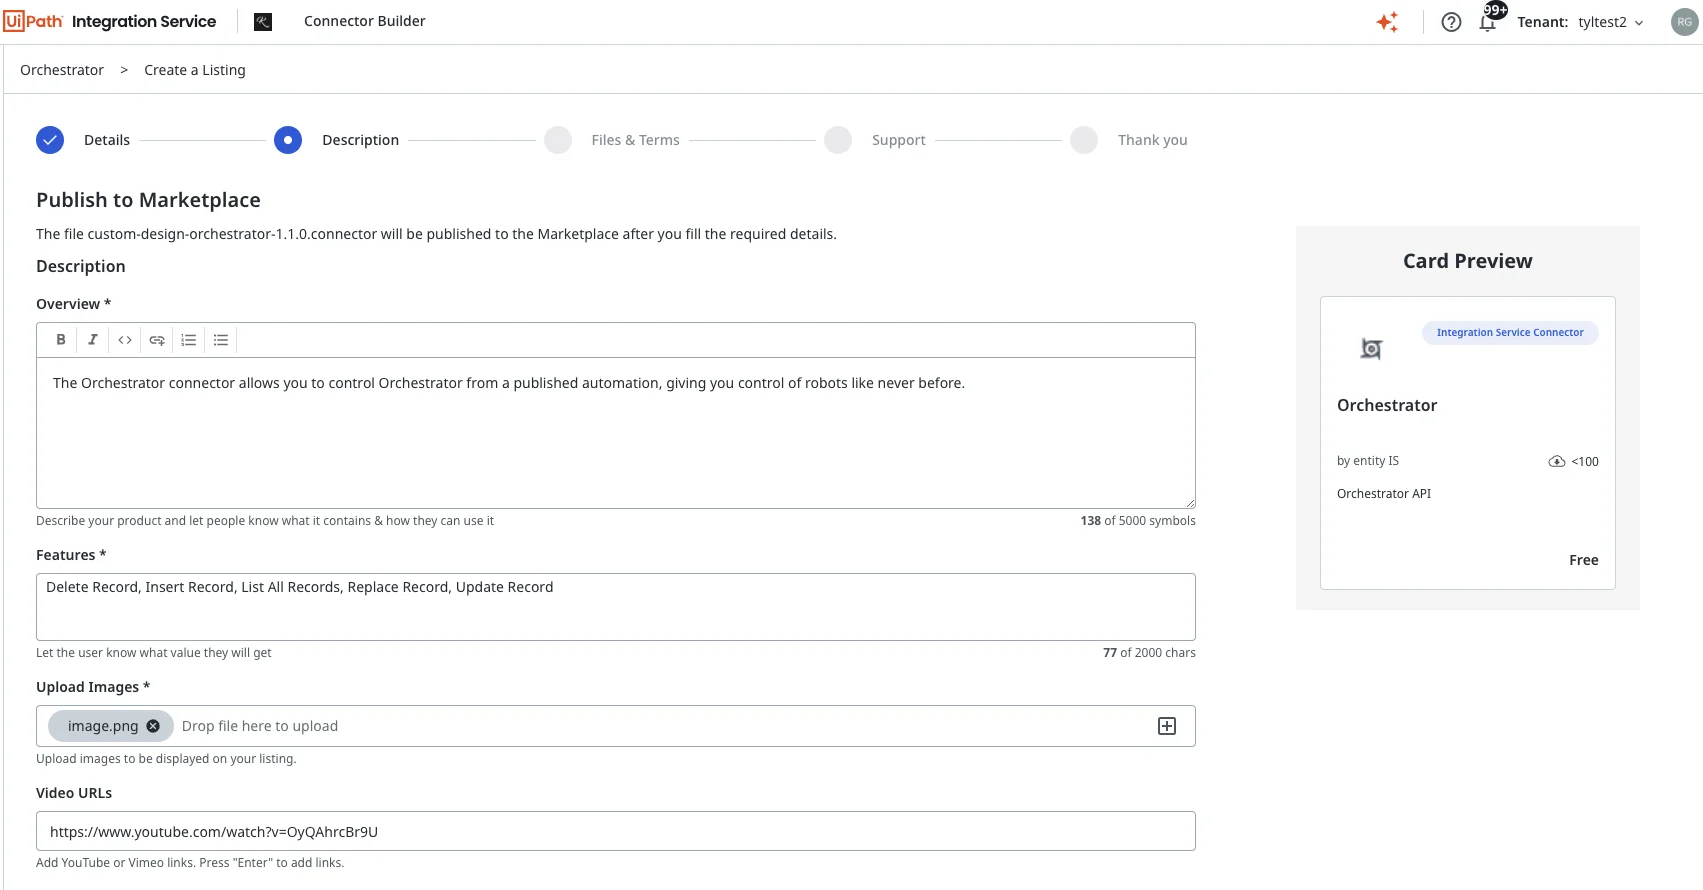
- Description.
- Files & Terms.
- Support.
These steps are similar to creating a listing directly through the Marketplace, described in the Marketplace User Guide in Submit a listing. There are slight differences to make the publishing process more streamlined.
Description
The Description step provides Marketplace customers with more in-depth information on the connector, including:
- Overview (supports a maximum of 5000 characters): Describe your listing and let people know what it contains and how they can use it. See the Marketplace guidelines for the Overview.
- Features (supports a maximum of 500 characters): Let Marketplace customers know what value they can get from using your connector. See the Marketplace guidelines for Features.
- Upload Images: Attach relevant screenshots to be displayed on your listing. This helps your audience navigate and understand what you are offering. See the Marketplace guidelines for images.
- Video URLs: Add relevant presentations or demo videos to your listing. Make sure they are in YouTube or Vimeo format. See the Marketplace guidelines for videos.

Files & Terms
The Files & Terms step allows you to set the specifications of the files, as well as the legal details of the connector release.
- Version: The version of the connector being published. We recommend matching the version being published to the version of the connector in your Integration Service tenant.
- Release Notes: Add details about this release and for each new version you add afterward.
- License: As a content creator, choose the type of license used for your content. For free listings, you can select and apply for an open-source software license or a Commercial License. We recommend using permissive licenses to increase usability for other Marketplace users. Make sure there is a clear and agreeable legal relationship between the content creator and the user. Refer to the UiPath Terms of Use for details about content licensing and the Marketplace guidelines for licences.
- License URL: Add your license link. Refer to the General FAQ - Listings section in the Marketplace User Guide for more details on licensing types.
- Privacy Terms: Describe how (and if) the listing you are submitting is processing the user's personal data. You can share the Privacy Terms or link to applicable policies. By selecting No, you are confirming this listing does not process any personal information. For details, refer to the Marketplace guidelines for privacy terms.
- Documentation: Upload the user guide and other documentation necessary or helpful for the content implementation/usage. You can use a template (refer to User guide template for listings) or add the link to the website hosting your documentation. For details, refer to the the Marketplace guidelines for documentation.
- Documentation URLs: Provide any links to documentation that could be helpful to Marketplace customers using your connector.

Support
Define the support type that the connector falls under. This can be defined as either Community Support or Supported by Publisher.
Supported by Publisher is used for paid listings and is not currently supported through this publishing flow.
Review the terms and conditions, then select Submit.
Review process
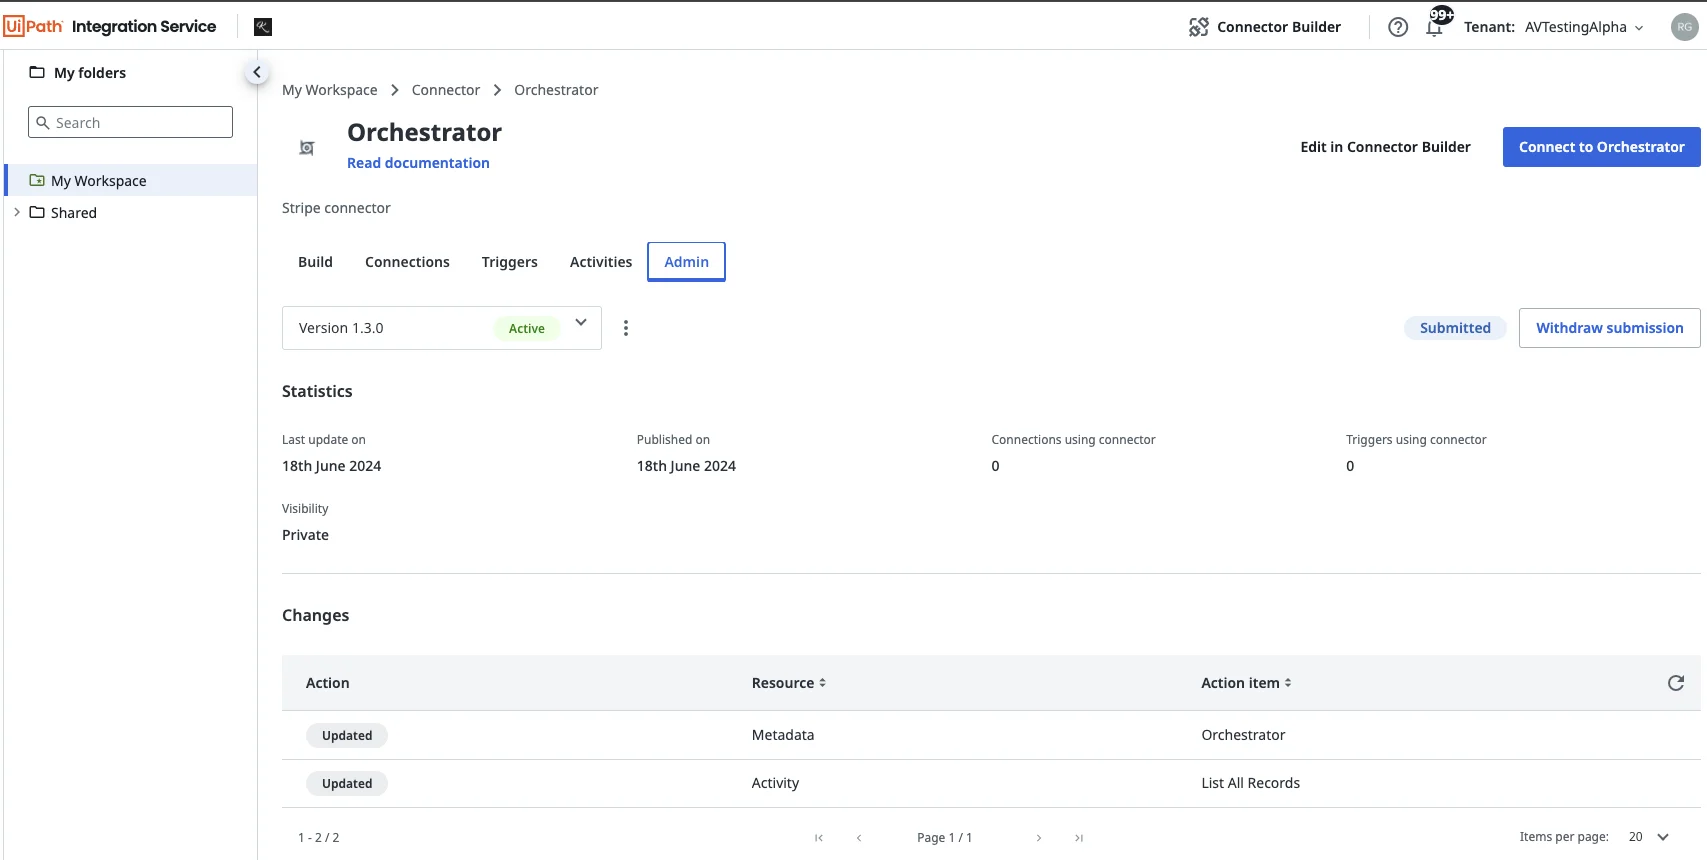
Once you submit a connector to the Marketplace, it receives a status. This status is then displayed in the Admin tab of the connector.
The status changes based on user actions (like withdraw or archive) or actions taken by the Marketplace team.
Submitted
The connector has been submitted, but the Marketplace team has not yet started on reviewing the connector. The connector can still be withdrawn from the Marketplace.

In review
Once the Marketplace team begins the review of the connector, the status is set to In review. The review process includes an evaluation of:
- Listing details: We verify that all information has been filled out properly.
- Security: All components of the connector are scanned to check for malware or viruses.
- Functionality: The connector is tested to make sure the intended usage matches the connector and its activities as specified in the overview section.
Once a submission is In review, you can no longer take any actions on the connector until it moves into a new status.
Needs update
If the Marketplace team finds an area of the submission that needs to be updated, the status is moved to Needs update. In this case, you, as the submitter, receive an email with feedback from the Marketplace team.
Use the Withdraw submission button to withdraw the submission. Make the necessary changes to the connector using Connector Builder, and resubmit the connector. Your previous form details are pulled into the submission form.

Published
Once the Marketplace team approves the submission, it is published as a Marketplace listing.
The Published status is displayed in the Integration Service Connectors catalog.

Published (archive requested)
If Marketplace receives a request to archive a listing, the status is displayed as Published (archive requested) until the listing is archived and removed from Marketplace.

Archived
An archived listing is displayed as Archived. You can resubmit an archived connector at anytime.
