# GZIP Compression
> Enable GZIP compression on Orchestrator HTTP responses to reduce payload size and improve server response time
In order to reduce the size of HTTP responses at server level and improve Orchestrator's response time, you have the option to compress them using GZIP compression.
## Prerequisites
Add the `` key in the config file, in the `httpCompression` section.
```
```
## Installing Dynamic Compression
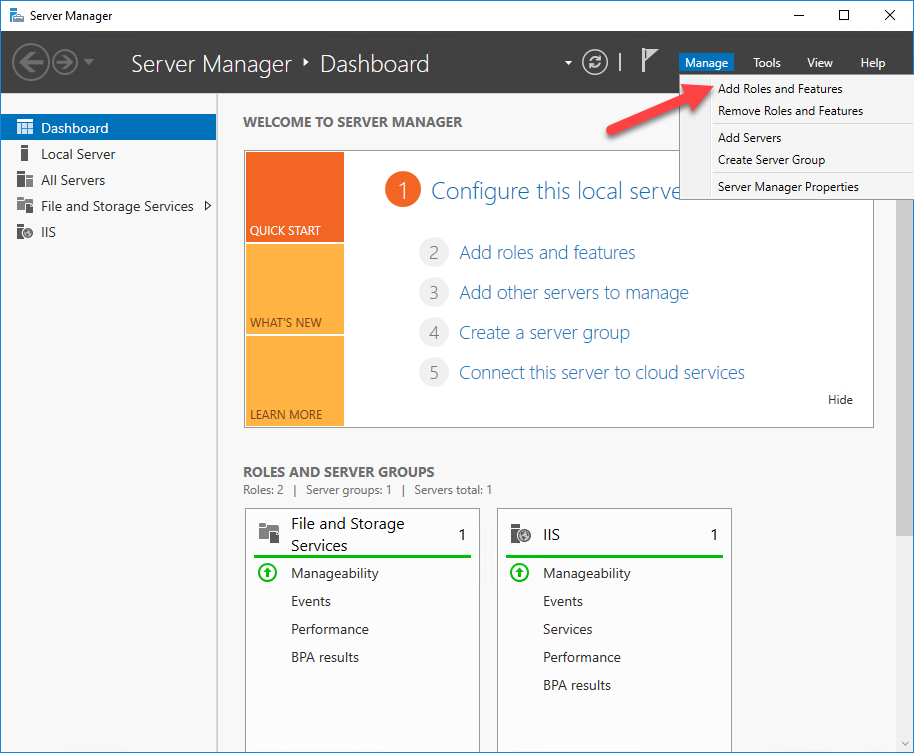
1. In Server Manager console, on the **Manage** menu, Select **Add Roles and Features**. The **Add Roles and Features Wizard** is displayed.
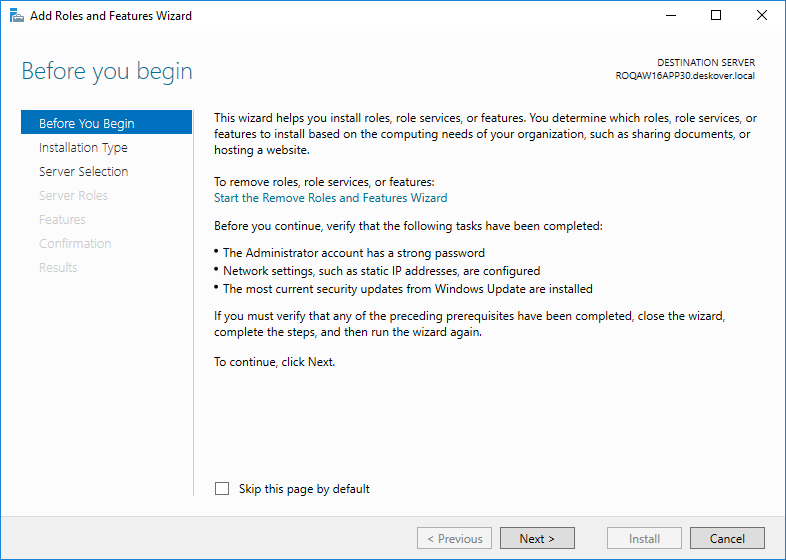
2. On the **Before you begin** page, Select **Next**.
3. On the **Select installation type** page, select **Role-based or feature-based installation** or **Remote Desktop Services installation**, and Select **Next**. More details on the official [Microsoft documentation](https://docs.microsoft.com/en-us/windows-server/administration/server-manager/install-or-uninstall-roles-role-services-or-features). Select **Next**.
4. On the **Select destination server** page, select a server from the server pool, or select an offline VHD, and Select **Next**. More details on the official [Microsoft documentation](https://docs.microsoft.com/en-us/windows-server/administration/server-manager/install-or-uninstall-roles-role-services-or-features). Select **Next**.
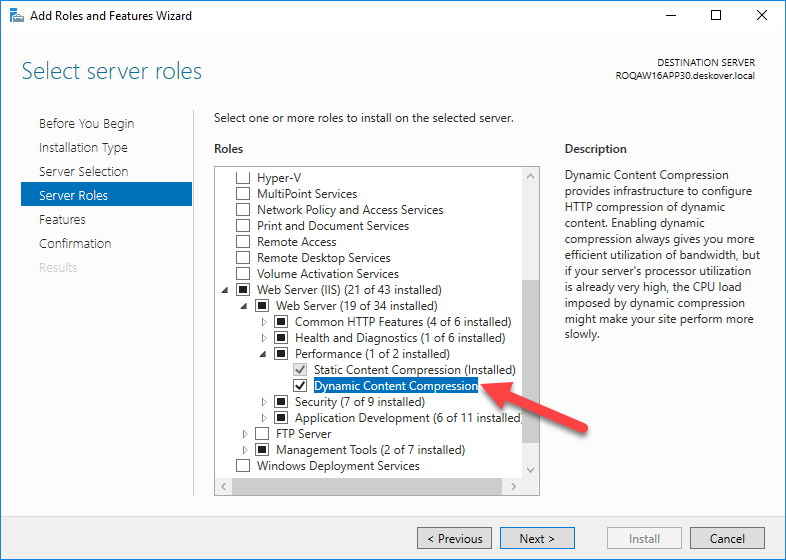
5. On the **Select Server Roles** page, in the **Roles** section, select **Web Server (IIS)** > **Web Server** > **Performance** > **Dynamic Content Compression**, and Select **Next**.
6. On the **Select features** page, Select **Next**.
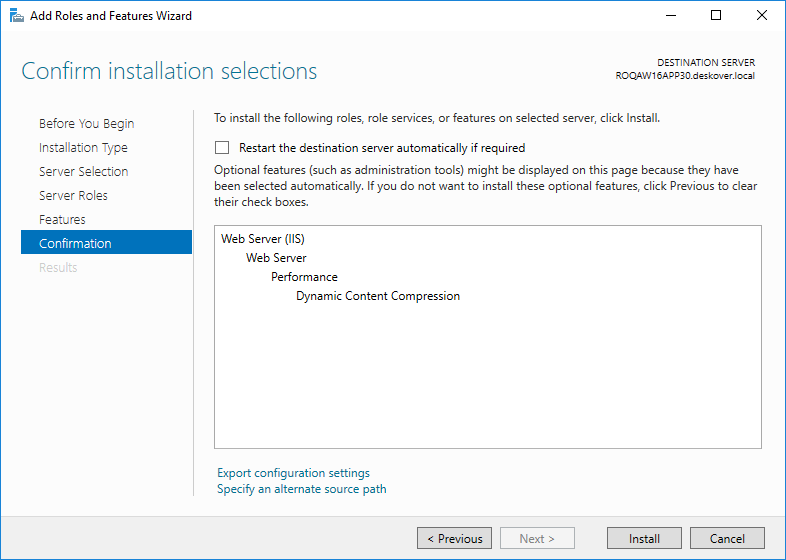
7. On the **Confirm installation selections** page, review your role and server selections, then Select **Install**. The Dynamic Content Compression feature has been installed.
## Enabling Dynamic Compression
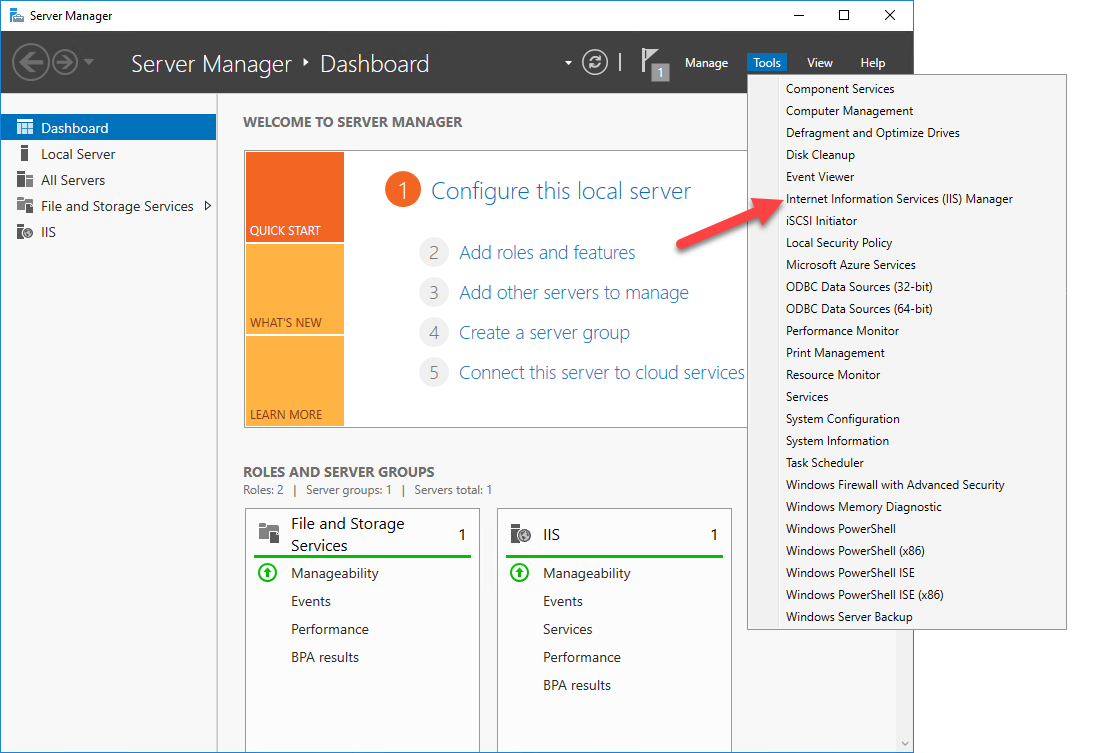
1. In Server Manager console, on the **Tools** menu, Select **Internet Information Services (IIS) Manager**. The IIS Manager is displayed.
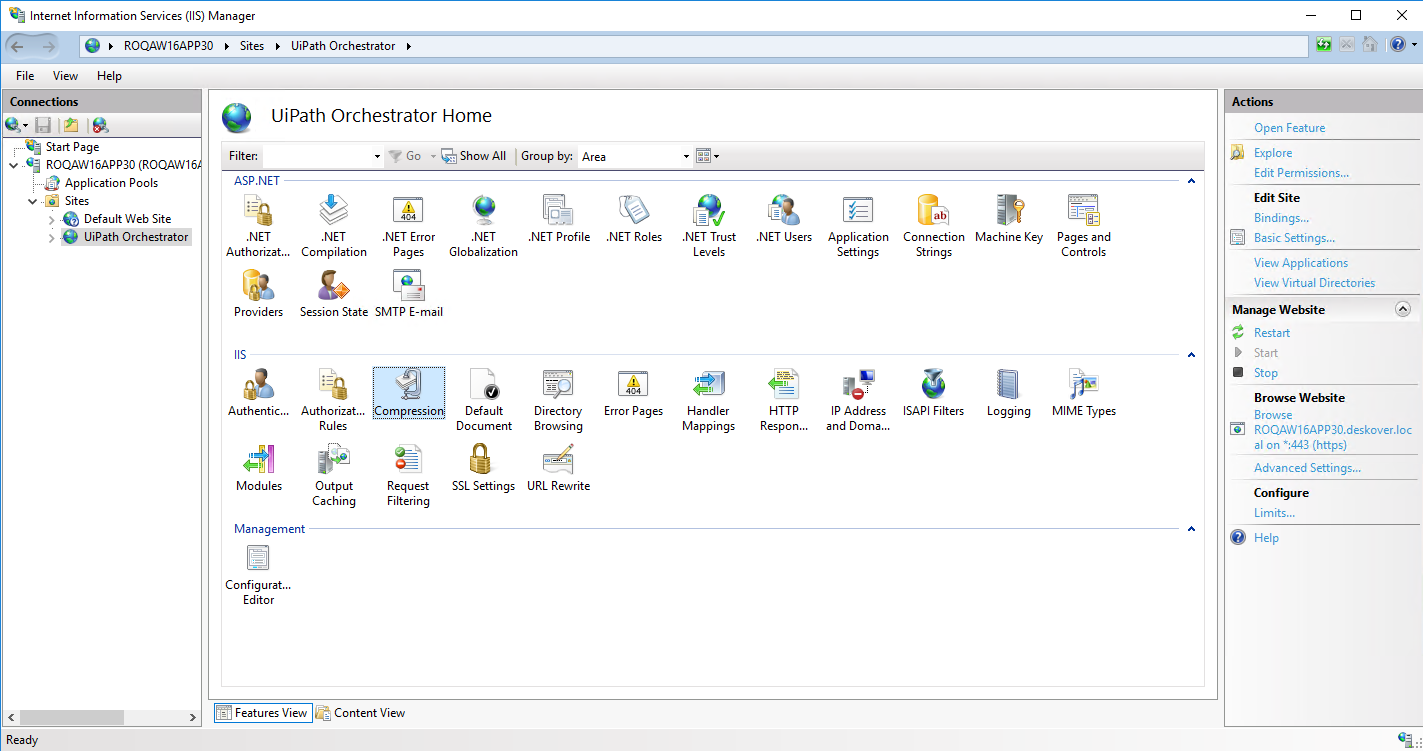
2. On the **Connections** pane, select your Orchestrator instance.
3. In the **IIS** section, double-Select **Compression**.
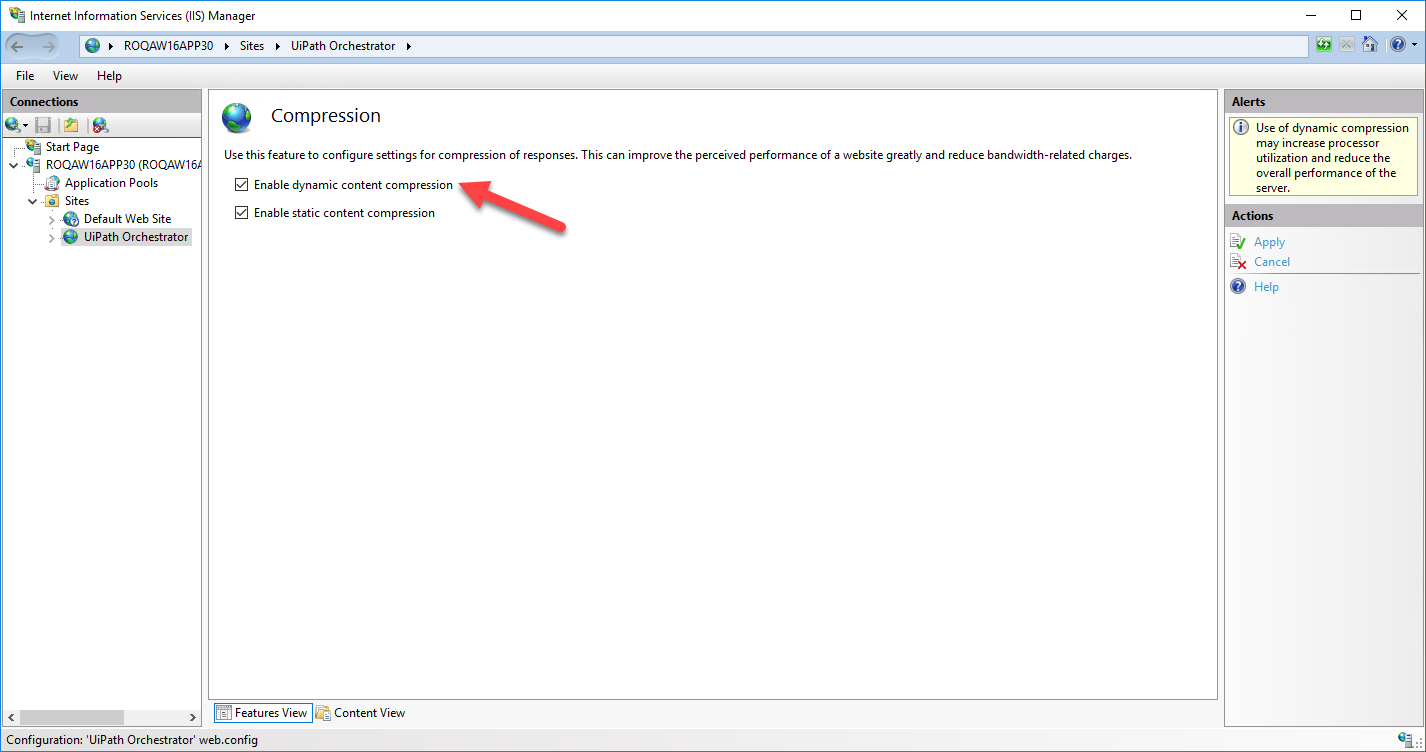
4. Select the **Enable Dynamic Content Compression** option.
:::note
The use of dynamic compression may increase processor utilization and reduce the overall performance of the server.
:::