# Attribute selectors
> An Attribute selector enables end users to select which attributes are used in a chart. End users can decide how to subdivide a chart by using attribute selectors.
## Introduction
An Attribute selector enables end users to select which attributes are used in a chart. End users can decide how to subdivide a chart by using attribute selectors.
## Creating an Attribute selector
Follow these steps to create an attribute selector.
| Step | Action |
| --- | --- |
| 1 | Open the app in your development environment, and go to the **Data** tab. |
| 2 | In the table item list, right-click on the table that contains the attributes you want to use in a selector and select **New control - Selector...**. A selector **New selector** is added in the table item list. |
| 3 | Double click on **New selector** to open the **Edit Control** dialog. |
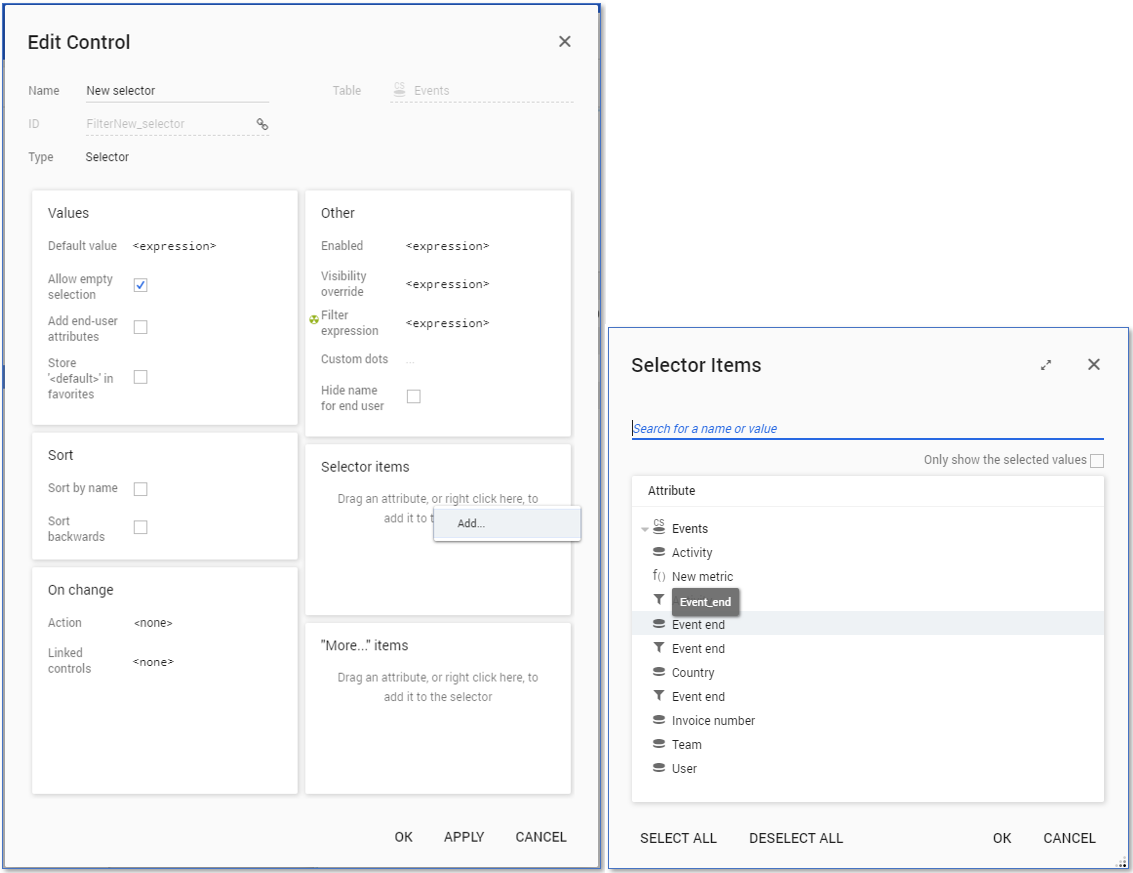
| 4 | Right click on the **Selector items** panel and select **Add…**. See illustration below. |
| 5 | Select the datasource attributes you want to add to the selector and click on OK (2x). |
### Setting a default value
The default value for attribute selectors differs from other filters. Since it refers to a specific attribute the `uid` function must be used to refer the attribute. For other filters the default value can be configured as a text value.
Follow these steps to set the default value for an attribute selector.
Step
Action
1
In the Edit Control dialog, click on expression next to Default value .
2
Enter the expression uid([attribute[) , for example uid(Invoice_owner) . Note: [attribute] must be one of the attributes available in the selector.
### Adding an additional level to the selector
The attributes which are most relevant for the end user to manipulate are added to the selector for quick access, whereas other, less relevant, attributes can be added to the **More...** items.
| Step | Action |
| --- | --- |
| 1 | In the **Edit Control** dialog, right click in the “More…” items panel and select **Add…**. |
| 2 | Select the dastasource attributes you want to add to the selector and click on OK (2x). |
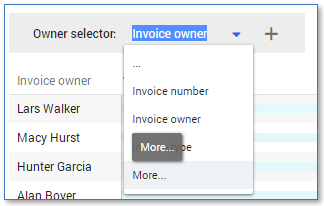
A new entry **More...** is added to the attribute selector. When a user clicks on this entry the **Select An Attribute** dialog opens in which the user can select the additional attributes. See illustration below.
### Extra options
The Edit Control dialog contains several useful options that are available for attribute selectors. For example:
* Use the **Allow empty selection** option in the **General** panel to control whether or not a user is forced to always select one attribute in the selector.
* Use **Hide name for end user** in the **Other** panel to control whether or not the name of the attribute selector is visible to end users.
* Use **Custom dots** in the **Other** panel to control what is shown when no attribute is selected or in the drop-down menu when an empty selection is selected.
## Using the Attribute selector on a chart
Follow these steps to add the attribute selector on a chart
| Step | Action |
| --- | --- |
| 1 | Go to the **Dashboards** tab and create a new dashboard based on the table in which the attribute selector control is present. |
| 2 | Go to the **Chart** tab. |
| 3 | Select the attribute you want to display in the chart from the **Rows** drop down list. |
| 4 | Select the attribute selector control from the **Metric** drop down list. |
| 5 | Drag the attribute selector control to the **Header controls** of the chart. |
## Using the Attribute selector on a Legacy chart
Follow these steps to add the attribute selector on a legacy chart.
| Step | Action |
| --- | --- |
| 1 | Go to the **Dashboards** tab and create a new dashboard based on the table in which the attribute selector control is present. |
| 2 | Go to the **Chart** tab. |
| 3 | Drag attribute selector to the **Rows** level in the **General** panel. |
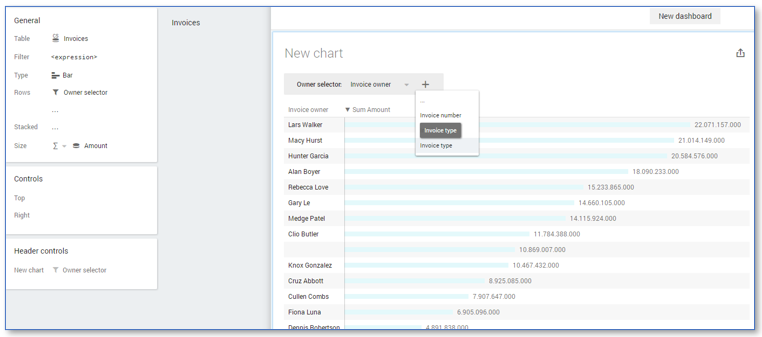
Dropping an attribute selector on one of the levels of the **General** panel automatically adds the attribute selector to the **Header** controls.
See illustration below for an example.