# Configuration Steps
> Configuration steps for setting up browser-specific WebDriver executables for UI Automation.
Each web browser uses its own WebDriver protocol implementation. As such, when you plan your automation projects via the WebDriver protocol, you need require the corresponding browser webdriver application on the machine, and have it configured as explained in the next topics. Below you find the requirements and steps to take in order to use the WebDriver protocol:
Web Browser
Webdriver Requirements
Chrome
ChromeDriver ChromeDriver.exe
Google Chrome is updated automatically and ChromeDriver builds are released often. Make sure that the ChromeDriver version always matches the version of Google Chrome.
Firefox
geckodriver geckodriver.exe
Builds for geckodriver are rarely released. It is recommended to use the latest version in your automation projects.
Edge
Microsoft Edge Driver msedgedriver.exe
Microsoft Edge Browser is updated automatically and Microsoft Edge Driver builds are released correspondingly. Make sure that the Microsoft Edge Driver version always matches the browser version.
## Installing the WebDriver Protocol
1. Download the Webdriver corresponding to the browser you want to use.
2. Install the downloaded Webdriver in a location of your choice, such as `C:\webdriver\Chrome`.
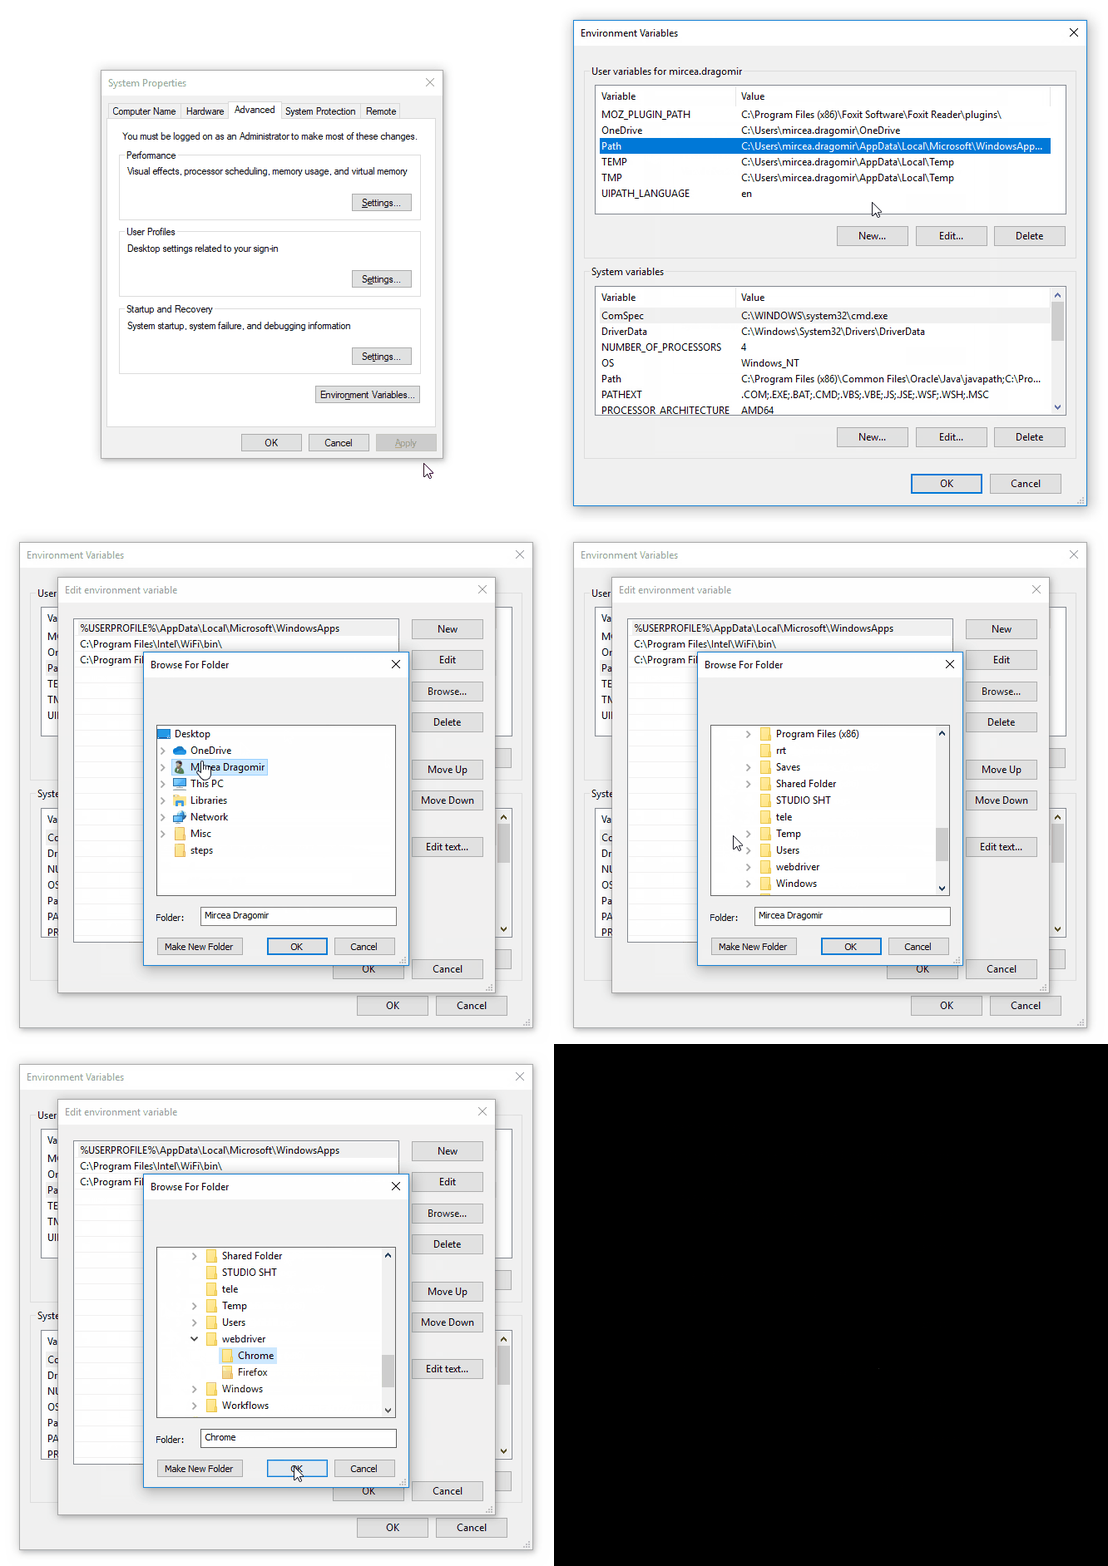
3. In the Windows Start Menu, find and open the **Edit the system environment variables** entry. The **System Properties** window is displayed.
4. Select the **Environment Variables** button at the bottom of the page. The **Environment Variables** window is displayed.
5. Select the **Path** variable either from the **User variables** or **System variables** section and select **Edit**. The **Edit environment variable** window is displayed.
6. Select **Browse** and select the folder where you installed the corresponding Webdriver executable. In our case this is `C:\webdriver\Chrome`.
7. Select **OK** on all previously opened windows to save the changes. The Webdriver protocol is now installed.
8. Restart the Robot Service for the changes to take effect. You are now ready to use the Webdriver protocol in your automation projects.
## Opening a Browser
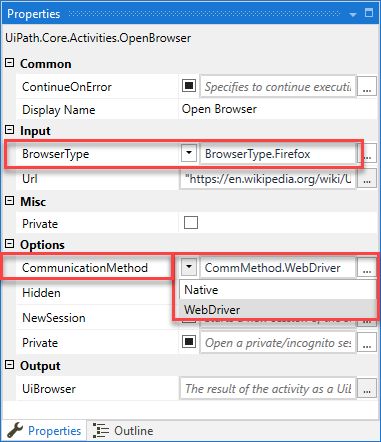
Interacting with a browser via the Webdriver protocol is possible inside an **Open Browser** or **Attach Browser** container. A couple of properties need to be configured, as follows:
### Visual Browser Automation
* **CommunicationMethod** - **WebDriver**
* **BrowserType** - **Chrome**, **Firefox** or **Edge**
### Headless Browser Automation
* **CommunicationMethod** - **WebDriver**
* **BrowserType** - **Chrome**, **Firefox** or **Edge**
* **Hidden** - **True**
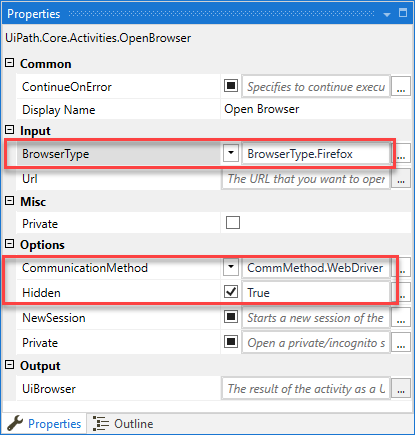
Please note that, for headless browser automation, activities relying on hardware events (such as **Click** or **Type Into**) must be configured to use the **SimulateClick** or **SimulateType** properties, or the **Send Window Messages** property.
## Closing a Browser
### Using the Close Tab Activity
It is recommended to use the **Close Tab** activity to close all open tabs. All you need to do is place it inside the **Open Browser** container which uses the WebDriver protocol at the end of the sequence. The corresponding webdriver application and processes are closed.
### Using the Close Application Activity
In this case, you need to make sure that the selector for the **Close Application** activity uses a `` tag. This way the corresponding webdriver process is also closed along with the browser session.
Below are a couple of valid `` tags you can use with the **Close Application** activity:
* ` ` - to close Firefox
* `