# Managing Data Labels
> 1. In the **Data Labeling** page, select **Choose from OOB labeling template**.
## Create labeling session
1. In the **Data Labeling** page, select **Choose from OOB labeling template**.
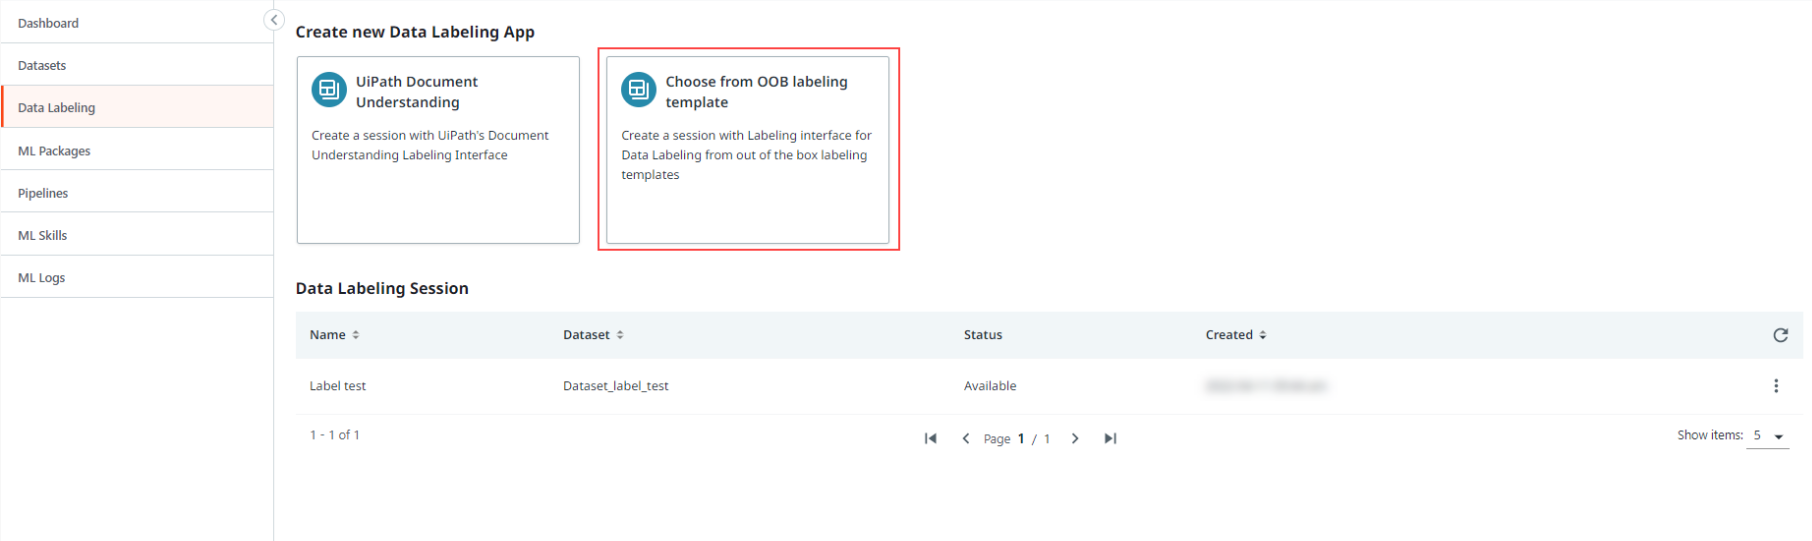
2. In the **Configure data labeling** page, select the out-of-the-box package you want to configure. For the purpose of this example, we will use **Email**. The Email template is a combination of text classification and entity recognition labels.
3. Enter a name for the Data Labeling section and choose the **Dataset**. You can also create a new dataset from this page. For more information on datasets, check the [About Datasets](https://docs.uipath.com/ai-center/automation-suite/2023.10/user-guide/about-datasets#about-datasets) page.
4. Select **Create**.
## Configure
In the **Configure** tab, you can configure the labels needed for your session.
There are two ways in which you can configure the labels:
* Using a General UI
* Using the Advanced editor
The left panel is the label config editor, while the right panel displays a preview of the current config. The right panel also displays the text components that are a part of the template. In this example, the Email template comes preset with From, To, CC, Date, and Text fields. You can add/remove these text components using the Advanced Editor.
:::note
The text components configured here determines the structure of the files imported for labeling.
:::
### Using the interface
You can add new labels by using the interface from the **General** tab.
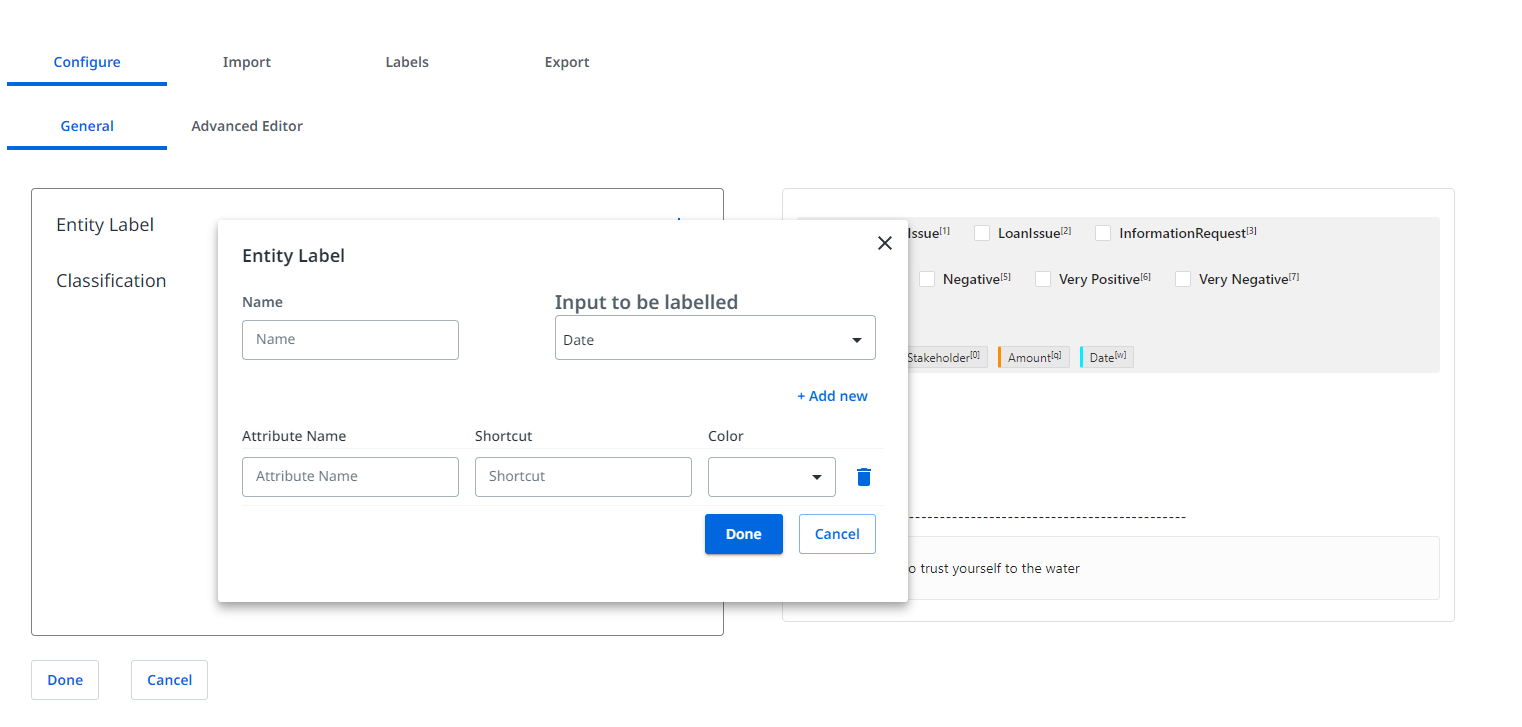
To add a label, select the **Plus** ➕ icon next to **Entity Label**. Add the following information for the new label:
* **Name**: the name of the new label.
* **Input to be labelled**: choose which text component you want to be labeled. In the case of **Email AI**, you can choose between `Date`, `From`, `To`, `cc`, and `text`.
* **Attribute name**: choose label names for the entities in your data. Use this to create attributes such as customer name, city name, telephone number, and so on.
* **Shortcut**: choose a hotkey for the label. Use this to configure a key as a shortcut. Only single letters or digits are supported.
* **Color**: choose a color for the label to distinguish it from the others.
:::note
You can add more attributes for the same label by selecting **+ Add new**.
:::
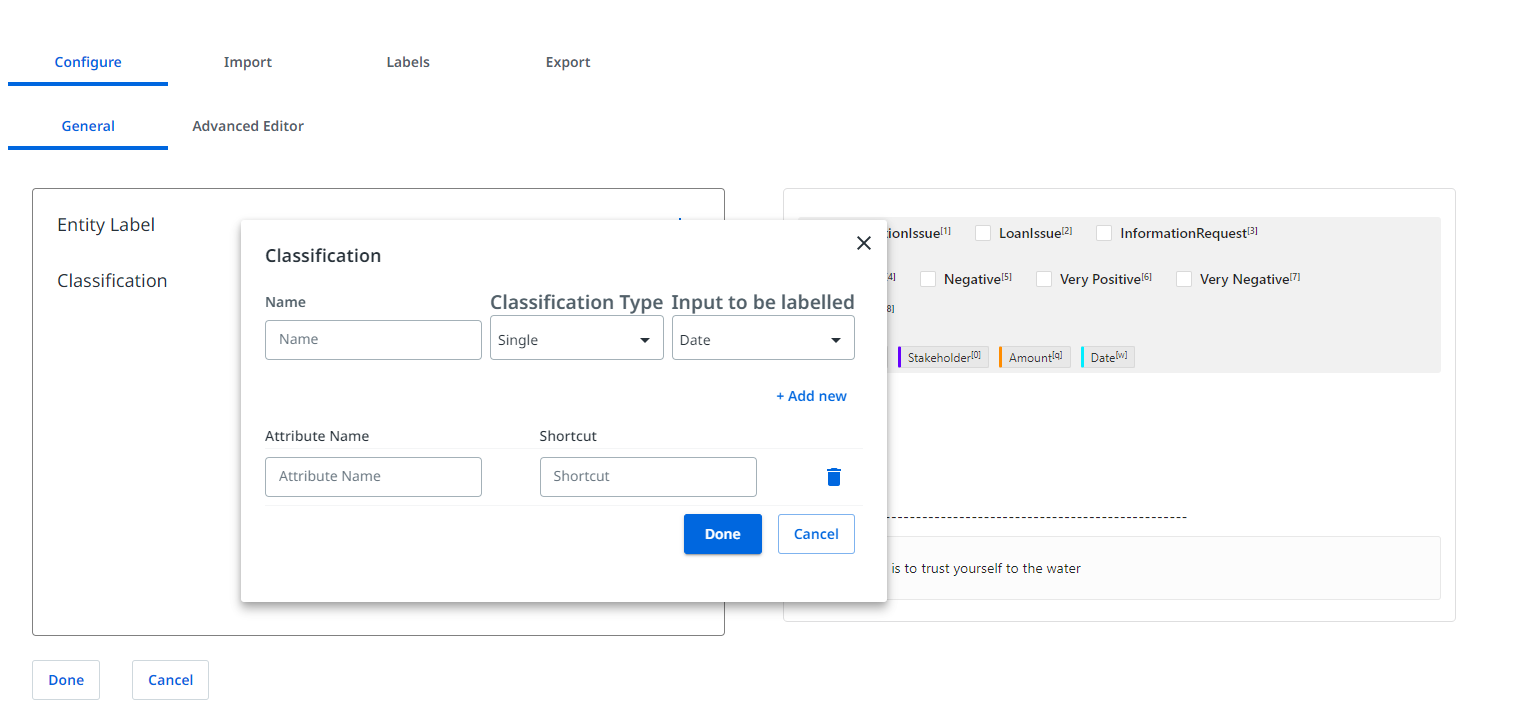
To add a classification, select the **Plus** ➕ icon next to **Classification**. Add the following information for the new label:
* **Name**: the name of the new classification.
* **Classification Type**: choose the type of classification. You can choose between **Single** and **Multiple**.
* **Attribute name**: choose label names for each class or value in your data. Use this to create attributes such as sentiment (positive or negative), the type of email (customer, marketing, spam), and so on.
* **Shortcut**: choose a hotkey for the attribute. Use this to configure a key as a shortcut. Only single letters or digits are supported.
:::note
You can add more attributes for the same classification by selecting **+ Add new**.
:::
### Using the Advanced Editor
You can add new labels by using the **Advanced Editor** tab.
To add a new label, make sure to use the following format: ``. Add the labels in the `` section. Once you add the new label, it will be displayed on the right side of the screen.
Once you finish adding all the needed labels, select **Done**.
:::note
Once configured, you can also reconfigure the labels by selecting **Reconfigure**.
Note that if you want to reconfigure data labeling, all labeled data that has not been exported will be lost and needs to be sent to labelers again.
:::
## Import
In the **Import** tab you can import the needed files for labeling. The labeling tool supports files in the JSON format. The JSON file should contain a data object that in turn contains the structure configured in the previous step. Check the following sample JSON file structured for the default Email template, containing From, To, CC, Date and Text fields as name-value pairs within a `data` object.
```
{
"data": {
"date": "1/29/2021 12:29:01 PM",
"from": "abc@xyz.com",
"to": "xyz@abc.com",
"cc": "",
"text": "I currently have 4 separate student loans that I have been paying on for years with Citi,..."
}
}
```
Once added, select **Upload**.
You can check all your uploaded files in the **Uploading and Validating Files** window. If there is an error to any of the files, the error message will help you in editing the file in order to meet the requirements.
For example, the `cc` field is missing in one of the uploaded files.
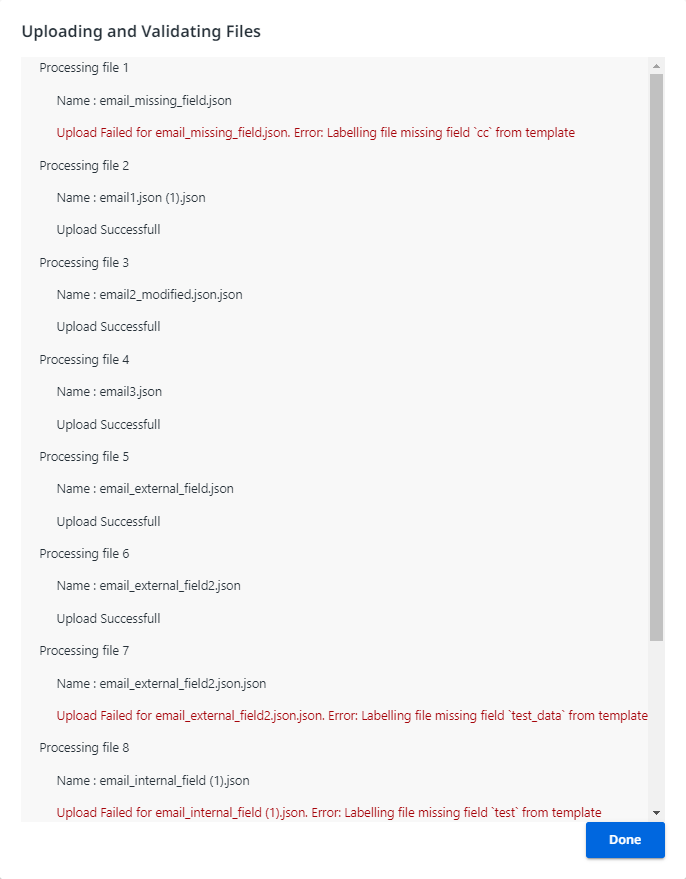
Once you checked the uploaded and validated files, select **Done**.
## Labels
:::note
* If you are using Chinese or Japanese, `granularity="word"` must
be removed using the **Advanced Editor**.
* If you are using right-to-left languages, you can set `view
style` using the **Advanced Editor**. To change the alignment, add `view style="text-align:right"` in the **Advanced Editor**.
:::
### AI Center
Once you imported the files, you can send them to **UiPath® Action Center** for human in the loop and labeling. There are several ways to do this from AI Center.
#### A selection of files
To send only a selection of files to Action Center, use the following steps:
1. Choose the files you want to send from the list by marking the checkbox from their respective row.
2. Select **Go to Action Center**.
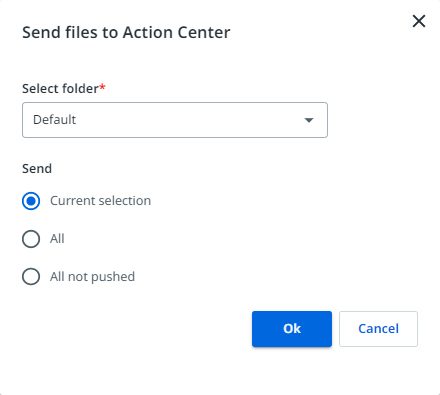
3. In the **Send files to Action Center** window, pick the folder from Action Center where you want to send the files to.
4. Check the **Current selection** bullet.
5. Select **Ok**.
#### All files
To send all files to Action Center, use the following steps:
1. Select **Go to Action Center**.
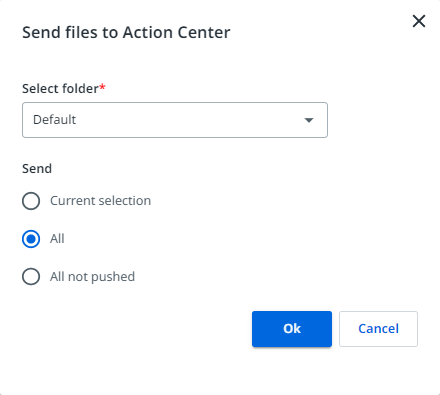
2. In the **Send files to Action Center** window, pick the folder from Action Center where you want to send the files to.
3. Check the **All** bullet.
4. Select **Ok**.
#### Files not pushed
To send only the files that were not already sent to Action Center or labeled, use the following steps:
1. Select **Go to Action Center**.
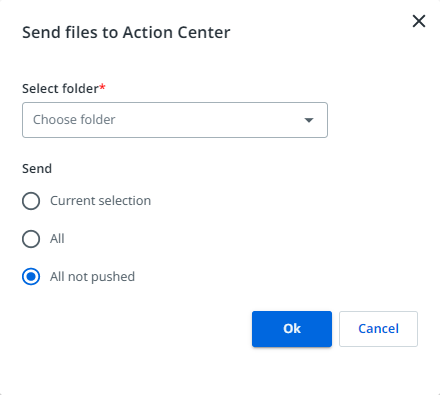
2. In the **Send files to Action Center** window, pick the folder from Action Center where you want to send the files to.
3. Check the **All not pushed** bullet.
4. Select **Ok**.
:::note
You can delete an existing label from the list, by selecting the three-dot button ⁝ next to the desired label and selecting **Delete**.
:::
### Action Center
Once the files are sent to Action Center, you can start labeling them.
1. Go to Action Center.
2. The files sent from AI Center are listed in **My Actions** under the **Unassigned** tab with the title **Data labelling task**.
3. Assign the task to yourself or someone else.
4. Go to the **Pending** tab and label the file accordingly.
:::note
The **Annotations** section is optional.
:::
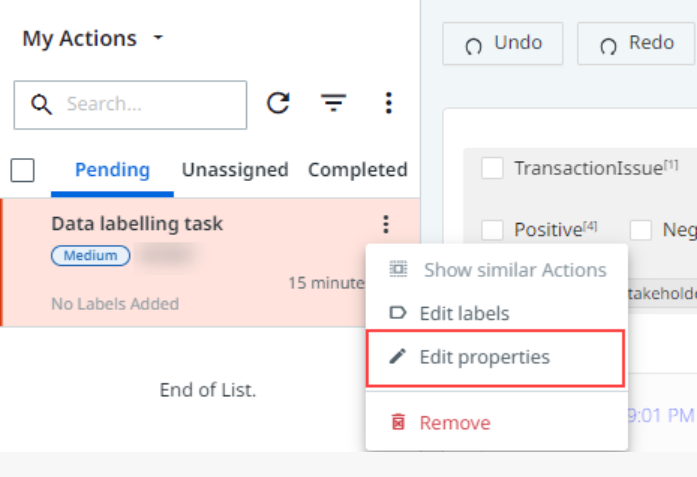
5. Select the three-dot ⁝ button in the **Data labelling task** item from the list and select **Edit labels** to edit the labels.
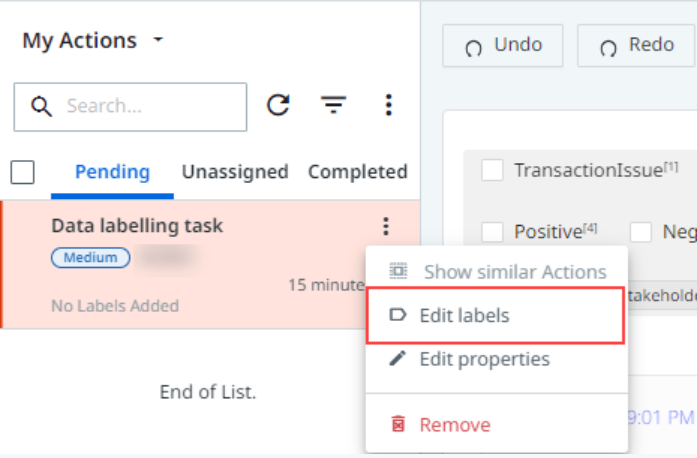
6. Select the three-dot ⁝ button in the **Data labelling task** item from the list and select **Edit properties** to edit the task.
7. Once the task is done, select **Complete**.
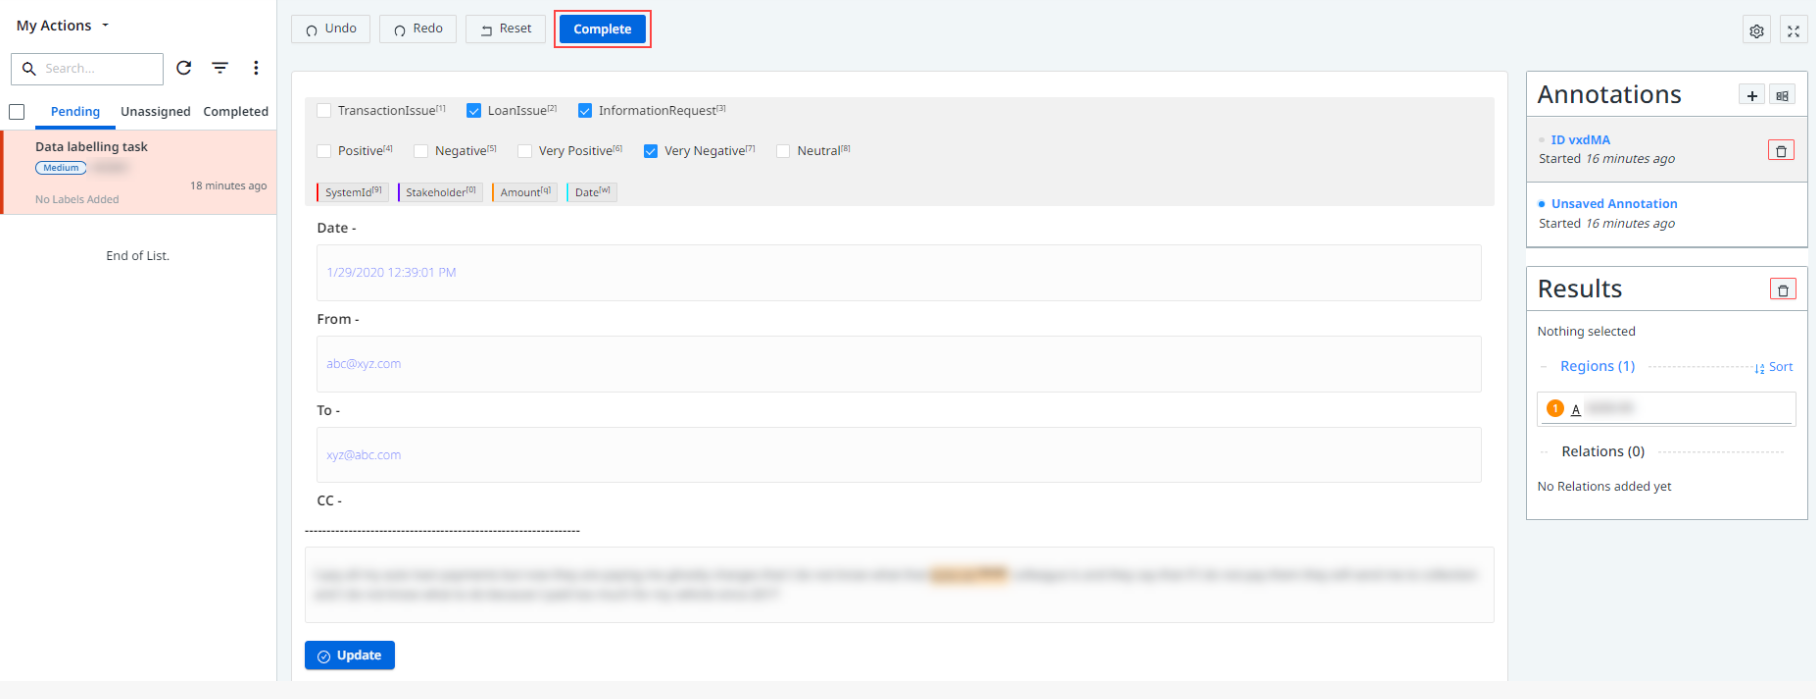
Once the task is completed, you can check the status of the file in the **Labels** tab from the **Data Labeling** page in AI Center. To do so, select **Refresh**.The status should now be updated to **Labeled** and the number of **Labeled** items is changed.
## Export
You can export labels from the **Export** tab.
To export files, select the **Export files to dataset** in the **Export** tab.
The export generates JSON files containing an `annotations` object, in addition to the original `data` object.
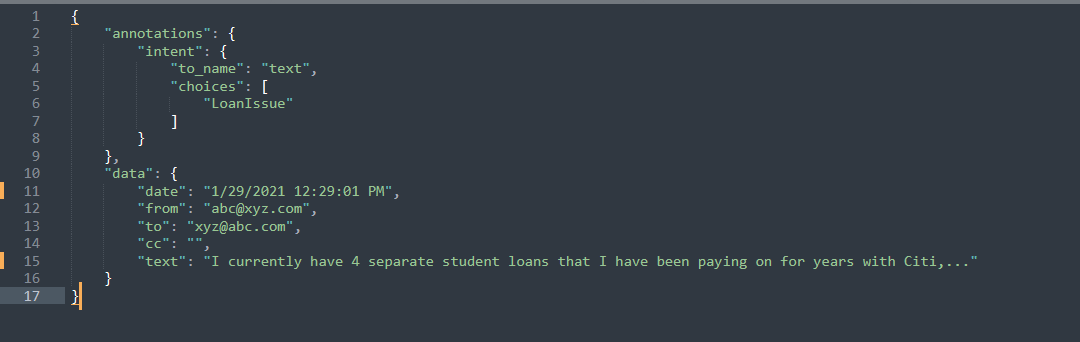
After the export is completed successfully, you can find the files at the following path:
### Datasets > Dataset_name > exportedFiles
:::note
If you do not provide a name in the **Export Name** field, the export files will have a timestamp for title.
:::